
Can you actually sharpen a circular saw blade? You sure can! Whether it’s a basic steel blade or one with carbide tips, sharpening it yourself is a smart way to save some cash and make your tools last a lot longer. This guide will walk you through everything you need to know to get those dull blades sharp again, including the different tools you can use, how to do it, and how to stay safe while you work.
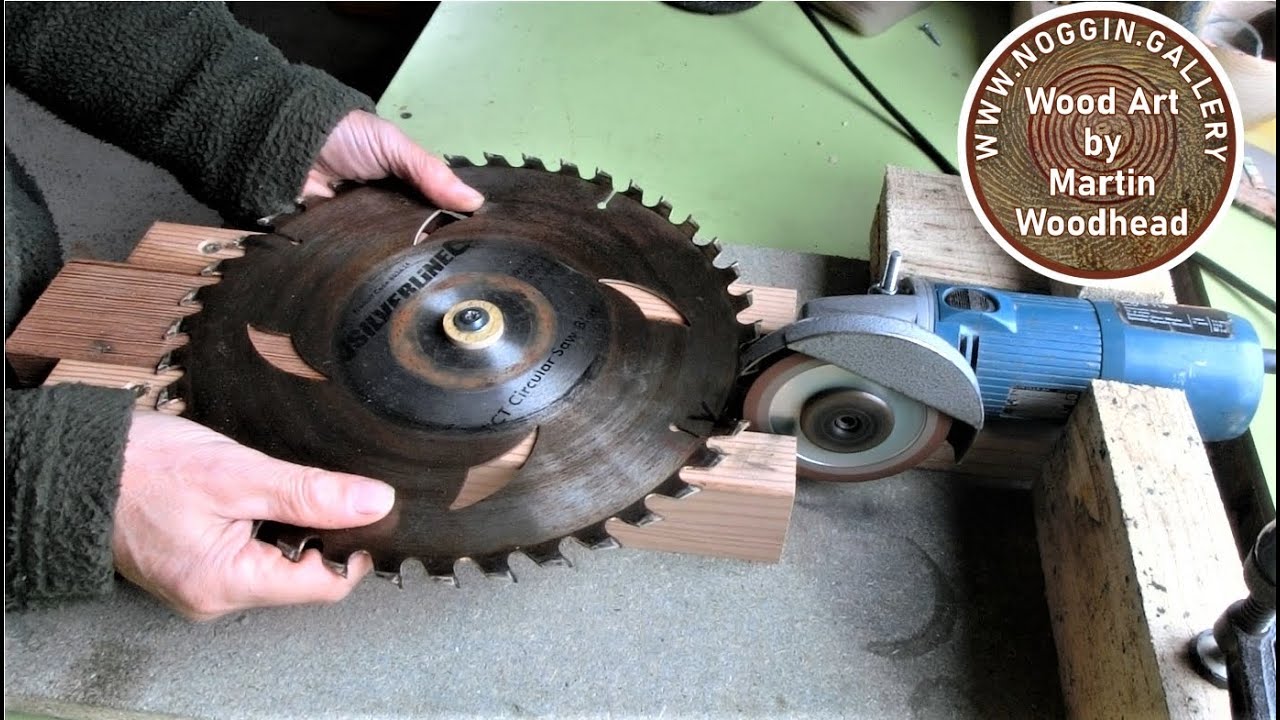
Image Source: i.ytimg.com
Why Sharpen Your Circular Saw Blade?
- Save Money: New blades can be expensive. Sharpening extends the life of your current blades.
- Improved Cut Quality: A sharp blade creates cleaner, more precise cuts.
- Increased Safety: Dull blades require more force, increasing the risk of kickback and accidents.
- Reduced Tool Strain: A sharp blade puts less stress on your saw motor, prolonging its life.
Identifying a Dull Blade
Before you start sharpening, it’s important to know if your blade actually needs it. Here’s how to tell if your circular saw blade is dull:
- Burning: The blade leaves burn marks on the wood.
- Splintering: The cut edges are rough and splintered.
- Slow Cutting: The saw struggles to cut through the material.
- Increased Effort: You need to push harder to make the cut.
- Unusual Noise: The saw makes a louder or different sound than usual.
Safety First: Precautions Before Sharpening
Safety is paramount when sharpening any blade. Always take these precautions:
- Wear Safety Glasses: Protect your eyes from flying debris.
- Wear Gloves: Protect your hands from sharp edges.
- Unplug the Saw: Ensure the saw cannot accidentally turn on.
- Work in a Well-Lit Area: A bright workspace allows for better visibility.
- Use Proper Ventilation: Grinding can produce dust; ensure good ventilation or wear a dust mask.
Methods for Sharpening Circular Saw Blades
There are several ways to sharpen a circular saw blade. The best method depends on the type of blade (steel vs. carbide-tipped) and your available tools.
1. Sharpening Circular Saw Blade with a File (For Steel Blades)
Sharpening a steel blade with a file is a simple and inexpensive method, ideal for those who prefer a manual approach.
Tools Needed:
- Circular Saw Blade File (triangular or specialized saw file)
- Work Gloves
- Safety Glasses
- Vise or Clamps
- Marker
Step-by-Step Guide:
- Secure the Blade: Clamp the blade firmly in a vise, exposing only a few teeth at a time. Make sure the teeth are easily accessible.
- Mark the Starting Point: Use a marker to mark the first tooth you’ll sharpen. This helps you keep track of your progress.
- File Each Tooth:
- Hold the file at the correct circular saw blade sharpening angle (usually around 45 degrees, but check the blade manufacturer’s recommendations).
- File each tooth with smooth, even strokes, following the original bevel of the tooth. File in one direction only (away from you).
- Apply consistent pressure. Usually 3-5 strokes per tooth is enough.
- Repeat for All Teeth: Work your way around the blade, sharpening each tooth in the same manner.
- Deburr (If Needed): After sharpening, lightly run a fine file along the back of the teeth to remove any burrs.
Pros:
- Inexpensive
- Simple to learn
- Good for touch-ups
Cons:
- Time-consuming
- Requires manual effort
- Less precise than other methods
- Only suitable for steel blades.
2. Sharpening Circular Saw Blade with a Grinder (For Steel and Carbide Blades)
Using a grinder is a faster and more precise method, especially for carbide-tipped blades. However, it requires more skill and caution.
Tools Needed:
- Angle Grinder or Bench Grinder
- Grinding Wheel (Diamond or Carbide-Specific for Carbide Blades)
- Safety Glasses
- Work Gloves
- Dust Mask
- Clamps or Vise
- Circular saw blade sharpening jig (Optional but highly recommended)
Step-by-Step Guide:
- Secure the Blade: Firmly clamp the blade in a vise, or better yet, use a circular saw blade sharpening jig to ensure consistent angles.
- Choose the Right Grinding Wheel:
- For steel blades, use a standard grinding wheel.
- For carbide-tipped blades, use a diamond grinding wheel specifically designed for carbide.
- Set the Grinder: Adjust the grinder to the correct angle. The circular saw blade sharpening angle is crucial for maintaining the blade’s performance. Refer to the blade manufacturer’s specifications. Using a circular saw blade sharpening jig can significantly simplify this process.
- Grind Each Tooth:
- Hold the blade firmly and carefully touch the grinding wheel to each tooth.
- Use light, even pressure. Avoid overheating the blade, as this can damage the steel or carbide.
- Make several light passes rather than one heavy pass.
- Focus on sharpening the face (the part that makes contact with the wood).
- Repeat for All Teeth: Work your way around the blade, grinding each tooth uniformly.
- Inspect and Deburr: Check each tooth for sharpness and remove any burrs with a fine file or deburring tool.
Pros:
- Faster than filing
- More precise, especially with a jig
- Suitable for both steel and carbide blades (with the correct wheel)
Cons:
- Requires more skill
- Risk of overheating the blade
- Requires more expensive equipment
- Can be dangerous if not handled carefully
3. Using a Dedicated Circular Saw Blade Sharpener
A dedicated circular saw blade sharpener is the best circular saw blade sharpener option. These machines are designed specifically for sharpening saw blades and offer the most precise and consistent results.
Tools Needed:
- Dedicated Circular Saw Blade Sharpener
- Safety Glasses
- Work Gloves
Step-by-Step Guide:
- Read the Manual: Follow the manufacturer’s instructions for your specific sharpener model.
- Mount the Blade: Secure the blade onto the sharpener, ensuring it is properly aligned.
- Adjust Settings: Set the correct angle and depth for your blade type.
- Sharpen Each Tooth: The sharpener will typically have an automated or semi-automated process for sharpening each tooth. Follow the instructions carefully.
- Inspect and Adjust: After sharpening, inspect the blade and make any necessary adjustments.
Pros:
- Most precise and consistent results
- Faster than other methods
- Easy to use once set up
Cons:
- Most expensive option
- Requires storage space
4. Circular Saw Blade Sharpening Service
If you don’t want to sharpen the blade yourself, you can use a circular saw blade sharpening service.
How it Works:
- Find a Service: Search for a local sharpening service or hardware store that offers sharpening.
- Drop Off or Mail In: Drop off your blade or mail it in for sharpening.
- Receive Sharpened Blade: Pick up your sharpened blade or have it mailed back to you.
Pros:
- Convenient
- Professional results
- No need to buy equipment
Cons:
- Can be expensive
- Requires waiting time
Tips for Sharpening Carbide-Tipped Saw Blades
Sharpening carbide-tipped saw blades requires extra care because carbide is very hard but also brittle.
- Use a Diamond Grinding Wheel: Always use a diamond grinding wheel specifically designed for carbide.
- Keep it Cool: Avoid overheating the carbide. Use light pressure and make multiple passes.
- Inspect Carefully: Look for cracks or chips in the carbide tips. If a tip is severely damaged, it may need to be replaced.
- Consider Professional Sharpening: If you’re not comfortable sharpening carbide blades, it’s best to take them to a professional.
Achieving the Correct Sharpening Angle
The circular saw blade sharpening angle is critical for optimal performance. The angle refers to the bevel of the tooth.
- Consult the Manufacturer: The best source of information is the blade manufacturer.
- Use a Protractor or Angle Gauge: Measure the original angle of the teeth before you begin sharpening.
- Circular Saw Blade Sharpening Jig: A jig can help you maintain the correct angle consistently.
- Common Angles: General-purpose blades typically have a 15-20 degree angle, while blades designed for ripping may have a steeper angle.
Diy Circular Saw Blade Sharpening Jig
Creating your own circular saw blade sharpening jig can save you money and provide a customized solution for maintaining the correct sharpening angle. Here’s a simple design:
Materials:
- Plywood or MDF (for the base and supports)
- Hinges
- Clamps
- Angle Finder
- Screws
Construction:
- Base: Cut a rectangular piece of plywood for the base.
- Supports: Cut two triangular pieces of wood to act as supports for the blade.
- Hinged Platform: Create a small platform that can be hinged to one of the supports. This platform will hold the grinder or file.
- Angle Adjustment: Use an angle finder to set the correct angle between the platform and the blade.
- Clamps: Use clamps to secure the blade to the supports.
Using the Jig:
- Place the blade in the jig and secure it with clamps.
- Adjust the angle of the platform to match the desired sharpening angle.
- Sharpen each tooth using a file or grinder, following the angle of the platform.
Maintaining Your Sharpened Blade
After sharpening, proper maintenance is key to prolonging the life of your blade.
- Clean the Blade: Remove sawdust and resin buildup with a blade cleaner.
- Store Properly: Store blades in a dry place, away from moisture and rust.
- Use Blade Stabilizers: These can reduce vibration and improve cut quality.
- Check Alignment: Regularly check the saw’s alignment to ensure accurate cuts.
How Often Should You Sharpen Your Circular Saw Blade?
The frequency of sharpening depends on several factors, including:
- Usage: How often do you use the saw?
- Material: What type of material are you cutting? Hardwoods dull blades faster than softwoods.
- Blade Quality: Higher-quality blades tend to stay sharp longer.
As a general guideline:
- Light Use: Sharpen every 6-12 months.
- Moderate Use: Sharpen every 3-6 months.
- Heavy Use: Sharpen every month or as needed.
Fathoming the Costs: Sharpening vs. Replacing
When deciding whether to sharpen or replace a blade, consider the following:
| Factor | Sharpening | Replacing |
|---|---|---|
| Cost | Lower initial cost | Higher initial cost |
| Time | Requires time and effort | Quick and easy |
| Blade Condition | Suitable for blades with minor dulling | Necessary for blades with severe damage |
| Equipment | Requires sharpening tools (file, grinder, etc.) | No additional equipment needed |
| Skill Level | Requires some skill and practice | No special skills required |
In general, sharpening is more cost-effective for blades that are only slightly dull. However, if a blade is severely damaged (e.g., bent, cracked, or missing teeth), it’s usually better to replace it.
Frequently Asked Questions (FAQ)
Q: What is the best way to sharpen a circular saw blade?
A: The best method depends on the type of blade and your skill level. A dedicated sharpener offers the most precise results, while filing is a simple and inexpensive option for steel blades.
Q: Can I use a Dremel to sharpen a circular saw blade?
A: Yes, you can use a Dremel with a grinding attachment. However, it requires a steady hand and precise control. It’s generally better suited for small touch-ups rather than sharpening the entire blade.
Q: Who is best suited to sharpening circular saw blades at home versus using a professional service?
A: Sharpening at home is suitable for DIY enthusiasts with some experience and the right tools. A professional service is better for those who lack the time, skills, or equipment.
Q: What angle should I sharpen my circular saw blade at?
A: The angle depends on the blade type. Consult the manufacturer’s recommendations. General-purpose blades typically have a 15-20 degree angle.
Q: How do I prevent overheating when sharpening with a grinder?
A: Use light pressure, make multiple passes, and allow the blade to cool down frequently.
By following these guidelines, you can effectively sharpen your circular saw blades, save money, and improve the quality of your cuts. Always prioritize safety and take the time to learn the proper techniques for your specific blade type and tools.

Hi, I’m Tom Scalisi, and welcome to The Saw Blog! I started this blog to share my hands-on experience and insights about woodworking tools—especially saws and saw blades. Over the years, I’ve had the chance to work with a wide range of tools, and I’m here to help both professionals and hobbyists make informed decisions when it comes to selecting and using their equipment. Whether you’re looking for in-depth reviews, tips, or just advice on how to get the best performance out of your tools, you’ll find it here. I’m excited to be part of your woodworking journey!