
A circular saw guide is a tool that helps you make straight and accurate cuts with a circular saw. They can be bought pre-made (circular saw guide rail, best circular saw guide) or constructed at home (DIY circular saw track, homemade circular saw guide, how to make a circular saw track). This article will cover how to use a circular saw guide (using a circular saw track), focusing on achieving perfect cuts with a circular saw straight cut jig.
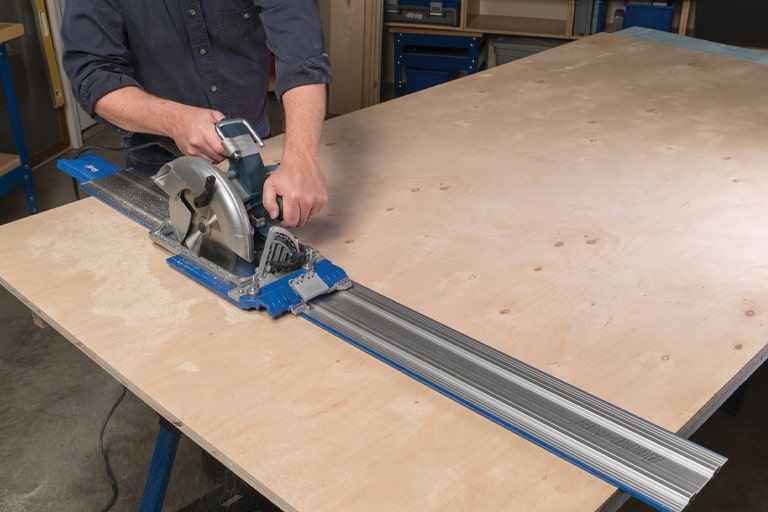
Image Source: learn.kregtool.com
Why Use a Circular Saw Guide?
Cutting a perfectly straight line with a circular saw can be surprisingly tough. Even people who have been woodworking for years sometimes have trouble keeping the saw from drifting off course. A saw guide or track makes this much easier by giving the saw a steady, straight edge to lean against as you cut. Using one comes with some great perks:
- Increased Accuracy: Guides ensure consistent, straight cuts, eliminating wobbly lines.
- Improved Safety: By keeping the saw on a defined path, guides reduce the risk of kickback and other accidents.
- Greater Efficiency: Guides save time by eliminating the need for repeated cuts and adjustments.
- Professional Results: Clean, straight cuts result in higher-quality finished projects.
Types of Circular Saw Guides
There are several types of circular saw guides, each with its own advantages and disadvantages:
- Commercial Track Saws: These are all-in-one systems that include a saw and a track. They are the most accurate and convenient option, but also the most expensive.
- Circular Saw Guide Rails: These are separate tracks that you can use with your existing circular saw. They are less expensive than track saws, but still offer excellent accuracy.
- Clamp-On Straight Edges: These are simple metal or plastic edges that you clamp to your workpiece. They are the least expensive option, but also the least accurate.
- Homemade Guides: These are guides that you build yourself out of wood or other materials. They can be a good option if you are on a tight budget, but require some woodworking skills.
Commercial Track Saws
These saws have a track. The saw slides on it. This makes very straight cuts. Track saws are easy to use and give great results. But, they are costly.
Circular Saw Guide Rails
These rails are sold alone. You use them with your saw. They are cheaper than track saws but work well. The saw glides along the rail.
Clamp-On Straight Edges
These are bars you clamp to the wood. They are cheap but not as accurate. You have to be careful to keep the saw against the edge.
Homemade Guides
You can build guides yourself. Use wood or other items. This saves money if you know woodworking. You need to be careful to make them straight.
How to Choose the Right Circular Saw Guide
The best type of guide for you will depend on your budget, skill level, and the types of projects you typically work on. Here are some factors to consider:
- Accuracy: If you need very accurate cuts, a track saw or guide rail is the best option.
- Ease of Use: Track saws and guide rails are generally easier to use than clamp-on straight edges or homemade guides.
- Cost: Clamp-on straight edges and homemade guides are the least expensive options.
- Portability: Clamp-on straight edges are the most portable option, while track saws can be bulky and difficult to transport.
- Project Size: For large projects, a track saw or guide rail is recommended. For smaller projects, a clamp-on straight edge or homemade guide may be sufficient.
Table: Comparing Circular Saw Guides
| Feature | Track Saw | Guide Rail | Clamp-On Edge | Homemade Guide |
|---|---|---|---|---|
| Accuracy | Excellent | Excellent | Good | Fair |
| Ease of Use | Excellent | Good | Fair | Fair |
| Cost | High | Medium | Low | Very Low |
| Portability | Low | Medium | High | Medium |
| Project Size | Large | Large | Small to Medium | Small to Medium |
Setting Up Your Circular Saw Guide
No matter what type of guide you choose, proper setup is crucial for achieving accurate cuts. Here’s a general guide:
- Prepare Your Workpiece: Make sure your workpiece is clean, flat, and securely supported.
- Position the Guide: Place the guide on the workpiece, aligning it with your desired cut line.
- Secure the Guide: Clamp or otherwise secure the guide to the workpiece. Make sure it is firmly in place and will not move during the cut.
- Check Alignment: Double-check that the guide is still aligned with your cut line.
- Adjust Saw Depth: Set the depth of your saw blade to just slightly deeper than the thickness of your workpiece.
- Test Cut: Make a test cut on a scrap piece of wood to ensure the saw is tracking correctly and the cut is accurate.
Detailed Setup for Specific Guide Types
Circular Saw Guide Rail:
- Most guide rails have a rubber strip that helps prevent splintering. Position this strip along the cut line.
- Some guide rails have anti-slip strips on the bottom. If yours doesn’t, consider adding some to prevent the rail from moving during the cut.
- Use clamps designed for guide rails to secure the rail to the workpiece.
Clamp-On Straight Edge:
- Make sure the clamp is securely tightened to prevent the edge from moving.
- Use a speed square or other tool to ensure the edge is perpendicular to the edge of your workpiece (if making a crosscut).
Homemade Guide:
- Ensure the guide is perfectly straight and square. Use a high-quality square to check alignment.
- Attach the guide to your workpiece with screws or clamps. Make sure the fasteners are countersunk to prevent them from interfering with the saw.
Making the Cut: Step-by-Step Guide
Once your guide is set up, you’re ready to make the cut:
- Safety First: Wear safety glasses and hearing protection.
- Position the Saw: Place the saw base against the guide.
- Start the Saw: Turn on the saw and let it reach full speed.
- Feed the Saw: Slowly and smoothly push the saw forward, keeping the base firmly against the guide. Avoid forcing the saw.
- Follow Through: Continue cutting until the saw has completely passed through the workpiece.
- Release the Trigger: Release the saw trigger and allow the blade to come to a complete stop before lifting the saw from the workpiece.
Tips for Making Perfect Cuts
- Use a Sharp Blade: A dull blade will cause the saw to bog down and produce a rough cut.
- Maintain Consistent Pressure: Apply even pressure to the saw throughout the cut.
- Avoid Kickback: Be aware of the potential for kickback. Keep your body out of the path of the blade and avoid cutting knots or other obstructions.
- Use Dust Collection: Connect your saw to a dust collector to improve visibility and reduce airborne dust.
- Practice: The more you practice, the better you will become at making accurate cuts with a circular saw and guide.
Creating a Homemade Circular Saw Guide
If you’re looking to save money, building your own circular saw straight edge guide is a viable option. Here are some circular saw guide plans and key considerations:
Simple Straight Edge Guide
This is the easiest type of guide to make.
Materials:
- A straight piece of wood (plywood, MDF, or hardwood)
- Screws or nails
- Wood glue
Instructions:
- Cut the wood to the desired length and width.
- Ensure one edge is perfectly straight. Use a jointer or table saw if necessary.
- Attach a fence to the straight edge, creating a channel for the saw base to ride against.
- Ensure the fence is perfectly parallel to the straight edge.
Sled-Type Guide
This guide offers more stability and control.
Materials:
- A base (plywood or MDF)
- Two runners (strips of wood)
- A fence (straight piece of wood)
- Screws or nails
- Wood glue
Instructions:
- Cut the base to the desired size.
- Attach the runners to the bottom of the base, creating a channel for the saw to slide along.
- Attach the fence to the top of the base, perpendicular to the runners.
- Ensure the fence is perfectly square to the runners.
Key Considerations for Homemade Guides
- Accuracy is Crucial: Use high-quality materials and take your time to ensure all parts are perfectly straight and square.
- Test and Adjust: After building your guide, make several test cuts to ensure it is accurate. Adjust as needed.
- Material Choice: Plywood and MDF are good choices for the base of the guide because they are stable and resist warping. Hardwood is a good choice for the fence because it is durable and easy to work with.
Maintaining Your Circular Saw Guide
Proper maintenance will extend the life of your guide and ensure it continues to provide accurate cuts:
- Clean the Guide Regularly: Remove dust and debris from the guide after each use.
- Inspect for Damage: Check the guide for cracks, dents, or other damage. Repair any damage immediately.
- Store Properly: Store the guide in a dry place, away from direct sunlight.
Troubleshooting Common Problems
- Saw Binding: If the saw is binding, it may be due to a dull blade, excessive pressure, or misalignment of the guide.
- Inaccurate Cuts: If the cuts are not accurate, check the alignment of the guide, the sharpness of the blade, and the pressure you are applying to the saw.
- Guide Slipping: If the guide is slipping, make sure it is securely clamped to the workpiece. Consider adding anti-slip strips to the bottom of the guide.
Achieving Accurate Cuts with Circular Saw: Recap
Using a circular saw guide, whether a commercial circular saw guide rail or a DIY circular saw track, drastically improves cut accuracy, safety, and efficiency. Selecting the right guide, setting it up correctly, and using proper cutting techniques are all key to achieving professional-quality results. Understanding the different types of guides, how to build one, and how to troubleshoot common problems will equip you with the knowledge needed to make perfect cuts every time.
FAQ: Circular Saw Guides
- What is the best circular saw guide? The best guide depends on your needs and budget. Commercial track saws offer the highest accuracy and ease of use but are the most expensive. Guide rails are a good compromise.
- Can I use a circular saw without a guide? Yes, but it is more difficult to make straight, accurate cuts. A guide is highly recommended, especially for longer cuts.
- Who is a circular saw guide for? Anyone who uses a circular saw and wants to make straight, accurate cuts.
- How to make a circular saw track? You can build a simple track using plywood and straight pieces of wood. Ensure everything is square and parallel. Refer to online plans for detailed instructions.
- What are circular saw guide plans? These are instructions for building your own circular saw guide, often available online for free or for purchase.
- What is a circular saw straight cut jig? This is another term for a circular saw guide, referring to its function of helping you make straight cuts.
- What is the benefit of using a circular saw track over a regular straight edge? A track provides better stability and helps prevent the saw from wandering, resulting in more accurate cuts.

Hi, I’m Tom Scalisi, and welcome to The Saw Blog! I started this blog to share my hands-on experience and insights about woodworking tools—especially saws and saw blades. Over the years, I’ve had the chance to work with a wide range of tools, and I’m here to help both professionals and hobbyists make informed decisions when it comes to selecting and using their equipment. Whether you’re looking for in-depth reviews, tips, or just advice on how to get the best performance out of your tools, you’ll find it here. I’m excited to be part of your woodworking journey!