
Yes, you can absolutely turn your circular saw into a table saw! By building a simple frame or using a store-bought kit, you can mount your saw upside down under a table to create your own DIY version. This guide will show you how to do it. It’s a great, low-cost way to get a table saw if you’re short on space or trying to save some money.
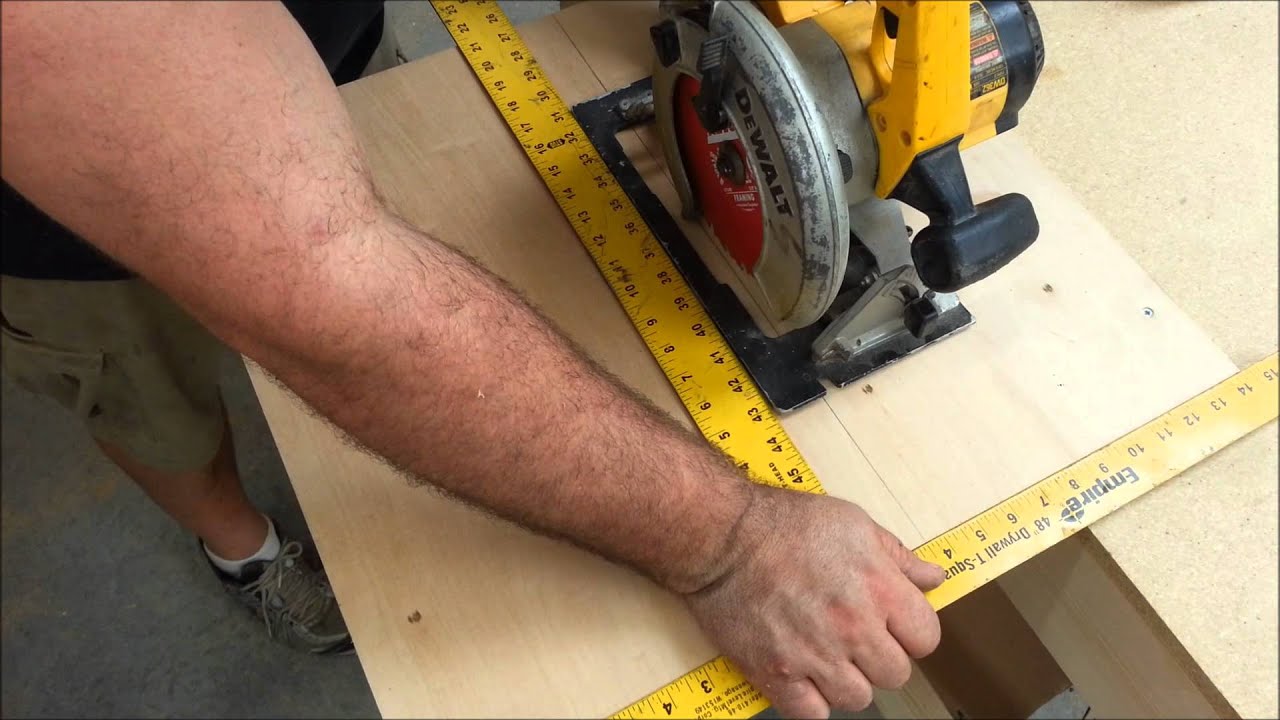
Image Source: i.ytimg.com
Why Build a Table Saw from a Circular Saw?
There are several reasons why a circular saw table saw conversion might be a great project for you:
- Cost Savings: Building a homemade table saw from a circular saw is significantly cheaper than buying a brand new table saw. You are repurposing a tool you likely already own.
- Space Efficiency: If you have a small workshop, a circular saw mounted in a table offers a smaller footprint than a full-sized table saw.
- Portability: While not as portable as the circular saw itself, the table saw jig can be made relatively lightweight and transportable.
- Versatility: With a little ingenuity, your DIY table saw can perform many of the same functions as a standard table saw.
- DIY Satisfaction: There’s a great sense of accomplishment in building your own tools!
Safety First!
Before starting any DIY project involving power tools, safety should be your top priority.
- Always wear safety glasses: Protect your eyes from flying debris.
- Use hearing protection: Circular saws are loud; protect your ears.
- Wear a dust mask: Sawdust can be harmful to your lungs.
- Unplug the saw before making any adjustments: This prevents accidental starts.
- Keep your hands away from the blade: Use push sticks and feather boards.
- Double-check all connections: Ensure everything is secure before turning on the saw.
- Work in a well-lit area: Good visibility is crucial for safety.
- Read and the manual for your circular saw: Make sure you know how to safely operate your saw.
Choosing the Right Circular Saw
Not all circular saws are created equal. Here’s what to look for when selecting a circular saw for your circular saw table saw conversion.
- Power: A more powerful saw will handle thicker materials more easily. Look for at least 12 amps.
- Blade Size: A 7 1/4-inch blade is standard and readily available.
- Base Plate Material: A flat, sturdy metal base plate is essential for mounting.
- Cord Placement: Consider where the power cord exits the saw. A rear-exit cord may be easier to manage.
- Weight: A lighter saw will be easier to maneuver while building the jig.
- Blade Adjustments: Make sure the saw allows for easy blade height and angle adjustments.
Methods for Circular Saw Table Saw Conversion
There are a few approaches to DIY table saw conversion. Here are two popular methods:
1. The Simple Jig Method: This is the easiest and cheapest method, ideal for occasional use.
2. The Full Enclosure Method: This method creates a more robust and integrated table saw.
Method 1: The Simple Jig Method
This circular saw table saw jig involves building a platform that holds the circular saw securely beneath a table.
Materials Needed
- Plywood or MDF (for the jig platform and table top)
- Wood screws
- Bolts, washers, and nuts (to secure the saw)
- Wood glue
- Clamps
- Measuring tape
- Pencil
- Circular saw (obviously!)
- Drill
- Jigsaw or router (for cutting the blade slot)
Step-by-Step Instructions
-
Measure Your Circular Saw: Accurately measure the dimensions of your circular saw’s base plate. Note the locations of the mounting holes.
-
Cut the Jig Platform: Cut a piece of plywood or MDF to a size slightly larger than your saw’s base plate. This will be the platform that holds the saw.
-
Drill Mounting Holes: Transfer the measurements of the mounting holes from the saw’s base plate to the jig platform. Drill holes through the platform at these locations.
-
Attach the Saw to the Platform: Using bolts, washers, and nuts, securely attach the circular saw to the jig platform. Ensure the blade is centered and parallel to the platform’s edges.
-
Build the Table Top: Cut a piece of plywood or MDF to the desired size for your table top. A good starting size is 24″ x 36″.
-
Cut the Blade Slot: Place the jig platform (with the saw attached) upside down on the underside of the table top. Carefully trace the outline of the saw blade’s path. Use a jigsaw or router to cut a slot along this line. This slot will allow the blade to protrude through the table top. Make sure the blade can retract all the way down without hitting anything.
-
Attach the Jig to the Table Top: Build a simple frame underneath the table top to provide support and a way to attach the jig platform. The frame can be made from 2×4 lumber. Securely screw and glue the frame to the table top.
-
Mount the Jig: Attach the jig platform (with the saw) to the underside of the table top using screws. Ensure the blade aligns perfectly with the slot you cut.
-
Test and Adjust: Plug in the saw and carefully test its operation. Adjust the blade height as needed. Ensure the blade moves freely through the slot.
Adding a Rip Fence (Optional)
A rip fence is essential for making accurate parallel cuts.
- Cut a straight piece of wood (e.g., a 2×4) to serve as the fence.
- Use clamps to temporarily attach the fence to the table top, parallel to the blade.
- Experiment with different positions until you achieve the desired cut width.
- Once you’re satisfied with the position, consider adding a more permanent clamping system or building a track for the fence to slide along.
Method 2: The Full Enclosure Method
This circular saw table saw modification creates a more enclosed and stable table saw. It requires more materials and time but results in a more professional and functional tool.
Materials Needed
- Plywood or MDF (for the enclosure and table top)
- 2×4 lumber (for the frame)
- Wood screws
- Bolts, washers, and nuts (to secure the saw)
- Dust collection port (optional)
- Switch box and power cord (optional, for remote power control)
- Miter slot hardware (optional)
- Wood glue
- Clamps
- Measuring tape
- Pencil
- Circular saw
- Drill
- Jigsaw or router
- Table saw (if available, for precise cuts)
Step-by-Step Instructions
-
Design Your Enclosure: Plan the dimensions of your table saw. Consider the size of your circular saw and the desired table top area. A good size for the table top is 30″ x 48″.
-
Build the Frame: Construct a sturdy frame from 2×4 lumber. This frame will support the table top and the enclosure.
-
Cut the Enclosure Panels: Cut the plywood or MDF panels for the sides, front, back, and bottom of the enclosure.
-
Assemble the Enclosure: Assemble the enclosure panels around the frame using wood screws and glue. Ensure the enclosure is square and rigid.
-
Cut the Table Top: Cut the plywood or MDF for the table top to the desired size.
-
Cut the Blade Opening: Place the circular saw (with the blade extended) on the underside of the table top. Trace the outline of the blade. Use a jigsaw or router to cut an opening for the blade.
-
Mount the Circular Saw: This is the trickiest part. You need to create a mounting system that allows you to adjust the blade height and angle from above the table. Here are a couple of options:
- Metal Brackets: Fabricate metal brackets that attach to the saw’s base plate and to the underside of the table top. Use threaded rods and knobs to adjust the blade height.
- Wood Sliders: Create a wooden sliding mechanism that allows you to raise and lower the saw. Use wedges or screws to lock the saw in place at the desired height.
-
Attach the Table Top: Attach the table top to the enclosure frame using screws and glue.
-
Add Miter Slots (Optional): Rout or cut miter slots into the table top. Install miter slot hardware.
-
Install a Dust Collection Port (Optional): Cut a hole in the enclosure and install a dust collection port. Connect it to your shop vacuum.
-
Install a Remote Power Switch (Optional): Install a switch box and power cord to control the saw from a convenient location on the table.
-
Test and Adjust: Plug in the saw and carefully test its operation. Adjust the blade height and angle as needed. Ensure the blade moves freely through the opening.
Adding a Rip Fence and Miter Gauge
- Rip Fence: You can build a more sophisticated rip fence system using T-track and adjustable clamps.
- Miter Gauge: Purchase a standard miter gauge that fits into the miter slots.
Tips for Improving Accuracy and Safety
- Use a High-Quality Blade: A sharp, high-quality blade will produce cleaner cuts and reduce the risk of kickback.
- Invest in Push Sticks and Feather Boards: These safety accessories are essential for keeping your hands away from the blade and preventing the workpiece from lifting.
- Check the Blade Alignment Regularly: Ensure the blade is parallel to the miter slots and perpendicular to the rip fence.
- Use a Square: A square is essential for making accurate 90-degree cuts.
- Make Slow, Controlled Cuts: Don’t force the saw. Let the blade do the work.
- Practice on Scrap Wood: Before working on your project, practice making cuts on scrap wood to get a feel for the saw.
- Regularly Clean the Saw: Remove sawdust and debris from the saw to ensure smooth operation and prevent overheating.
Benefits and Drawbacks
| Feature | Simple Jig Method | Full Enclosure Method |
|---|---|---|
| Cost | Low | Moderate |
| Complexity | Easy | Difficult |
| Stability | Moderate | High |
| Accuracy | Moderate | High |
| Dust Collection | Poor | Good (with dust port) |
| Safety | Moderate | High |
| Portability | Good | Limited |
| Blade Adjustment | Less Convenient | More Convenient |
Troubleshooting
- Saw vibrates excessively: Ensure the saw is securely mounted to the jig or enclosure. Check the blade for damage or imbalance.
- Blade doesn’t cut straight: Check the blade alignment. Ensure the rip fence is parallel to the blade.
- Wood binds or kicks back: Ensure the blade is sharp. Use feather boards to prevent the wood from lifting. Make sure the riving knife (if your saw has one) is properly aligned.
- Motor overheats: Ensure the saw has adequate ventilation. Don’t force the saw to cut too quickly.
Circular Saw Table Saw Plans
There are many circular saw table saw plans available online. Search for “circular saw table saw plans” or “DIY table saw plans” to find a plan that suits your skill level and budget. Many plans include detailed drawings, material lists, and step-by-step instructions.
Conclusion
A circular saw table saw conversion is a rewarding project that can save you money and space. By following these instructions and taking the necessary safety precautions, you can build a functional and affordable table saw for your workshop. Remember to start with a clear plan, work carefully, and always prioritize safety.
Frequently Asked Questions (FAQ)
Q: What is the best circular saw to use for a table saw conversion?
The best circular saw for a conversion is one with a powerful motor (at least 12 amps), a flat, sturdy metal base plate, and easy blade height and angle adjustments. Consider the cord placement, aiming for a rear-exit cord if possible.
Q: How much does it cost to build a table saw from a circular saw?
The cost depends on the materials you use and the complexity of the design. A simple jig can cost as little as $20-$50, while a full enclosure might cost $100-$200 or more. This excludes the cost of the circular saw itself, which you ideally already own.
Q: Is a DIY table saw as accurate as a store-bought table saw?
While a DIY table saw can be quite accurate, it may not be as precise as a high-end store-bought model. The accuracy depends on the quality of your construction and the care you take in aligning the blade and fence.
Q: Can I cut plywood with a circular saw table saw?
Yes, you can cut plywood with a circular saw table saw. Use a blade designed for plywood to minimize splintering.
Q: What safety precautions should I take when using a circular saw table saw?
Always wear safety glasses, hearing protection, and a dust mask. Use push sticks and feather boards to keep your hands away from the blade. Ensure the saw is securely mounted and the blade is properly aligned. Never force the saw to cut too quickly.
Q: What is kickback, and how can I prevent it?
Kickback occurs when the wood being cut is pinched by the blade and thrown back towards the operator. To prevent kickback, use a sharp blade, ensure the riving knife is properly aligned, and use feather boards to keep the wood from lifting.

Hi, I’m Tom Scalisi, and welcome to The Saw Blog! I started this blog to share my hands-on experience and insights about woodworking tools—especially saws and saw blades. Over the years, I’ve had the chance to work with a wide range of tools, and I’m here to help both professionals and hobbyists make informed decisions when it comes to selecting and using their equipment. Whether you’re looking for in-depth reviews, tips, or just advice on how to get the best performance out of your tools, you’ll find it here. I’m excited to be part of your woodworking journey!