
Can you make a table saw from a circular saw? Yes, you can. Circular saw table conversion is a popular DIY project for woodworkers looking for a budget table saw alternative. This guide will walk you through the process of building a table saw using a circular saw, offering detailed instructions, safety tips, and circular saw table saw plans. Whether you’re interested in repurposing a circular saw into a table saw or simply want a more versatile tool, this homemade table saw guide will help you create a functional and cost-effective solution.
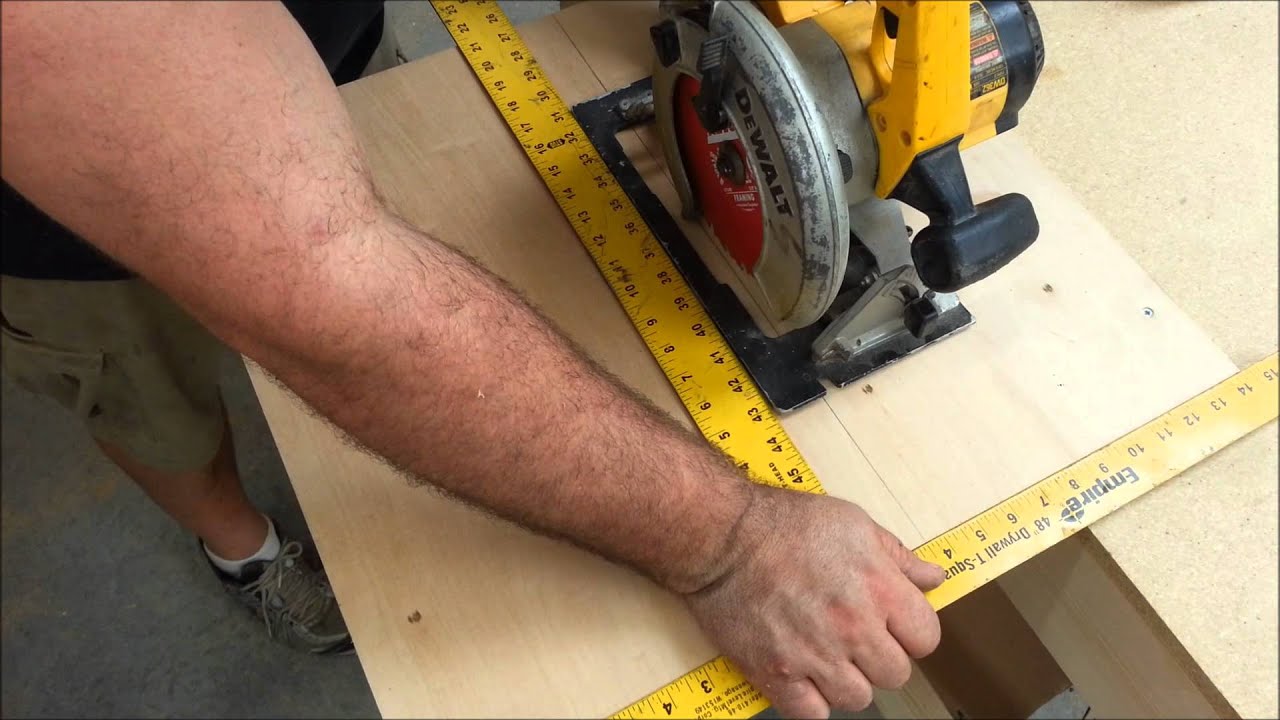
Image Source: i.ytimg.com
Why Convert a Circular Saw to a Table Saw?
There are several compelling reasons to consider a DIY table saw from circular saw project:
- Cost Savings: Table saws can be expensive. Converting a circular saw is a significantly cheaper option.
- Space Efficiency: If you have limited workshop space, a converted table saw can be more compact than a full-sized model.
- Versatility: A table saw allows for more precise cuts and greater control than using a circular saw freehand.
- DIY Satisfaction: Building your own tools is a rewarding experience that enhances your woodworking skills.
Essential Tools and Materials
Before you begin the circular saw table conversion, gather the necessary tools and materials. This list covers the basics; you may need additional items depending on your specific design.
Tools
- Circular Saw (obviously!)
- Drill with various drill bits
- Screwdriver (Phillips and flathead)
- Jigsaw
- Measuring Tape
- Square
- Clamps
- Safety Glasses
- Hearing Protection
- Work Gloves
- Router (optional, but highly recommended for clean edges)
Materials
- Plywood (¾ inch thick is recommended for the table top)
- Wood for the frame (2x4s or similar)
- Screws (various sizes for wood and metal)
- Bolts, washers, and nuts for securing the circular saw
- Metal Brackets (for reinforcing the frame)
- On/Off Switch (essential for safety)
- Electrical Wiring and Connectors
- Blade Guard (for safety)
- Riving Knife or Splitter (for safety)
- Miter Slot Track (optional, for using a miter gauge)
- T-Track (optional, for adding jigs and fixtures)
- Wood Glue
- Paint or Finish (for protecting the wood)
Planning Your Table Saw Design
A well-thought-out plan is crucial for a successful circular saw table saw jig. Consider the following factors:
Table Size
First, you’ll need to decide how big you want your table saw to be. A pretty standard size is about 24 inches wide and 36 inches long, but feel free to change those numbers to fit your workspace or the types of projects you’re planning to do.
Circular Saw Mounting
How will you secure the circular saw to the table? A common method involves creating a mounting plate that attaches to the saw’s base.
Safety Features
Prioritize safety by including a blade guard, riving knife, and easily accessible on/off switch.
Features
Do you want a miter slot, T-tracks, or other features? Plan for these in advance.
Sample Table Dimensions
Here is an example table size to consider:
| Dimension | Size (inches) |
|---|---|
| Table Length | 36 |
| Table Width | 24 |
| Table Height | 34 |
Building the Table Saw Frame
The frame provides the structural support for your table saw.
-
Cut the Frame Pieces: Cut the wood for the frame to the desired dimensions. For a rectangular frame, you’ll need four pieces: two for the length and two for the width.
-
Assemble the Frame: Join the frame pieces using screws and wood glue. Ensure the frame is square by checking the diagonals. Reinforce the corners with metal brackets for added strength.
-
Add Legs: Cut four legs to the desired height (typically around 34 inches). Attach the legs to the frame using screws and glue. Again, ensure they are square and securely fastened.
-
Bracing: Add cross braces between the legs for extra stability. This will prevent the table from wobbling.
Creating the Table Top
The table top provides a flat, stable surface for your cuts.
-
Cut the Plywood: Cut the plywood to the desired dimensions for the table top.
-
Cut the Opening for the Blade: Carefully measure and mark the location for the circular saw blade. Use a jigsaw to cut out the opening. Ensure the opening is slightly larger than the blade to allow for movement.
-
Create a Mounting Plate: Cut a piece of plywood or metal to serve as the mounting plate for the circular saw. The plate should be large enough to cover the opening in the table top.
-
Attach the Mounting Plate to the Table Top: Secure the mounting plate to the underside of the table top using screws and glue. Align it carefully so that the blade opening lines up correctly.
Circular Saw Mounting for Table Saw Use
This is a crucial step in the converting circular saw to bench saw process.
-
Attach the Circular Saw to the Mounting Plate: Position the circular saw on the mounting plate and mark the locations for the mounting bolts. Drill holes through the mounting plate at these locations.
-
Secure the Saw: Use bolts, washers, and nuts to secure the circular saw to the mounting plate. Ensure the saw is firmly attached and cannot move during operation.
-
Adjust Blade Height: Devise a mechanism for adjusting the blade height. This could involve using threaded rods or a simple lever system.
Integrating Safety Features
Safety is paramount when building a table saw using a circular saw.
-
Install a Blade Guard: A blade guard is essential for protecting your hands from the spinning blade. You can purchase a universal blade guard or fabricate one from clear plastic.
-
Add a Riving Knife or Splitter: A riving knife or splitter prevents the wood from pinching the blade, which can cause kickback. Install this behind the blade, ensuring it is aligned correctly.
-
Install an On/Off Switch: Mount an easily accessible on/off switch to the table saw frame. Wire the switch to the circular saw’s power cord, ensuring the wiring is safe and secure.
-
Emergency Shut-Off: Consider adding an emergency shut-off switch within easy reach.
Adding Optional Features
Enhance your table saw with these optional features:
-
Miter Slot: Cut a miter slot into the table top using a router and a straight edge. Install a miter slot track to allow for the use of a miter gauge.
-
T-Track: Install T-tracks in the table top for adding jigs and fixtures. T-tracks provide a versatile way to secure workpieces and accessories.
-
Fence System: Build or purchase a fence system to guide your cuts. A good fence system will improve accuracy and repeatability.
-
Dust Collection: Add a dust collection port to help keep your workshop clean. Connect the port to a shop vacuum to remove sawdust as you cut.
Finishing Touches
Complete your table saw with these finishing touches:
-
Sand the Table Top: Sand the table top smooth to remove any splinters or rough edges.
-
Apply a Finish: Apply a coat of paint, varnish, or polyurethane to protect the wood from moisture and wear.
-
Test and Adjust: Test the table saw to ensure it is working correctly. Adjust the blade alignment, fence, and other components as needed.
Circular Saw Table Saw Plans: A Step-by-Step Example
Here’s a simplified plan to guide your build. Remember to adjust measurements to fit your specific circular saw and needs.
Step 1: Frame Construction
- Cut four 2x4s: Two at 36 inches (length) and two at 24 inches (width).
- Assemble the rectangle using screws and wood glue. Check for squareness.
- Cut four legs at 34 inches from 2x4s.
- Attach the legs to the inside corners of the frame, ensuring they are flush with the top. Secure with screws and glue.
- Add 2×4 cross braces between the legs for stability.
Step 2: Table Top Preparation
- Cut a piece of ¾-inch plywood to 36 inches by 24 inches.
- Find the center of the plywood. This is where your blade will emerge.
- Using the circular saw’s base plate as a template, trace its outline onto a separate piece of ¼-inch plywood.
- Cut out the traced shape with a jigsaw. This will be your mounting plate.
- Place your circular saw on the mounting plate and trace around the blade opening. Adjust this opening to be slightly larger to allow free movement of the blade when raised or lowered.
- Drill holes in the mounting plate to align with the mounting holes on your circular saw’s base.
Step 3: Attaching the Saw and Mounting Plate
- Attach the mounting plate to the underside of the plywood table top using screws and construction adhesive.
- Securely bolt the circular saw to the mounting plate. Ensure the blade protrudes through the opening you made in the table top.
Step 4: Safety Features
- Attach a blade guard above the blade. Universal blade guards are available online or at hardware stores.
- Install a riving knife or splitter directly behind the blade. This should be slightly thinner than the blade.
- Wire an on/off switch to the circular saw’s power cord. Mount the switch on the frame for easy access.
Step 5: Optional Features
- Cut a miter slot into the table top.
- Install T-tracks to accommodate jigs and fixtures.
- Build or purchase a fence system.
Table: Bill of Materials (Example)
| Item | Quantity | Dimensions (inches) | Material |
|---|---|---|---|
| Frame Length | 2 | 36 x 3.5 x 1.5 | 2×4 |
| Frame Width | 2 | 24 x 3.5 x 1.5 | 2×4 |
| Legs | 4 | 34 x 3.5 x 1.5 | 2×4 |
| Table Top | 1 | 36 x 24 x 0.75 | Plywood |
| Mounting Plate | 1 | Varies based on saw | Plywood |
| Cross Braces | 2 | Varies, measure on site | 2×4 |
| Screws/Bolts/Washers | Varies | Various sizes | |
| On/Off Switch | 1 | N/A | |
| Blade Guard | 1 | N/A | |
| Riving Knife/Splitter | 1 | N/A | |
| Miter Slot Track (Opt.) | 1 | Varies | |
| T-Track (Opt.) | Varies | Varies |
Tips for Accurate Cuts
- Use a Sharp Blade: A dull blade will produce rough cuts and increase the risk of kickback.
- Align the Fence: Ensure the fence is parallel to the blade for accurate rip cuts.
- Use a Miter Gauge: For accurate crosscuts, use a miter gauge in the miter slot.
- Feed the Wood Slowly: Avoid forcing the wood through the blade. Let the blade do the work.
- Use Push Sticks: Use push sticks to keep your hands away from the blade when making narrow cuts.
Troubleshooting Common Issues
- Blade Wobbling: Ensure the blade is properly tightened and not damaged.
- Kickback: Ensure the riving knife is properly aligned and that you are not forcing the wood through the blade.
- Inaccurate Cuts: Check the fence alignment and ensure the table top is flat and stable.
- Motor Overheating: Avoid prolonged use at high speeds. Allow the motor to cool down periodically.
Is this a Budget Table Saw Alternative?
Yes, absolutely! The primary benefit of a circular saw table conversion is cost savings. You can often build a functional table saw for a fraction of the price of a new one, especially if you already own a circular saw.
Safety Precautions
- Always wear safety glasses and hearing protection.
- Never operate the table saw without a blade guard and riving knife.
- Keep your hands away from the blade at all times.
- Use push sticks when making narrow cuts.
- Ensure the work area is well-lit and free of clutter.
- Disconnect the power cord before making any adjustments or repairs.
- Never leave the table saw unattended while it is running.
- Read and understand the circular saw’s owner’s manual before beginning the conversion.
Frequently Asked Questions (FAQ)
Q: What is the best circular saw to use for a table saw conversion?
A: A corded circular saw with a powerful motor (15 amps or more) is recommended. Look for a saw with a flat base for easy mounting.
Q: Can I use a cordless circular saw for this project?
A: While possible, cordless circular saws may not provide the sustained power needed for consistent performance. Corded saws are generally preferred.
Q: How much does it cost to convert a circular saw to a table saw?
A: The cost can vary depending on the materials you use, but you can typically build one for under $200 if you already own a circular saw.
Q: Is it safe to convert a circular saw to a table saw?
A: Yes, if done correctly and with appropriate safety measures. Always use a blade guard, riving knife, and other safety features.
Q: What is a riving knife and why is it important?
A: A riving knife is a thin piece of metal that sits behind the blade and prevents the wood from pinching, reducing the risk of kickback.
Q: How do I adjust the blade height on my converted table saw?
A: You can use threaded rods or a lever system to adjust the blade height. This will depend on your specific design.
Q: How do I ensure my fence is parallel to the blade?
A: Use a measuring tape to measure the distance between the fence and the blade at the front and back of the table. Adjust the fence until the measurements are equal.
By following this comprehensive homemade table saw guide, you can successfully repurpose a circular saw into a table saw and enjoy the benefits of a versatile and cost-effective woodworking tool. Remember to prioritize safety and take your time to ensure a well-built and functional table saw.

Hi, I’m Tom Scalisi, and welcome to The Saw Blog! I started this blog to share my hands-on experience and insights about woodworking tools—especially saws and saw blades. Over the years, I’ve had the chance to work with a wide range of tools, and I’m here to help both professionals and hobbyists make informed decisions when it comes to selecting and using their equipment. Whether you’re looking for in-depth reviews, tips, or just advice on how to get the best performance out of your tools, you’ll find it here. I’m excited to be part of your woodworking journey!