
What is a Ryobi miter saw? A Ryobi miter saw is a power tool used to make accurate crosscuts and angled cuts in wood. It is essential for woodworking projects and home renovations. This Ryobi miter saw guide will teach you how to use it safely and effectively.
This guide is here to show you exactly how to use your Ryobi miter saw the right way and, most importantly, how to stay safe. We’ll cover everything from getting it set up for the first time to learning more advanced ways to cut, so you can really get your money’s worth out of the tool. Plus, I’ll share some easy maintenance tips to make sure your saw stays in great shape and keeps running smoothly for a long time.
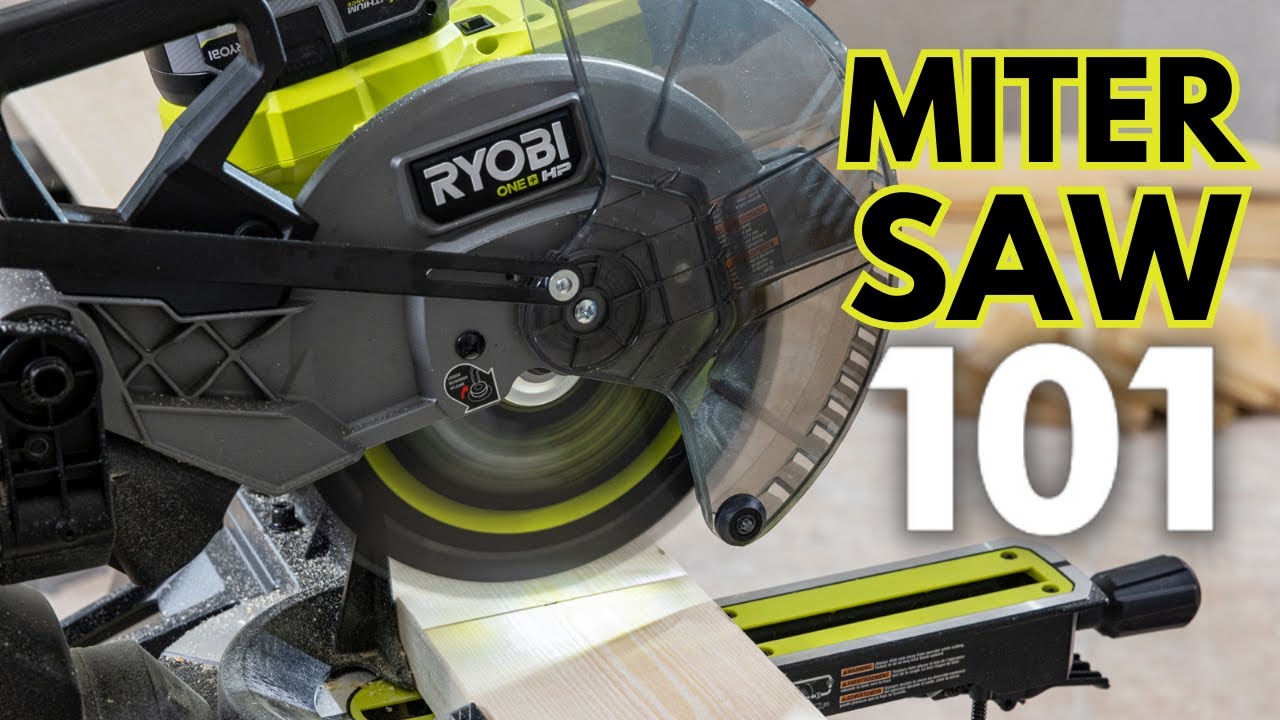
Image Source: i.ytimg.com
I. Getting Started with Your Ryobi Miter Saw
Unboxing and Ryobi Miter Saw Setup
- Carefully Unpack: Open the box and take out all the parts. Check them against the parts list in the manual.
- Inspect for Damage: Look closely for any damage that may have happened during shipping. If you find something, contact the store or Ryobi.
- Mount the Saw: Put the saw on a stable, flat surface. You can use a workbench or a miter saw stand. Make sure it won’t move while you’re using it. Bolt it down if possible.
- Install the Blade (if needed): If the blade is not already installed, follow the instructions in the section on Ryobi miter saw blade replacement.
- Connect to Power: Plug the saw into a grounded outlet. Use the right extension cord if you need one.
Safety First: Essential Precautions
Safety is the most important thing when using any power tool. Always follow these guidelines when using a Ryobi miter saw:
- Read the Manual: Always read and fully comprehend the owner’s manual before operating the Ryobi miter saw. It contains vital safety information.
- Wear Safety Gear: Wear safety glasses to protect your eyes from flying debris. Ear protection is also a must to reduce noise.
- Use a Dust Mask: Sawdust can be harmful to breathe. Use a dust mask or respirator, especially when cutting a lot of wood.
- Keep Your Hands Clear: Keep your hands away from the blade at all times. Never reach over or around the blade while it’s spinning.
- Secure the Workpiece: Always clamp or hold the workpiece firmly in place. This prevents it from moving during the cut.
- Disconnect When Adjusting: Always unplug the saw before making any adjustments or changing the blade.
- Inspect the Saw: Before each use, check the saw for any damage or loose parts.
- Avoid Loose Clothing: Do not wear loose clothing or jewelry that could get caught in the blade.
- Stay Focused: Pay attention to what you’re doing and don’t let yourself get distracted.
- Never Force the Saw: Let the blade do the work. Forcing it can cause kickback or damage to the saw.
II. Basic Operations: Making Simple Cuts
Ryobi Miter Saw Angle Adjustments: Setting the Miter Angle
The miter angle is the angle of the cut relative to the fence. Here’s how to adjust it:
- Loosen the Miter Lock: Find the miter lock lever or knob, usually located at the front of the saw. Loosen it to allow the table to rotate.
- Rotate the Table: Turn the table to the desired angle. Most saws have markings for common angles like 45 degrees and 90 degrees.
- Use the Detents (if available): Many saws have detents, which are preset stops at common angles. These make it easier to set the angle accurately.
- Tighten the Miter Lock: Once you’ve set the angle, tighten the miter lock to secure the table in place.
- Verify the Angle: Always double-check the angle with a protractor or angle finder to make sure it’s correct.
Making a Crosscut: 90-Degree Cut
A crosscut is a straight cut across the width of the board at a 90-degree angle.
- Set the Miter Angle: Make sure the miter angle is set to 0 degrees (90-degree cut).
- Place the Workpiece: Put the wood flat against the fence. Make sure it is held firmly and securely.
- Turn On the Saw: Start the saw and let the blade reach full speed before cutting.
- Lower the Blade: Slowly lower the blade into the wood, keeping it aligned with your cut line.
- Cut Through the Wood: Push the blade down and forward through the wood in a smooth, controlled motion.
- Release the Trigger: Once the cut is complete, release the trigger and let the blade stop completely before raising it.
- Remove the Cut Piece: Take the cut piece off the saw.
Ryobi Miter Saw Cutting Techniques: Cutting Tips for Better Results
- Support Long Pieces: Use rollers or supports to hold long pieces of wood level with the saw table. This prevents the wood from bending or breaking.
- Make Multiple Passes: For thick pieces of wood, you may need to make multiple passes. Lower the blade slightly for each pass until you’ve cut all the way through.
- Avoid Kickback: Kickback happens when the blade catches on the wood and throws it back toward you. To avoid kickback, always hold the wood firmly, use a sharp blade, and don’t force the saw.
- Practice on Scrap Wood: Before cutting expensive or important pieces, practice on scrap wood to get a feel for the saw and the cut.
III. Advanced Techniques: Bevel and Compound Cuts
Ryobi Miter Saw Bevel Cuts: Setting the Bevel Angle
A bevel cut is a cut made at an angle to the face of the wood. Here’s how to set the bevel angle:
- Loosen the Bevel Lock: Find the bevel lock lever or knob, usually located on the back or side of the saw. Loosen it to allow the saw head to tilt.
- Tilt the Saw Head: Tilt the saw head to the desired angle. Most saws have markings for common angles.
- Tighten the Bevel Lock: Once you’ve set the angle, tighten the bevel lock to secure the saw head in place.
- Verify the Angle: Always double-check the angle with a protractor or angle finder.
Making a Bevel Cut
- Set the Bevel Angle: Adjust the bevel angle as described above.
- Secure the Workpiece: Put the wood flat against the fence and clamp it firmly.
- Turn On the Saw: Start the saw and let the blade reach full speed.
- Lower the Blade: Slowly lower the blade into the wood, keeping it aligned with your cut line.
- Cut Through the Wood: Push the blade down and forward through the wood in a smooth, controlled motion.
- Release the Trigger: Once the cut is complete, release the trigger and let the blade stop completely before raising it.
- Remove the Cut Piece: Take the cut piece off the saw.
Ryobi Miter Saw Compound Cuts: Combining Miter and Bevel Angles
A compound cut combines both a miter angle and a bevel angle. This is often used for making trim or molding.
- Set the Miter Angle: Adjust the miter angle as described earlier.
- Set the Bevel Angle: Adjust the bevel angle as described above.
- Secure the Workpiece: Put the wood flat against the fence and clamp it firmly.
- Turn On the Saw: Start the saw and let the blade reach full speed.
- Lower the Blade: Slowly lower the blade into the wood, keeping it aligned with your cut line.
- Cut Through the Wood: Push the blade down and forward through the wood in a smooth, controlled motion.
- Release the Trigger: Once the cut is complete, release the trigger and let the blade stop completely before raising it.
- Remove the Cut Piece: Take the cut piece off the saw.
IV. Maintaining Your Ryobi Miter Saw
Ryobi Miter Saw Blade Replacement: Changing the Blade
A sharp blade is essential for making clean, accurate cuts. Here’s how to change the blade:
- Unplug the Saw: Always unplug the saw before changing the blade.
- Locate the Blade Bolt: Find the bolt that holds the blade in place. It is usually located in the center of the blade.
- Lock the Blade: Many saws have a blade lock. Use this to keep the blade from turning while you loosen the bolt.
- Loosen the Bolt: Use the wrench that came with the saw to loosen the bolt. Turn it in the direction indicated in the manual.
- Remove the Old Blade: Carefully remove the old blade.
- Install the New Blade: Put the new blade on the saw. Make sure the teeth are pointing in the right direction.
- Tighten the Bolt: Tighten the bolt securely with the wrench.
- Release the Blade Lock: If you used a blade lock, release it.
- Test the Saw: Plug in the saw and turn it on to make sure the blade is running smoothly.
Ryobi Miter Saw Maintenance: Regular Cleaning and Lubrication
Regular maintenance will keep your saw running smoothly and extend its life.
- Clean the Saw: After each use, clean the saw with a brush or vacuum to remove sawdust and debris.
- Lubricate Moving Parts: Lubricate the moving parts of the saw with a light oil. This will help them move smoothly and prevent rust.
- Check the Brushes: Check the motor brushes regularly and replace them when they are worn.
- Inspect the Cord: Inspect the power cord for damage and replace it if necessary.
V. Ryobi Miter Saw Troubleshooting
Common Problems and Solutions
Here are some common problems you may encounter with your Ryobi miter saw and how to fix them:
| Problem | Possible Cause | Solution |
|---|---|---|
| Saw won’t start | No power | Check the power cord, outlet, and circuit breaker. |
| Blade is dull | Worn blade | Replace the blade. |
| Cut is not accurate | Miter or bevel angle is incorrect | Double-check the angles and adjust them as needed. |
| Saw vibrates excessively | Loose blade or motor mount | Tighten the blade bolt and motor mount screws. |
| Wood splinters | Dull blade or cutting too fast | Replace the blade or slow down your cutting speed. |
| Saw bogs down | Cutting too thick of wood | Make multiple passes or use a saw with more power. |
If you can’t fix the problem yourself, take the saw to a qualified repair shop.
VI. Advanced Projects and Applications
Once you’ve mastered the basics, you can use your Ryobi miter saw for a variety of advanced projects:
- Building Furniture: Use the saw to cut accurate angles for chairs, tables, and other furniture.
- Installing Trim and Molding: Use the saw to make precise cuts for baseboards, crown molding, and door frames.
- Framing Walls: Use the saw to cut the studs, headers, and other framing members for walls.
- Deck Building: Use the saw to cut the deck boards, posts, and railings for a deck.
By following this Ryobi miter saw guide, you’ll be able to use your Ryobi miter saw safely and effectively for all your woodworking projects. Always remember to prioritize safety, take your time, and practice on scrap wood before cutting expensive materials. With a little practice, you’ll be able to make accurate, professional-looking cuts every time.
VII. Frequently Asked Questions (FAQ)
-
Can I cut metal with my Ryobi miter saw?
No, Ryobi miter saws are designed for cutting wood and some plastics. Cutting metal can damage the saw and create a safety hazard. There are specialized metal-cutting saws available.
* What is the best blade for cutting hardwood?A blade with more teeth will provide a cleaner cut in hardwoods. A blade with 60 to 80 teeth is generally recommended for hardwoods.
* How often should I replace the blade?The frequency of blade replacement depends on how often you use the saw and what you are cutting. If the blade is dull or damaged, replace it immediately.
* What kind of oil should I use to lubricate my Ryobi miter saw?Use a light machine oil or silicone spray lubricant. Avoid using heavy oils or grease.
* Is it okay to use an extension cord with my Ryobi miter saw?Yes, but use a heavy-duty extension cord that is rated for outdoor use. Make sure the cord is long enough to reach the outlet without being stretched too tight.
* How do I prevent tear-out on my cuts?Use a sharp blade, support the workpiece close to the cut line, and consider scoring the cut line with a utility knife before cutting.
* Where can I find replacement parts for my Ryobi miter saw?You can find replacement parts at the Ryobi website, Home Depot, or other online retailers.
* What is the difference between a miter saw and a compound miter saw?A miter saw can make miter cuts (angled cuts across the width of the wood). A compound miter saw can make both miter cuts and bevel cuts (angled cuts across the face of the wood).
* How do I store my Ryobi miter saw when not in use?Store the saw in a dry, clean place. Cover it with a cloth or plastic sheet to protect it from dust and moisture.
* Can I adjust the speed of my Ryobi miter saw?Most Ryobi miter saws have a fixed speed. Some newer models may have variable speed control, but this is not common.

Hi, I’m Tom Scalisi, and welcome to The Saw Blog! I started this blog to share my hands-on experience and insights about woodworking tools—especially saws and saw blades. Over the years, I’ve had the chance to work with a wide range of tools, and I’m here to help both professionals and hobbyists make informed decisions when it comes to selecting and using their equipment. Whether you’re looking for in-depth reviews, tips, or just advice on how to get the best performance out of your tools, you’ll find it here. I’m excited to be part of your woodworking journey!