
What is the best way to clean a table saw metal surface? The best way involves several steps: initial cleaning with a solvent, removing rust if present, protecting the surface with wax or a specialized coating, and regular maintenance to prevent future buildup. This guide will walk you through the entire process.
A table saw is a significant investment for any woodworker, whether you’re a seasoned professional or a weekend hobbyist. Keeping your table saw in top condition is crucial for accuracy, safety, and the longevity of the tool. The metal surface, particularly on cast iron table saws, is susceptible to rust and damage if not properly maintained. This comprehensive guide will cover essential techniques for metal surface cleaning, table saw rust removal, and effective rust prevention table saw strategies. By following these steps, you can ensure your saw operates smoothly and accurately for years to come.
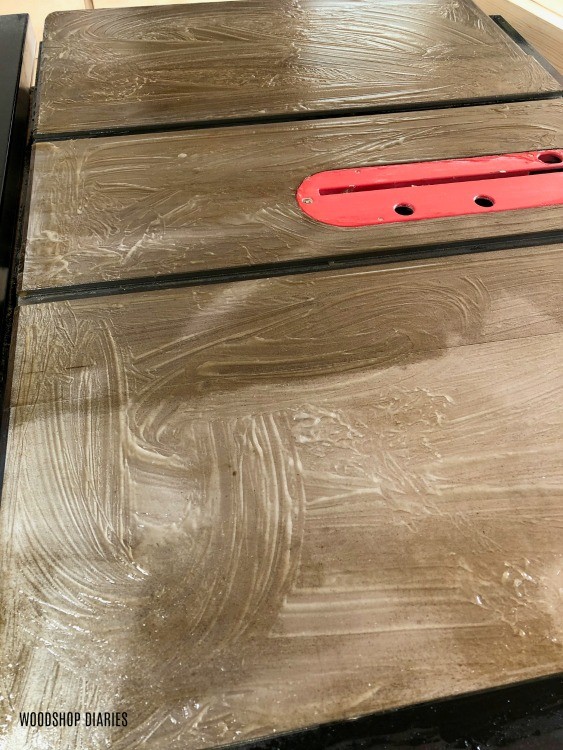
Image Source: www.woodshopdiaries.com
Why Cleaning Your Table Saw Surface Matters
A clean table saw surface isn’t just about aesthetics; it’s about performance and safety. Here’s why regular table saw maintenance is crucial:
- Improved Accuracy: A smooth, clean surface allows wood to glide easily, leading to more accurate cuts. Rust or grime can cause friction, making it harder to control the wood and increasing the risk of errors.
- Reduced Friction: Reduced friction means less effort is required to push the wood through the saw, which translates to less strain on the motor and a longer lifespan for your tool.
- Enhanced Safety: A sticky or rough surface can cause kickback, a dangerous situation where the wood is thrown back toward the operator. A clean surface minimizes this risk.
- Rust Prevention: Regular cleaning and protection are essential for rust prevention table saw. Rust can quickly damage the metal surface, affecting performance and requiring costly repairs.
- Increased Tool Longevity: Proper table saw maintenance, including surface cleaning, helps extend the life of your saw, protecting your investment.
Initial Cleaning: Removing Dust, Debris, and Old Coatings
Before you can address rust or apply any protective coatings, you need to thoroughly clean the cleaning table saw top. This involves removing dust, sawdust, pitch, and any old wax or protectant.
Supplies You’ll Need:
- Shop vacuum
- Scraper (plastic or metal)
- Mineral spirits or other solvent (citrus-based cleaners also work)
- Clean rags (microfiber recommended)
- Optional: Degreaser
Step-by-Step Cleaning Process:
- Vacuum the Surface: Use a shop vacuum to remove loose dust and sawdust from the entire table saw surface, including the grooves and edges.
- Scrape Away Debris: Use a plastic or metal scraper to carefully remove any hardened pitch, glue, or other debris that is stuck to the surface. Be gentle to avoid scratching the metal.
- Apply Solvent: Dampen a clean rag with mineral spirits or your chosen solvent. Wipe down the entire table saw surface, applying enough solvent to loosen any remaining residue.
- Wipe Clean: Use a clean, dry rag to wipe away the solvent and dissolved debris. Repeat steps 3 and 4 until the rag comes away clean.
- Degrease (Optional): If the surface is particularly greasy or oily, use a degreaser following the manufacturer’s instructions. Be sure to remove all traces of the degreaser with a clean, damp rag.
- Dry Thoroughly: Allow the table saw surface to air dry completely before proceeding to the next step.
Table Saw Rust Removal: Tackling Corrosion
Rust is bad news for any metal surface, and your table saw is no exception. It is really important to deal with it fast to stop it from causing more damage. There are plenty of ways to remove rust, ranging from gentle fixes to stronger solutions, depending on how bad the rust actually is.
Assessing the Rust:
- Light Surface Rust: This type of rust appears as a light orange discoloration. It’s usually easy to remove with mild abrasives.
- Moderate Rust: Moderate rust has a more noticeable texture and may have begun to pit the metal. More aggressive methods are needed to remove it.
- Heavy Rust: Heavy rust forms thick, flaky layers and can cause significant damage to the metal. This may require professional restoring table saw surface.
Table 1: Rust Removal Methods Comparison
| Method | Severity of Rust | Materials Needed | Pros | Cons |
|---|---|---|---|---|
| Steel Wool & Oil | Light | 0000 steel wool, lubricating oil (e.g., WD-40) | Gentle, effective for light surface rust | Can leave steel wool residue, not effective for heavy rust |
| Rust Eraser | Light to Moderate | Rust eraser block | Easy to use, good for localized rust spots | May wear down quickly, not suitable for large areas |
| Sandpaper | Moderate | Sandpaper (various grits), sanding block | Effective for removing moderate rust and smoothing the surface | Can be time-consuming, requires caution to avoid scratching |
| Chemical Rust Remover | Moderate to Heavy | Chemical rust remover (phosphoric acid-based), safety gloves, eye protection | Effective for removing heavy rust, can reach hard-to-reach areas | Requires careful handling, can be corrosive, needs thorough rinsing |
| Electrolysis | Heavy | Battery charger, washing soda, water, container, sacrificial anode | Highly effective for removing heavy rust, minimal risk of damaging the metal | Requires specialized setup, can be time-consuming |
Methods for Removing Rust:
1. Steel Wool and Oil:
This is a gentle method suitable for light surface rust.
- Apply Oil: Liberally apply a lubricating oil, such as WD-40 or mineral oil, to the rusted area.
- Rub with Steel Wool: Using 0000 steel wool, gently rub the rusted area in a circular motion. The oil will help to lift the rust particles.
- Wipe Clean: Wipe away the oil and rust residue with a clean rag. Repeat as needed.
- Important: Ensure you remove all steel wool fragments. A magnet wrapped in cloth can help.
2. Rust Eraser:
Rust erasers are abrasive blocks specifically designed for removing rust.
- Dry Surface: Make sure the table saw surface is dry.
- Rub with Eraser: Rub the rust eraser over the affected area, applying moderate pressure.
- Wipe Away Residue: Wipe away the residue with a clean rag.
3. Sandpaper:
Sandpaper is effective for moderate rust but requires caution to avoid scratching the metal.
- Start with Coarse Grit: Begin with a coarser grit sandpaper (e.g., 220 grit) to remove the bulk of the rust.
- Sand the Area: Sand the rusted area in a circular motion, using a sanding block for even pressure.
- Progress to Finer Grits: Gradually progress to finer grits (e.g., 320, 400 grit) to smooth the surface.
- Clean Thoroughly: Wipe away all sanding dust with a clean rag.
4. Chemical Rust Remover:
Chemical rust removers are effective for heavier rust but require careful handling. Look for a best rust remover for table saw that is safe for cast iron.
- Protect Yourself: Wear safety gloves and eye protection.
- Apply Rust Remover: Apply the chemical rust remover to the rusted area according to the manufacturer’s instructions.
- Allow to Dwell: Let the rust remover dwell for the recommended time.
- Scrub (If Necessary): If the rust is stubborn, scrub the area with a non-abrasive brush.
- Rinse Thoroughly: Rinse the table saw surface thoroughly with water.
- Dry Immediately: Dry the surface immediately to prevent flash rust.
5. Electrolysis:
Electrolysis is a more advanced method for removing heavy rust without damaging the metal. It requires a specialized setup.
- Create Electrolyte Solution: Mix washing soda (sodium carbonate) with water in a plastic container.
- Set Up Electrolysis: Suspend the rusted table saw component in the solution, ensuring it doesn’t touch the container. Connect a battery charger to the component (negative terminal) and a sacrificial anode (e.g., a piece of steel) (positive terminal).
- Run Electrolysis: Turn on the battery charger. The electrolysis process will remove the rust.
- Rinse and Dry: Once the rust is removed, rinse the component thoroughly with water and dry it immediately.
Important Safety Tip: When using any chemical rust remover, work in a well-ventilated area, wear appropriate personal protective equipment (PPE), and follow the manufacturer’s instructions carefully.
Polishing Table Saw Top: Achieving a Smooth Surface
After removing rust, the polishing table saw top step will help to create a smooth, low-friction surface that will improve the performance of your saw.
Supplies You’ll Need:
- Fine-grit sandpaper (400, 600, 800 grit)
- Sanding block
- Polishing compound (optional)
- Clean rags
- Wax or table saw surface protectant
Polishing Steps:
- Sand with Fine Grits: Use fine-grit sandpaper (starting with 400 grit and progressing to 600 and 800 grit) to smooth the table saw surface. Use a sanding block to ensure even pressure.
- Apply Polishing Compound (Optional): If desired, apply a small amount of polishing compound to a clean rag and buff the surface.
- Wipe Clean: Wipe away all sanding dust and polishing compound residue with a clean rag.
- Apply Protectant: Apply a coat of wax or a specialized table saw surface protectant to the polished surface. This will help to prevent rust and reduce friction.
Protecting Your Table Saw Surface: Preventing Future Rust
The final step in maintaining your table saw is protecting the metal surface to prevent future rust and corrosion. There are several options available, each with its own advantages and disadvantages.
Types of Table Saw Surface Protectants:
- Wax: Wax is a popular and affordable option. It provides a protective barrier against moisture and reduces friction. Apply a thin coat of wax to the surface and buff it with a clean rag. Repeat every few weeks or as needed. Paste wax is generally preferred.
- Spray-On Protectants: These products create a thin, dry film that protects against rust and reduces friction. They are easy to apply and provide long-lasting protection.
- Specialized Coatings: Some coatings are specifically designed for table saw surfaces. These coatings offer superior protection and durability but may be more expensive.
- Oil: Light oils can also be used to protect the surface, but they may attract dust and sawdust.
Applying Protectant:
- Clean the Surface: Make sure the table saw surface is clean and dry.
- Apply Protectant: Apply the protectant according to the manufacturer’s instructions.
- Buff (If Necessary): If using wax, buff the surface with a clean rag to create a smooth, even finish.
- Allow to Cure: Allow the protectant to cure completely before using the table saw.
Table 2: Comparison of Table Saw Surface Protectants
| Protectant | Pros | Cons |
|---|---|---|
| Wax | Affordable, easy to apply, reduces friction | Needs frequent reapplication, can be messy |
| Spray-On Protectants | Easy to apply, long-lasting protection, dry film | Can be more expensive than wax |
| Specialized Coatings | Superior protection, durable | More expensive, may require special application techniques |
| Oil | Can provide some protection, may already have on hand | Attracts dust, may not provide long-term protection |
Regular Maintenance: Keeping Your Table Saw in Top Shape
Protecting your table saw surface is not a one-time task; it requires regular maintenance to ensure long-lasting performance and rust prevention table saw.
Maintenance Tips:
- Clean After Each Use: Vacuum the table saw surface after each use to remove dust and sawdust.
- Wipe Down Regularly: Wipe down the surface with a clean rag and solvent every week or two.
- Reapply Protectant: Reapply wax or spray-on protectant every few weeks or as needed.
- Store Properly: Store your table saw in a dry environment to minimize the risk of rust. Consider using a table saw cover to protect it from dust and moisture.
- Check for Rust Regularly: Inspect the table saw surface regularly for signs of rust. Address any rust promptly to prevent it from spreading.
Troubleshooting Common Issues
Even with regular maintenance, you may encounter some common issues with your table saw surface. Here are some troubleshooting tips:
- Sticky Surface: If the surface feels sticky, it may be due to a buildup of pitch or old wax. Clean the surface thoroughly with a solvent and reapply protectant.
- Rust Spots: If you notice rust spots, remove them promptly using one of the methods described above. Apply protectant to prevent further rust.
- Scratches: Minor scratches can be removed with fine-grit sandpaper and polishing compound. Deeper scratches may require professional repair.
Frequently Asked Questions (FAQ)
-
Can I use WD-40 to clean my table saw surface?
Yes, WD-40 can be used to clean and lubricate your table saw surface. It helps remove rust and grime and provides a temporary layer of protection. However, it is not a long-term solution and should be followed up with a wax or specialized protectant. -
What is the best way to prevent rust on my table saw?
The best way to prevent rust prevention table saw is to regularly clean the table saw surface, apply a protective coating (such as wax or a specialized protectant), and store your table saw in a dry environment. -
How often should I clean my table saw surface?
You should vacuum the table saw surface after each use and wipe it down with a solvent every week or two. Reapply protectant every few weeks or as needed. -
Can I use steel wool on my cast iron table saw?
Yes, you can use 0000 steel wool on your cast iron table saw to remove light rust. However, be sure to remove all steel wool fragments after use, as they can cause rust. -
What is the best type of wax for a table saw?
Paste wax is generally considered the best type of wax for a table saw. It provides a durable protective barrier and is easy to apply and buff. -
How do I remove deep scratches from my table saw surface?
Deep scratches may require professional repair. You can try to smooth them out with fine-grit sandpaper and polishing compound, but be careful not to damage the surrounding metal.
Conclusion
Keeping your table saw metal surface clean, rust-free, and protected is essential for achieving accurate cuts, ensuring safety, and prolonging the life of your tool. By following the techniques outlined in this guide, you can maintain your table saw in top condition and enjoy years of reliable performance. Remember that regular table saw maintenance and proactive rust prevention table saw strategies are key to protecting your investment and ensuring your woodworking projects are a success. Whether you’re focused on table saw rust removal, metal surface cleaning, or simply cleaning table saw top, these steps will help you achieve the best results.

Hi, I’m Tom Scalisi, and welcome to The Saw Blog! I started this blog to share my hands-on experience and insights about woodworking tools—especially saws and saw blades. Over the years, I’ve had the chance to work with a wide range of tools, and I’m here to help both professionals and hobbyists make informed decisions when it comes to selecting and using their equipment. Whether you’re looking for in-depth reviews, tips, or just advice on how to get the best performance out of your tools, you’ll find it here. I’m excited to be part of your woodworking journey!