
Changing a table saw blade on your DeWalt table saw is simple, but it’s important to take precautions. This guide covers the DeWalt table saw blade replacement procedure, focusing on safety. We’ll cover how to remove your DeWalt table saw blade, install a new one, and ensure you’re doing it the best and safest way possible.
Table saws are powerful tools that can make quick work of wood projects. But with that power comes risk. Changing a table saw blade safely is crucial for avoiding injury. This guide provides a detailed, step-by-step DeWalt table saw blade change procedure, emphasizing safety at every turn. Whether you’re performing routine DeWalt table saw blade replacement or switching to a different blade for a specific cut, this comprehensive resource will walk you through the process. This includes how to use the DeWalt table saw arbor lock and even DeWalt table saw blade guard removal, where applicable and following all safety guidelines.
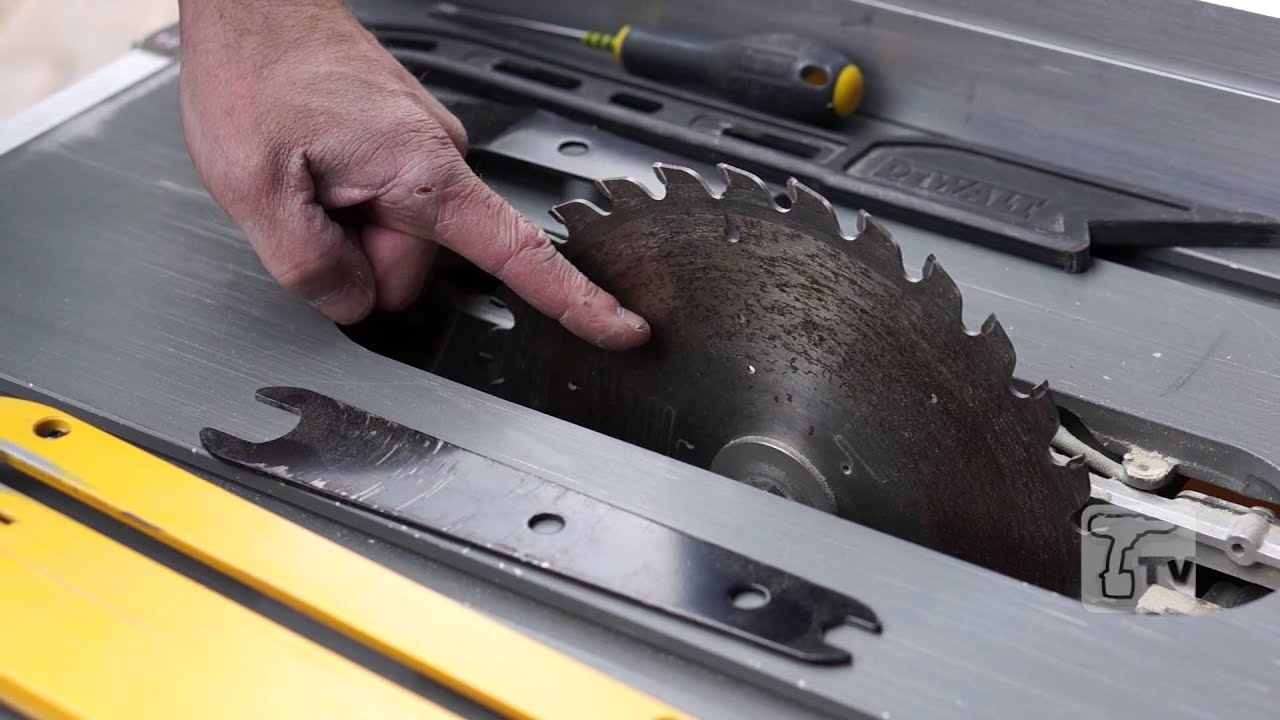
Image Source: i.ytimg.com
Preparing for a Blade Change
Before you even think about touching your table saw, there are several crucial steps to take. Rushing into a blade change is a recipe for disaster. These steps set the stage for a safe and successful blade replacement.
Disconnect the Power Source
This is non-negotiable. Unplug your DeWalt table saw from the electrical outlet. Do not rely on the power switch. Accidents can happen, and a disconnected power source is your first line of defense. It is possible to mistakenly hit the power button when performing Dewalt table saw blade change procedure, so unplugging will prevent injuries.
Gather Your Tools
Having everything you need within reach will minimize distractions and the need to leave the saw unattended mid-change. Here’s what you’ll likely need:
- The correct wrench(es): Most DeWalt table saws require two wrenches. One to hold the arbor (the shaft the blade mounts on) in place and another to loosen the arbor nut. Note the DeWalt table saw blade wrench size for your model may vary. Check your manual.
- Work gloves: These will protect your hands from sharp blade teeth and any potential splinters.
- Safety glasses: Sawdust and debris can easily get into your eyes.
- A block of wood: This will be used to wedge the blade against the table to make the arbor easier to loosen.
- Clean rags: For wiping down the blade and arbor.
Understanding Your DeWalt Table Saw
Each model has its nuances. Consult your owner’s manual for specific instructions and safety recommendations related to replacing table saw blade DeWalt models. Note any peculiarities about your saw’s arbor locking mechanism or blade guard system. It’s the manufacturer’s guide to your specific tool.
Removing the Old Blade
With your prep work complete, you’re ready to remove the old blade. Take your time and follow each step carefully.
Raise the Blade to its Highest Position
Raising the blade makes it easier to access the arbor nut and maneuver the wrenches. Use the blade height adjustment crank to bring the blade to its maximum height.
Engaging the Arbor Lock
The DeWalt table saw arbor lock is a crucial safety feature that prevents the arbor from spinning while you loosen the arbor nut.
- Locate the arbor lock. It’s usually a button or lever near the blade.
- Press and hold the arbor lock. You may need to rotate the blade slightly until the lock engages fully. You’ll feel it click or lock into place.
Loosening the Arbor Nut
The arbor nut is what secures the blade to the saw. Here’s where things can get tricky, and knowing the correct orientation for your saw is important.
- Using the correct DeWalt table saw blade wrench size, place one wrench on the arbor nut.
- Place the second wrench on the flat spot on the arbor shaft.
- Important: Most table saws have a left-handed thread. This means you’ll need to turn the wrench CLOCKWISE to loosen the nut. Check your manual to confirm. This is a VERY common mistake.
- Use the block of wood to wedge against the blade’s teeth on the table to add counter-torque.
- Apply firm, steady pressure. The nut might be tight, especially if it hasn’t been removed in a while. If it’s exceptionally stubborn, try tapping the wrench gently with a rubber mallet.
- Once the nut is loose, remove both wrenches.
Removing the Blade Guard and Throat Plate
Most table saws have a blade guard and throat plate. These need to be removed before you can fully remove the blade.
- DeWalt table saw blade guard removal: Follow the instructions in your owner’s manual for removing the blade guard. This usually involves releasing a lever or clamp and lifting the guard off.
- Remove the throat plate (the insert surrounding the blade). This usually lifts out easily or requires unscrewing a few fasteners.
Final Removal of the Old Blade
With the nut loosened and the guard/plate removed, you can finally remove the blade.
- Carefully remove the arbor nut, washer, and outer flange. Keep these parts together in a safe place.
- Gently lift the old blade off the arbor. Be mindful of the teeth – they are sharp!
- Wipe down the arbor and flanges with a clean rag to remove any sawdust or residue.
Installing the New Blade
Now it’s time to put in the new blade. Pay close attention to the direction of the blade’s teeth.
Blade Orientation
This is critical. The blade’s teeth must point in the correct direction for the saw to cut properly and safely.
- Look for the arrow or markings on the blade indicating the direction of rotation.
- The teeth should point towards the direction the blade spins when the saw is running.
Mounting the New Blade
With the old blade out, you’ll need to carefully install the new blade.
- Slide the new blade onto the arbor, ensuring it sits flush against the inner flange.
- Replace the outer flange, washer, and arbor nut in the correct order.
- Make sure everything is seated properly before proceeding.
Tightening the Arbor Nut
Just like loosening, tightening the arbor nut requires careful attention.
- Engage the arbor lock again.
- Using both wrenches, tighten the arbor nut securely. Remember, the thread is usually left-handed, so turn COUNTER-CLOCKWISE to tighten.
- Don’t overtighten! Snug is good enough. You don’t want to damage the arbor or strip the threads.
- Release the arbor lock.
Reinstalling the Blade Guard and Throat Plate
Safety first! Reinstalling the blade guard and throat plate is essential.
- Reinstall the throat plate, making sure it sits flush with the table surface.
- Reattach the blade guard, following the instructions in your owner’s manual. Ensure it moves freely and doesn’t interfere with the blade’s rotation.
Final Checks
Before plugging the saw back in, perform a few final checks.
- Manually rotate the blade to ensure it spins freely and doesn’t wobble.
- Double-check that the blade guard is properly installed and functioning.
- Verify that the arbor nut is tight.
Best Way to Change Dewalt Table Saw Blade: Tips and Tricks
Changing a table saw blade can seem daunting, but with the right knowledge and techniques, it can become a routine part of woodworking. Here are some tips for the best way to change DeWalt table saw blade:
Cleaning and Inspection
Before you put the new blade on, take a second to give the “arbor” (the shaft that holds the blade) and the “flanges” (the metal disks that sandwich the blade) a good cleaning. You can use a wire brush to scrub away any rust or gunk that’s built up. While you’re at it, check those metal disks for any wear or cracks. If they’re damaged, the blade might wobble while it spins, which leads to messy cuts and can actually be pretty dangerous.
Blade Storage
Store your blades properly to protect them from damage and rust. Use a dedicated blade case or a wall-mounted rack. Avoid storing blades in damp or humid environments.
Sharpening
Instead of replacing blades frequently, consider sharpening them. A sharp blade cuts more cleanly and requires less force, reducing the risk of kickback. Professional sharpening services are readily available.
Choosing the Right Blade
Selecting the appropriate blade for the material you’re cutting is crucial for achieving optimal results and preventing damage. Use a general-purpose blade for plywood and hardwoods, a rip blade for cutting with the grain, and a crosscut blade for cutting against the grain. For specialized materials like laminate or non-ferrous metals, use blades specifically designed for those applications.
Knowing When to Replace
Even with proper care and maintenance, table saw blades eventually wear out. Replace your blade when you notice any of the following:
- Excessive vibration during cutting
- Difficulty making clean cuts
- Visible damage to the teeth
- Excessive rust or corrosion
Safety Precautions
- Always wear safety glasses: Even when the saw is off, debris can dislodge and cause eye injuries.
- Use work gloves: Protect your hands from sharp blade teeth and splinters.
- Never force anything: If the arbor nut is too tight, try penetrating oil or seek professional assistance. Forcing it can damage the arbor.
- Concentrate: Avoid distractions when changing the blade. This is not the time to answer the phone or have a conversation.
- Double-check everything: Before plugging the saw back in, ensure everything is properly tightened and the blade guard is functioning correctly.
Fathoming Different Blade Types
Different blades are designed for different purposes. Using the wrong blade can lead to poor cuts, kickback, and even damage to your saw.
| Blade Type | Application | Characteristics |
|---|---|---|
| General Purpose | Plywood, hardwoods, softwoods | Moderate tooth count, good for both ripping and crosscutting |
| Rip Blade | Cutting with the grain | Low tooth count, designed for fast, efficient ripping |
| Crosscut Blade | Cutting against the grain | High tooth count, produces clean, smooth cuts |
| Combination Blade | Versatile, suitable for a range of tasks | Medium tooth count, compromises between ripping and crosscutting performance |
| Specialty Blades | Laminate, non-ferrous metals, plastics | Specific tooth geometry and materials designed for particular materials |
FAQ (Frequently Asked Questions)
- What is the DeWalt table saw blade wrench size? The DeWalt table saw blade wrench size varies depending on the model. Consult your owner’s manual for the correct sizes. Typically, you’ll need two wrenches: one for the arbor nut and one to hold the arbor shaft.
- How to remove DeWalt table saw blade if the arbor nut is stuck? Apply penetrating oil to the nut and let it sit for a few minutes. Use a longer wrench for more leverage. If it’s still stuck, seek professional help to avoid damaging the arbor.
- Can I use any brand of blade on my DeWalt table saw? Yes, you can use any brand of blade as long as it’s the correct diameter (usually 10 inches) and has the correct arbor size (usually 5/8 inch).
- Who is responsible if I hurt myself changing the blade? Ultimately, you are. Following safety procedures and the manufacturer’s instructions are key to safe operation.
Changing a table saw blade doesn’t need to be scary. By carefully following these steps and prioritizing safety, you can easily replace your blade and get back to your woodworking projects.

Hi, I’m Tom Scalisi, and welcome to The Saw Blog! I started this blog to share my hands-on experience and insights about woodworking tools—especially saws and saw blades. Over the years, I’ve had the chance to work with a wide range of tools, and I’m here to help both professionals and hobbyists make informed decisions when it comes to selecting and using their equipment. Whether you’re looking for in-depth reviews, tips, or just advice on how to get the best performance out of your tools, you’ll find it here. I’m excited to be part of your woodworking journey!