
A Dewalt sliding miter saw is used to make accurate crosscuts and angled cuts in wood. This guide will walk you through Dewalt sliding miter saw operation, covering everything from safety to advanced miter saw cutting techniques.
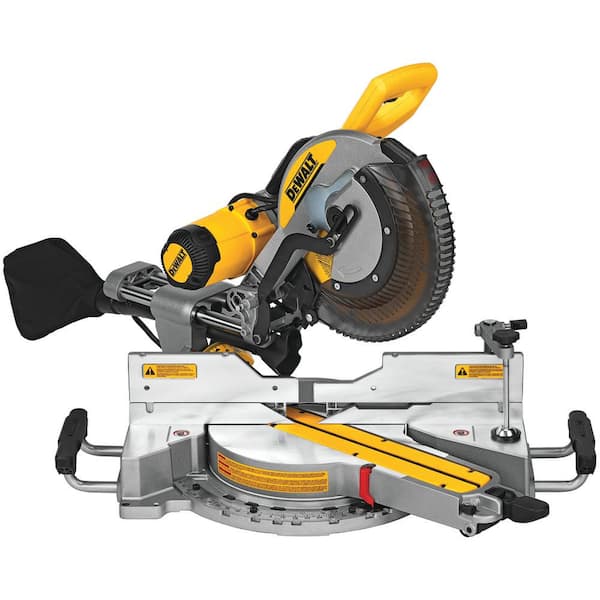
Image Source: images.thdstatic.com
Selecting the Right Dewalt Sliding Miter Saw
Before delving into miter saw cutting techniques, choosing the right saw is key. Dewalt offers various models. Consider these factors:
- Size: Smaller saws (7 1/4″ – 8 1/2″) are more portable. Larger saws (10″ – 12″) offer greater cutting capacity, crucial for wider boards.
- Sliding vs. Non-Sliding: Sliding miter saws can cut wider pieces than their blade size allows, by moving the blade along rails.
- Corded vs. Cordless: Corded saws offer consistent power. Cordless saws provide mobility.
- Features: Look for features like laser guides, LED work lights, and dust collection ports.
Essential Safety Guidelines: Using Dewalt Miter Saw Safely
Safety must always be your top priority. Following these rules prevents accidents:
- Read the Manual: Always read and follow Dewalt’s specific instructions for your saw model.
- Wear Safety Gear: Always wear safety glasses, hearing protection, and a dust mask.
- Inspect the Saw: Before each use, check the blade for damage, ensure all guards are in place and working, and verify that all knobs and levers are tightened.
- Secure the Workpiece: Use clamps to hold the wood firmly against the fence. Never hold the wood with your hand directly in the path of the blade.
- Keep Hands Clear: Keep your hands at least 6 inches away from the blade.
- Never Reach Over the Blade: Avoid reaching over the blade while the saw is running.
- Let the Blade Stop: Allow the blade to come to a complete stop before lifting it from the workpiece.
- Unplug the Saw: Unplug the saw before performing any maintenance or miter saw blade replacement.
- Work in a Well-Ventilated Area: This minimizes dust inhalation.
- No Loose Clothing or Jewelry: These items can get caught in the moving parts.
Setting Up Your Dewalt Sliding Miter Saw
Proper setup is vital for accuracy and safety.
Positioning the Saw
- Place the saw on a stable, level surface. A miter saw stand is recommended for portability and stability.
- Ensure enough space around the saw for the sliding function and handling long pieces of wood.
Making Necessary Dewalt Miter Saw Fence Adjustment
The fence provides a reference surface for accurate cuts.
- Check for Squareness: Use a speed square to ensure the fence is perfectly square to the blade.
- Adjust if Needed: Most Dewalt miter saws have adjustable fences. Loosen the screws and adjust the fence until it is square. Retighten the screws securely.
- Verify Accuracy: Make a test cut and measure the angle to confirm the fence is properly aligned.
Adjusting the Miter Angle
Miter angle adjustments are for angled cuts across the width of the board.
- Loosen the Miter Lock: Locate the miter lock lever or knob (typically at the front of the saw). Loosen it to allow the table to rotate.
- Set the Angle: Use the miter scale to select the desired angle. Most saws have positive stops at common angles like 0°, 15°, 22.5°, 30°, and 45°.
- Lock the Angle: Tighten the miter lock lever or knob to secure the table at the selected angle.
- Double-Check: Always double-check the angle before cutting.
Setting the Bevel Angle
Bevel angle adjustments tilt the blade for angled cuts through the thickness of the board.
- Loosen the Bevel Lock: Find the bevel lock lever or knob (usually at the back or side of the saw). Loosen it to allow the blade to tilt.
- Set the Angle: Use the bevel scale to set the desired angle.
- Lock the Angle: Tighten the bevel lock lever or knob.
- Verify: Double-check the angle with a protractor or bevel gauge.
Dewalt Sliding Miter Saw Operation: Basic Cutting Techniques
Crosscuts
A crosscut is a straight cut across the width of the wood.
- Position the Wood: Place the wood flat against the fence and the table.
- Secure the Wood: Use a clamp to hold the wood firmly.
- Start the Saw: Turn on the saw and let the blade reach full speed.
- Lower the Blade: Slowly lower the blade into the wood.
- Push the Blade: For a sliding miter saw, pull the blade towards you through the wood. For a non-sliding saw, simply lower the blade straight down.
- Complete the Cut: Continue the cut until the blade has completely passed through the wood.
- Release the Trigger: Release the trigger and allow the blade to stop completely before lifting the saw.
Miter Cuts
A miter cut is an angled cut across the width of the wood.
- Set the Miter Angle: Adjust the miter angle to the desired setting as described earlier.
- Position and Secure the Wood: Place the wood against the fence and clamp it securely.
- Make the Cut: Follow the same cutting steps as for a crosscut.
Bevel Cuts
A bevel cut is an angled cut through the thickness of the wood.
- Set the Bevel Angle: Adjust the bevel angle to the desired setting.
- Position and Secure the Wood: Place the wood against the fence and clamp it firmly.
- Make the Cut: Follow the same cutting steps as for a crosscut.
Compound Cuts
A compound cut combines a miter and bevel angle simultaneously.
- Set Both Angles: Adjust both the miter and bevel angles to the desired settings.
- Position and Secure the Wood: Place the wood against the fence and clamp it securely.
- Make the Cut: Follow the same cutting steps as for a crosscut.
Advanced Miter Saw Cutting Techniques
Cutting Crown Molding with Miter Saw
Cutting crown molding can be tricky. It requires understanding how to position the molding and set the correct angles.
- Molding Orientation: Crown molding is typically installed at an angle where the top edge rests against the wall and the bottom edge rests against the ceiling.
- “Spring Angle”: Determine the “spring angle” of your crown molding. This is the angle at which it sits against the wall and ceiling.
- Laying Flat vs. Nested: You can cut crown molding “laying flat” on the miter saw table or “nested” against the fence. Laying flat is generally easier.
- Miter and Bevel Settings: Use a crown molding angle chart or calculator to determine the correct miter and bevel settings for your saw, based on the spring angle and the type of corner you are cutting (inside or outside).
- Test Cuts: Always make test cuts on scrap pieces to verify your settings before cutting the actual molding.
Cutting Perfect Miters
For seamless miter joints, precision is crucial.
- Accurate Measurements: Measure the wood carefully and accurately.
- Precise Angle Settings: Use a digital angle finder to set the miter angle precisely.
- Sharp Blade: A sharp blade produces cleaner cuts and reduces splintering.
- Consistent Pressure: Apply consistent pressure while cutting to avoid blade deflection.
- Test and Adjust: Make test cuts and adjust the angle as needed to achieve a perfect fit.
Miter Saw Blade Replacement
Changing the blade is a routine part of miter saw maintenance.
- Unplug the Saw: Disconnect the saw from the power source.
- Locate the Blade Bolt: Find the bolt that secures the blade to the arbor. It’s usually located behind a guard.
- Engage the Arbor Lock: Most Dewalt miter saws have an arbor lock that prevents the blade from rotating while you loosen the bolt.
- Loosen the Bolt: Use the wrench provided with the saw to loosen the bolt. Note the direction of the threads (usually reverse-threaded).
- Remove the Old Blade: Carefully remove the bolt, the outer washer, and the old blade.
- Install the New Blade: Place the new blade onto the arbor, ensuring the teeth are pointing in the correct direction (towards the front of the saw and downward).
- Reinstall the Washer and Bolt: Reinstall the outer washer and bolt.
- Tighten the Bolt: Tighten the bolt securely using the wrench.
- Release the Arbor Lock: Release the arbor lock.
- Test the Saw: Plug in the saw and run it briefly to ensure the blade is running smoothly and securely.
Miter Saw Maintenance and Troubleshooting
Regular maintenance extends the life of your saw and ensures accurate cuts.
Cleaning
- Dust Removal: Regularly clean the saw to remove sawdust and debris. Use a brush or vacuum cleaner.
- Lubrication: Lubricate moving parts with a dry lubricant to keep them operating smoothly.
- Blade Cleaning: Clean the blade with a blade cleaner to remove pitch and resin buildup.
Calibration
- Check for Squareness: Periodically check the fence and blade for squareness and adjust as needed.
- Miter and Bevel Scales: Verify the accuracy of the miter and bevel scales and recalibrate if necessary.
Common Problems and Solutions
| Problem | Possible Cause | Solution |
|---|---|---|
| Saw vibrates excessively | Loose blade, worn bearings | Tighten blade, replace bearings |
| Cuts are not square | Fence out of alignment, blade not square to table | Adjust fence, adjust blade angle |
| Blade binds | Dull blade, wood pinching the blade | Replace blade, use a splitter or riving knife |
| Motor overheats | Excessive use, dull blade | Allow motor to cool, replace blade |
| Poor dust collection | Clogged dust port, weak vacuum | Clear dust port, upgrade vacuum |
Best Practices for Miter Saw Use
- Plan Your Cuts: Before starting, plan the sequence of your cuts to minimize waste and ensure accuracy.
- Use Support Rollers: Use support rollers or extensions to support long workpieces.
- Make Test Cuts: Always make test cuts on scrap wood to verify your settings and technique.
- Keep the Blade Sharp: A sharp blade is essential for clean, accurate cuts.
- Take Your Time: Avoid rushing. Work carefully and deliberately to achieve the best results.
- Store Properly: When not in use, store the saw in a clean, dry place to protect it from damage.
Frequently Asked Questions (FAQ)
What is the best way to prevent splintering when cutting wood with a miter saw?
Use a sharp blade, place masking tape over the cut line, and make sure to feed the saw smoothly.
Can I cut metal with my Dewalt sliding miter saw?
No, standard wood-cutting miter saws are not designed for metal. Use a metal-cutting saw with the appropriate blade for metal.
Who is responsible if I get injured using a miter saw?
You are responsible for following safety guidelines. Failure to follow these guidelines leading to injury is your liability.
Why is my miter saw cutting at an angle even when set to 0 degrees?
The fence may not be square to the blade, or the miter scale may be inaccurate. Check and adjust the fence and scale.
How often should I replace the blade on my Dewalt miter saw?
Blade replacement depends on usage. Replace the blade when you notice dullness, splintering, or difficulty cutting.
What is the purpose of the sliding function on a sliding miter saw?
The sliding function allows you to cut wider pieces of wood than the diameter of the blade would normally allow.
If you follow these tips, you will be able to use your Dewalt sliding miter saw safely and get cuts that look professional. Always keep safety in mind as your top priority. And remember, don’t rush—taking your time is the best way to make sure you get great results.

Hi, I’m Tom Scalisi, and welcome to The Saw Blog! I started this blog to share my hands-on experience and insights about woodworking tools—especially saws and saw blades. Over the years, I’ve had the chance to work with a wide range of tools, and I’m here to help both professionals and hobbyists make informed decisions when it comes to selecting and using their equipment. Whether you’re looking for in-depth reviews, tips, or just advice on how to get the best performance out of your tools, you’ll find it here. I’m excited to be part of your woodworking journey!