
Can you cut thin strips on a table saw? Yes, you can cut thin strips on a table saw, but it requires careful technique and often the use of a specialized jig to ensure safety and accuracy. This comprehensive guide covers everything you need to know about safely cutting thin strips on a table saw, from choosing the right equipment to mastering essential cutting techniques.
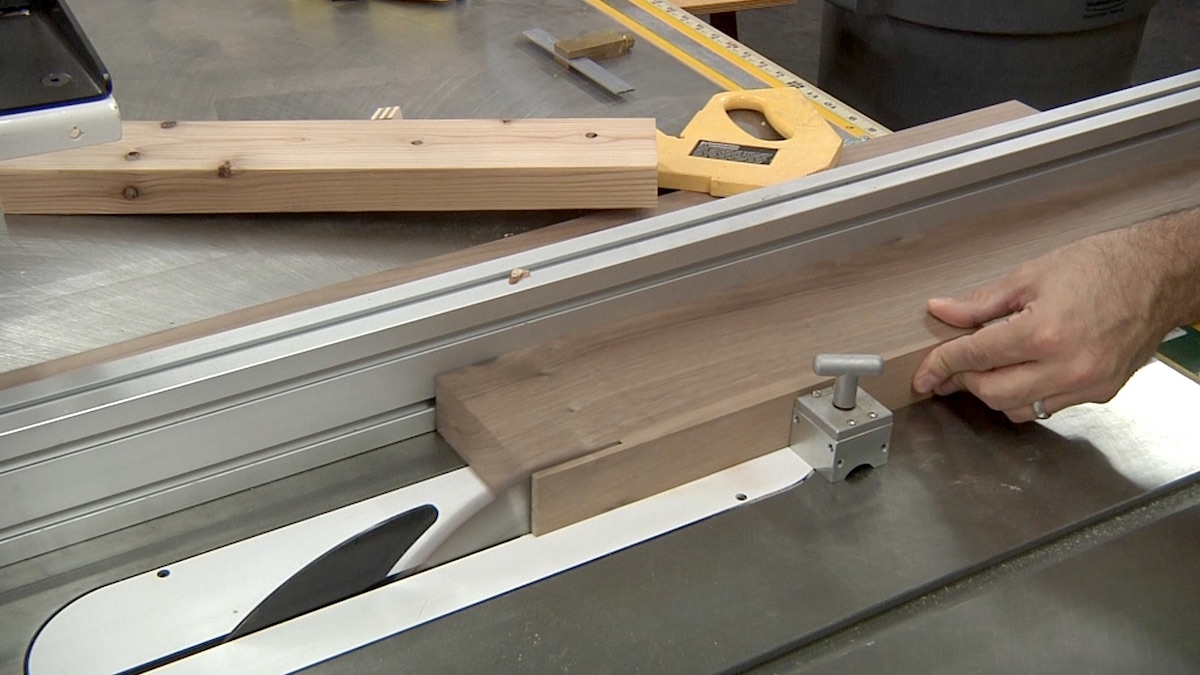
Image Source: thewoodwhisperer.com
Setting Up For Success: Essential Tools and Safety Gear
Before you even think about turning on your table saw, make sure you have all the right tools and safety gear ready to go. Nothing is more important than keeping yourself safe while you work.
Necessary Tools
- Table Saw: A well-maintained table saw is the foundation.
- Table Saw Thin Strip Jig: Crucial for safely and accurately cutting thin strips. Homemade or commercially available options exist.
- Push Sticks/Push Blocks: These help you guide the workpiece past the blade while keeping your hands safely away.
- Featherboards: These hold the workpiece firmly against the fence and table, preventing kickback.
- Accurate Measuring Tools: A quality ruler, calipers, and a marking gauge are essential for precision.
- Clamps: Clamps are helpful for securing jigs and fences.
Essential Safety Gear
- Safety Glasses: Protect your eyes from flying debris.
- Hearing Protection: Table saws are loud. Protect your hearing with earplugs or earmuffs.
- Dust Mask/Respirator: Sawdust is harmful to your lungs.
- Close-Fitting Clothing: Avoid loose clothing or jewelry that could get caught in the saw.
Designing and Building a Table Saw Thin Strip Jig
A table saw thin strip jig is your best friend when ripping thin strips table saw. This jig allows you to cut narrow strips table saw with enhanced safety and greater precision thin strip cutting. There are many designs but the principle remains the same: to provide a safe and controlled way to guide the wood past the blade.
Simple Thin Strip Jig Design
This design uses a base, a runner that fits snugly in your table saw’s miter slot, and an adjustable fence.
- Base: A piece of plywood or MDF larger than the area you plan to work.
- Runner: A strip of wood that fits perfectly into your table saw’s miter slot. It should slide smoothly without play.
- Adjustable Fence: A piece of wood attached to the base that can be moved and clamped to set the desired strip width.
Building the Jig
- Cut the Base: Cut a piece of plywood or MDF for the base. The size will depend on the size of your table saw.
- Attach the Runner: Glue and screw the runner to the base, ensuring it’s perfectly parallel to the edge of the base.
- Create the Adjustable Fence: Cut a piece of wood for the adjustable fence. Attach it to the base using clamps and bolts or screws that allow for adjustment. Ensure the fence can be moved and locked securely.
Fine-Tuning the Jig
After building your jig, test it thoroughly. Make sure the runner slides smoothly, the fence is secure, and the measurements are accurate. Any inaccuracies in the jig will be reflected in the strips you cut.
Safely Cutting Thin Strips: Step-by-Step Guide
Now that you have the tools and a suitable jig, let’s dive into the process of safely cutting thin strips.
Step 1: Preparation
- Inspect Your Wood: Ensure the wood is free of knots, warps, or other defects that could cause problems during cutting.
- Measure and Mark: Accurately measure and mark the desired width of your thin strips. Use a sharp pencil or marking knife for precision.
- Set Up the Jig: Place the jig in the miter slot and adjust the fence to the desired width. Double-check your measurements.
Step 2: Blade Height and Fence Position
- Blade Height: Adjust the blade height so that it’s just high enough to clear the workpiece. This minimizes the risk of kickback.
- Fence Position: Lock the fence securely. Ensure it is parallel to the blade. Use a reliable measuring tool to confirm the distance between the fence and the blade.
Step 3: Making the Cut
- Power On: Turn on the table saw.
- Feed the Workpiece: Hold the workpiece firmly against the jig’s fence and the table. Use a push stick or push block to advance the wood past the blade. Keep your hands well away from the blade.
- Maintain Consistent Pressure: Apply even pressure to ensure a smooth and consistent cut.
- Complete the Cut: Continue feeding the workpiece until it has completely cleared the blade. Turn off the saw.
Step 4: Repeat and Refine
- Repeat: Repeat the process to cut additional thin strips.
- Check Accuracy: Periodically check the width of the strips to ensure consistency.
- Adjust as Needed: If necessary, adjust the fence to correct any inaccuracies.
Alternative Thin Strip Cutting Techniques
While a dedicated jig is often the best option, there are alternative techniques you can use to cut thin strips on a table saw.
Using the Table Saw Fence Directly
Cutting thin strips using only the table saw fence is possible, but it is considered riskier and should only be attempted with extreme caution.
- Set the Fence: Position the fence close to the blade for the desired strip width.
- Use Featherboards: Use featherboards to keep the workpiece tight against the fence and the table.
- Push Sticks/Blocks: Use push sticks or push blocks to guide the workpiece through the blade.
- Avoid Trapping: Be extremely careful to avoid trapping the cutoff piece between the blade and the fence, which can cause kickback.
Important Safety Note: This method is not recommended for very thin strips, as it increases the risk of kickback and injury.
Ripping Thin Strips with a Second Fence
Another alternative is to use a temporary auxiliary fence alongside your primary fence.
- Attach Auxiliary Fence: Secure a straight piece of wood to your table saw fence, creating a second fence closer to the blade.
- Set the Distance: Adjust the auxiliary fence to achieve the desired thin strip width.
- Cut as Usual: Use push sticks and featherboards to guide the wood and cut the strip.
This method provides a wider surface for guiding the workpiece, improving stability and reducing the risk of the wood slipping.
Tips for Cutting Accurate Thin Strips
Achieving consistent thin strips requires attention to detail and a few helpful tips.
- Sharp Blade: Use a sharp, high-quality blade designed for ripping. A dull blade can cause the wood to wander and result in uneven cuts.
- Consistent Feed Rate: Maintain a steady feed rate. Avoid pushing too quickly or too slowly.
- Check for Blade Runout: Ensure your saw blade is running true. Excessive runout can cause inaccurate cuts.
- Calibrate Your Saw: Regularly calibrate your table saw to ensure the fence is parallel to the blade and the blade is square to the table.
- Test Cuts: Always make test cuts on scrap wood before cutting your final workpiece.
- Minimize Vibration: Ensure your table saw is stable and free from excessive vibration.
Dealing with Micro Thin Strips
Cutting micro thin strips table saw, those less than 1/8 inch, presents unique challenges. Special precautions are required to maintain safety and precision.
Specialized Jigs
For micro thin strips table saw, consider a jig specifically designed for these cuts. These jigs often incorporate features like a zero-clearance insert to provide maximum support for the workpiece.
Handling
Use extreme caution when handling such small pieces. Avoid using your fingers to guide the wood directly. Rely heavily on push sticks and featherboards.
Multiple Passes
Consider making multiple passes to achieve the desired thickness. This can reduce the risk of the wood splintering or breaking.
Fathoming Different Wood Types
The type of wood you are cutting can affect the outcome.
Hardwoods
Hardwoods like oak, maple, and cherry require sharp blades and a steady feed rate to prevent burning and tear-out.
Softwoods
Softwoods like pine and fir are easier to cut, but they can be prone to splintering. Use a fine-tooth blade and a slow feed rate.
Exotic Woods
Exotic woods may have unique properties that require special attention. Some exotic woods are oily and can clog saw blades. Others may be brittle and prone to chipping.
Table Saw Strip Dimensions: Considerations for Your Project
The final dimensions of your thin strips are critical for the success of your project. Before you begin cutting, consider the following:
- Desired Thickness: Accurately determine the desired thickness of your strips.
- Material Loss: Account for material loss due to the saw blade kerf.
- Sanding Allowance: If you plan to sand the strips, allow for additional material loss.
By carefully considering these factors, you can ensure that your thin strips meet the required table saw strip dimensions for your project.
Common Mistakes to Avoid
- Rushing the Cut: Cutting too quickly increases the risk of errors and accidents.
- Inaccurate Measurements: Double-check your measurements before cutting.
- Ignoring Safety Precautions: Never compromise on safety.
- Using a Dull Blade: A dull blade can cause a range of problems, including kickback and inaccurate cuts.
- Not Securing the Workpiece: Ensure the workpiece is securely held in place before cutting.
Troubleshooting Common Problems
- Uneven Strips: Check your fence alignment and blade runout.
- Burning: Use a sharper blade and reduce your feed rate.
- Kickback: Ensure you are using proper safety techniques and equipment. Check that your riving knife or splitter is properly installed and adjusted.
- Splintering: Use a fine-tooth blade and a slower feed rate. Consider using a zero-clearance insert.
FAQ: Cutting Thin Strips on a Table Saw
Q: Is it safe to cut thin strips on a table saw?
A: Yes, but it requires careful technique, the use of appropriate safety equipment, and often a specialized jig. Always prioritize safety.
Q: What is the best jig for cutting thin strips?
A: The best jig depends on your specific needs. A simple adjustable fence jig is a good starting point. For very thin strips, consider a more specialized jig with enhanced workpiece support.
Q: Can I cut thin strips without a jig?
A: It is possible, but it is riskier and should only be attempted with extreme caution and the use of featherboards and push sticks. Never attempt to cut very thin strips without a jig.
Q: How do I prevent kickback when cutting thin strips?
A: Use featherboards, push sticks, and a riving knife or splitter. Maintain a consistent feed rate and avoid trapping the cutoff piece between the blade and the fence.
Q: What is the best blade for cutting thin strips?
A: A sharp, high-quality ripping blade is ideal. For hardwoods, choose a blade with fewer teeth. For softwoods, choose a blade with more teeth to minimize splintering.
Q: What should I do if my thin strips are not consistent?
A: Check your fence alignment, blade runout, and feed rate. Ensure your workpiece is securely held in place and that you are using a consistent amount of pressure.
Mastering the art of cutting thin strips on a table saw takes time and practice. By following the guidelines in this guide and prioritizing safety, you can achieve accurate and consistent results while minimizing the risk of injury. Remember to always be vigilant and to never compromise on safety.

Hi, I’m Tom Scalisi, and welcome to The Saw Blog! I started this blog to share my hands-on experience and insights about woodworking tools—especially saws and saw blades. Over the years, I’ve had the chance to work with a wide range of tools, and I’m here to help both professionals and hobbyists make informed decisions when it comes to selecting and using their equipment. Whether you’re looking for in-depth reviews, tips, or just advice on how to get the best performance out of your tools, you’ll find it here. I’m excited to be part of your woodworking journey!