
Changing a table saw blade is a critical maintenance task for any woodworker. How to remove table saw blade? You remove a table saw blade by first unplugging the saw, locking the arbor, loosening the arbor nut, and carefully removing the old blade. This guide covers the entire table saw blade changing procedure, from preparation to blade selection and proper disposal, ensuring a safe table saw blade change and optimal cutting performance.
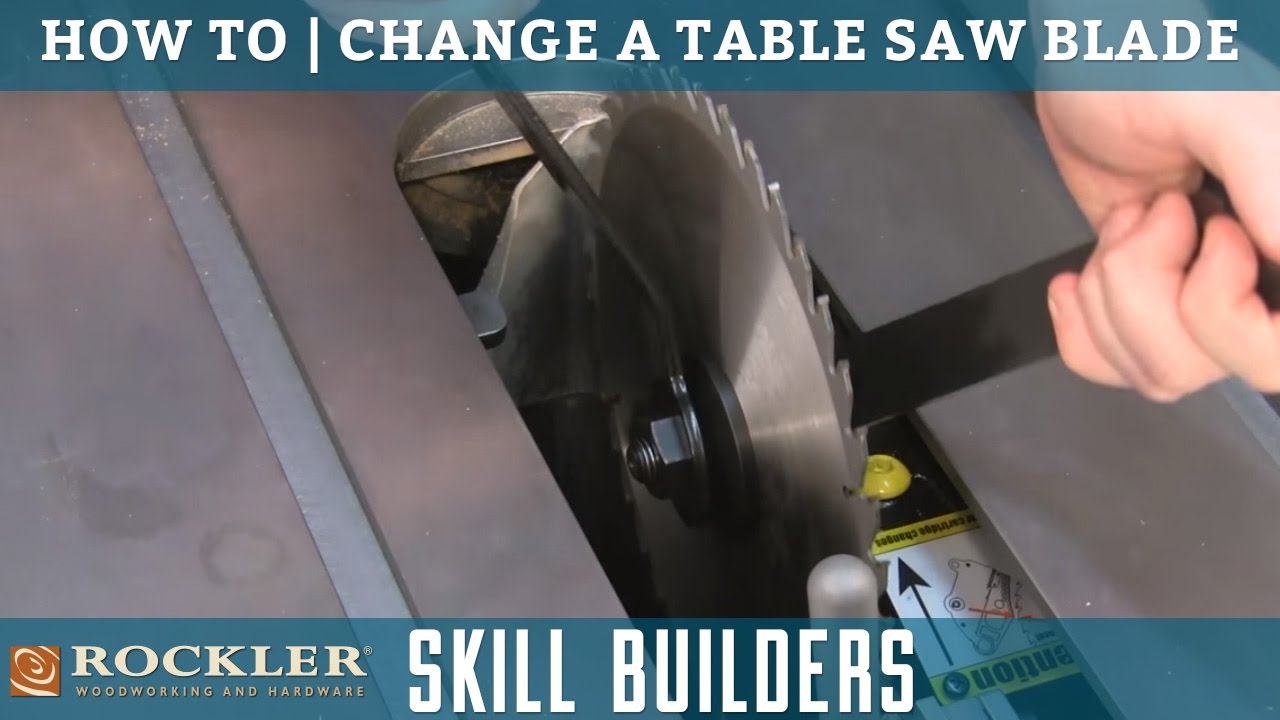
Image Source: i.ytimg.com
Why Replacing Table Saw Blade is Important
A sharp, clean blade is essential for precise and safe cuts. Over time, blades become dull or damaged, leading to:
- Increased kickback risk.
- Burn marks on the wood.
- Chipped edges.
- Greater strain on the saw motor.
- Slower cutting speed.
Regular table saw blade replacement prevents these problems, improves cut quality, and extends the life of your table saw.
Choosing the Right Blade
Selecting the correct blade is crucial for the type of wood and cut you’re making. Here’s a quick rundown of common blade types:
- General Purpose Blades: These blades are versatile and suitable for various cuts, including ripping and crosscutting. They usually have around 40-50 teeth.
- Ripping Blades: Designed for cutting along the grain of the wood (ripping). They typically have fewer teeth (24-30) with a large gullet to remove waste quickly.
- Crosscut Blades: Ideal for cutting across the grain (crosscutting). They usually have a higher tooth count (60-80) for a smoother finish.
- Combination Blades: Offer a compromise between ripping and crosscutting, suitable for general woodworking tasks.
- Specialty Blades: These include blades for plywood, melamine, non-ferrous metals, and plastics. They are designed with specific tooth geometry and materials to handle these materials effectively.
Consider these factors when choosing a blade:
- Tooth Count: More teeth provide a smoother cut but slower cutting speed. Fewer teeth are better for ripping thick stock quickly.
- Tooth Grind: Different tooth grinds (ATB, FTG, Hi-ATB, TCG) are suited for different materials and cut types.
- Kerf Width: A full-kerf blade (1/8 inch) removes more material and requires more power than a thin-kerf blade (3/32 inch).
- Blade Diameter: Match the blade diameter to your table saw’s specifications.
- Arbor Size: The blade’s arbor size must match your saw’s arbor. Most table saws use a 5/8-inch arbor.
Safety First: Preparing for Table Saw Blade Change
Safety should always be your top priority when performing any table saw maintenance.
Essential Safety Gear
Always wear:
- Safety Glasses: Protect your eyes from flying debris.
- Hearing Protection: Table saws are loud, and prolonged exposure can damage your hearing.
- Gloves: Protect your hands from sharp blade edges.
Power Down and Disconnect
- Unplug the Saw: Disconnect the table saw from the power outlet before starting any work. This is the most crucial step to prevent accidental start-ups.
- Remove the Key: If your saw has a removable safety key, take it out to prevent unauthorized use.
Clear the Area
- Clean the Table: Remove any sawdust, tools, or other objects from the table saw surface.
- Provide Adequate Lighting: Ensure you have enough light to see what you’re doing clearly.
Step-by-Step Table Saw Blade Installation Guide
Follow these steps for a safe and effective table saw blade installation guide.
1. Raise the Blade to Its Highest Position
Crank the blade height adjustment wheel to raise the blade to its maximum height. This provides more room to access the arbor nut.
2. Remove the Throat Plate
The throat plate is the insert surrounding the blade on the table surface.
- Depending on your saw model, it may be held in place by latches, screws, or simply friction.
- Release the latches or unscrew the screws to remove the throat plate.
- Set the throat plate aside.
3. Lock the Arbor
The arbor is the shaft that holds the blade. You need to lock it to prevent it from rotating while loosening the arbor nut.
- Arbor Lock Mechanism: Most table saws have a built-in arbor lock. This is usually a button or lever located near the blade. Consult your saw’s manual for the exact location.
- Engage the arbor lock. You should feel or hear it click into place.
- If your saw doesn’t have an arbor lock, you can use a wooden block to wedge between the blade teeth and the table surface. This method is less secure and requires extra caution.
4. Loosen the Arbor Nut
The arbor nut secures the blade to the arbor. How to remove table saw blade is to loosen this nut!
- Wrench Size: Use the correct size wrench for your saw’s arbor nut. Using the wrong size can damage the nut. Check your saw’s manual for the correct size.
- Direction: The direction to loosen the nut depends on your saw’s design.
- Most table saws have a left-hand thread, meaning you turn the nut clockwise to loosen it.
- Some saws have a right-hand thread, meaning you turn the nut counterclockwise to loosen it.
- Check your saw’s manual or look for an arrow on the saw indicating the loosening direction.
- Apply Pressure: Place the wrench on the nut and apply firm, steady pressure in the correct direction. You may need to use a cheater bar (a pipe extension) on the wrench for extra leverage if the nut is very tight. Be careful not to apply excessive force, which could damage the saw.
- Once the nut is loose, remove the wrench.
5. Remove the Outer Flange and Old Blade
- Outer Flange: After removing the nut, there’s usually an outer flange (a flat washer) that sits against the blade. Remove this flange.
- Carefully Remove the Blade: Gently pull the old blade off the arbor. Be careful of the sharp teeth.
- Inspect the Arbor and Flanges: Check the arbor and both flanges for any damage, dirt, or debris. Clean them thoroughly with a wire brush or solvent if necessary.
6. Install the New Blade
Now, let’s begin installing table saw blade
- Mount the New Blade: Place the new blade onto the arbor, ensuring it sits flush against the inner flange. Make sure the teeth are pointing in the correct direction (usually forward, towards the direction of cut). Check the blade for the direction indicator.
- Reinstall the Outer Flange: Place the outer flange back onto the arbor, ensuring it is properly seated against the blade.
- Reinstall the Arbor Nut: Screw the arbor nut back onto the arbor by hand, tightening it until it is snug.
7. Tighten the Arbor Nut
- Lock the Arbor: Re-engage the arbor lock.
- Tighten with Wrench: Use the wrench to tighten the arbor nut securely. Apply firm, steady pressure, but avoid over-tightening. The goal is to secure the blade firmly, not to strip the threads.
- Remove Arbor Lock: Release the arbor lock.
8. Replace the Throat Plate
- Reinstall the Throat Plate: Place the throat plate back into its slot on the table surface.
- Secure it with the latches or screws, if applicable.
- Ensure the throat plate is flush with the table surface to avoid creating a tripping hazard or interfering with the workpiece.
9. Test the Blade
- Turn on the Saw: Plug the saw back into the power outlet.
- Test Cut: Turn on the saw and make a test cut in a piece of scrap wood.
- Check for Vibration: Listen for any unusual noises or vibrations. If the blade vibrates excessively, stop the saw immediately and re-check the blade installation.
- Inspect the Cut: Examine the cut for smoothness and accuracy. If the cut is not clean, you may need to adjust the fence or miter gauge.
Best Way to Change Table Saw Blade: Tips for Success
- Consult Your Manual: Always refer to your table saw’s manual for specific instructions and safety guidelines.
- Cleanliness is Key: Keep the arbor, flanges, and blade clean to ensure proper seating and prevent runout.
- Check Alignment: After installing a new blade, check the blade’s alignment with the fence. Misalignment can lead to inaccurate cuts and increased kickback risk.
- Use a Blade Stabilizer: A blade stabilizer can help reduce vibration and improve cut quality, especially with thin-kerf blades.
- Proper Storage: Store your blades in a safe place to protect them from damage and corrosion. Use blade guards or dedicated blade storage containers.
Disposing of Old Blades
- Wrap the Blade: Before disposing of a used blade, wrap the teeth with cardboard or tape to prevent accidental cuts.
- Mark as “Dull”: Clearly mark the blade as “dull” or “used” to prevent someone from accidentally using it.
- Recycle if Possible: Check with your local recycling center to see if they accept used saw blades.
- Proper Disposal: If recycling is not an option, dispose of the blade in a secure container to prevent injury.
Troubleshooting Common Problems
- Arbor Nut Stuck: If the arbor nut is stuck, try using a penetrating oil to loosen it. Let the oil soak in for several minutes before attempting to remove the nut again.
- Blade Vibration: Blade vibration can be caused by several factors, including a bent blade, a loose arbor nut, or misalignment. Check all these factors and correct them as needed.
- Poor Cut Quality: Poor cut quality can be caused by a dull blade, incorrect blade selection, or misalignment. Ensure the blade is sharp and appropriate for the material you’re cutting, and check the alignment of the blade and fence.
Safe Table Saw Blade Change: Key Takeaways
- Safety First: Always prioritize safety by wearing appropriate safety gear and disconnecting the power.
- Right Blade: Select the correct blade for the material and cut you’re making.
- Proper Installation: Follow the steps carefully to ensure the blade is properly installed and secured.
- Regular Maintenance: Regularly inspect and replace your blades to maintain optimal performance and safety.
- Consult Manual: Always refer to your table saw’s manual for specific instructions and safety guidelines.
Table: Common Table Saw Blade Types and Their Uses
| Blade Type | Tooth Count | Kerf Width | Ideal Use |
|---|---|---|---|
| General Purpose | 40-50 | 1/8 inch | Ripping, crosscutting, and general woodworking |
| Ripping | 24-30 | 1/8 inch | Cutting along the grain (ripping) |
| Crosscut | 60-80 | 1/8 inch | Cutting across the grain (crosscutting) |
| Combination | 40-50 | 1/8 inch | General woodworking tasks |
| Plywood/Melamine | 80+ | Thin-kerf | Plywood, melamine, and other delicate materials |
| Non-Ferrous Metal | 80+ | Varies | Aluminum, brass, and other non-ferrous metals |
Table Saw Blade Changing Procedure: Step-by-Step Checklist
| Step | Description | Safety Note |
|---|---|---|
| 1. Prepare | Gather tools, safety gear, and new blade. | Wear safety glasses, hearing protection, and gloves. |
| 2. Power Down | Unplug the table saw. | This is the most critical safety step. |
| 3. Raise Blade | Raise the blade to its highest position. | |
| 4. Remove Throat Plate | Remove the throat plate surrounding the blade. | |
| 5. Lock Arbor | Engage the arbor lock to prevent the blade from rotating. | If no arbor lock, use a wooden block carefully. |
| 6. Loosen Arbor Nut | Loosen the arbor nut with the correct size wrench (check rotation direction). | Apply firm pressure; use a cheater bar if needed, but avoid excessive force. |
| 7. Remove Old Blade | Remove the outer flange and carefully remove the old blade. | Be careful of the sharp teeth. |
| 8. Install New Blade | Mount the new blade onto the arbor, ensuring correct direction. | Make sure the teeth point in the correct direction. |
| 9. Tighten Arbor Nut | Reinstall and tighten the arbor nut securely. | Avoid over-tightening. |
| 10. Replace Throat Plate | Reinstall the throat plate. | Ensure it is flush with the table surface. |
| 11. Test Blade | Plug in the saw and make a test cut. | Check for vibration and cut quality. |
| 12. Dispose of Old Blade | Wrap and mark the old blade before disposal. | Prevent accidental cuts. |
Frequently Asked Questions (FAQ)
What is the best type of table saw blade for cutting plywood?
If you want to cut plywood without making a mess of the edges, the best choice is a specialized plywood blade or a “crosscut” blade with a lot of teeth—usually 80 teeth or more.
The teeth on these blades are shaped in a special way to slice through the wood cleanly. This helps prevent those ugly splinters and jagged edges (often called “tear-out”) that usually happen with plywood, leaving you with a smooth, professional-looking finish.
Can I use a dull table saw blade?
No, you should not use a dull table saw blade. Dull blades can cause kickback, burning, splintering, and require more force to push the wood through, increasing the risk of accidents. Replace or sharpen your blades regularly.
Who should change a table saw blade?
Any competent woodworker or DIY enthusiast comfortable with basic tool maintenance can change a table saw blade. If you are unsure or uncomfortable with any part of the process, seek assistance from an experienced woodworker or qualified professional.
How often should I change my table saw blade?
The frequency of table saw blade replacement depends on usage and the materials you cut. If you notice reduced cutting performance, burning, or splintering, it’s time to change or sharpen your blade. Heavy users may need to change blades more frequently than occasional users.
What is kickback, and how can I prevent it?
Kickback is a dangerous event where the workpiece is suddenly thrown back towards the operator. It can be caused by a dull blade, misalignment, improper cutting technique, or binding. Prevent kickback by using a sharp blade, maintaining proper alignment, using a splitter or riving knife, and feeding the wood smoothly and steadily.
Is a thin kerf blade better than a full kerf blade?
Thin-kerf blades remove less material and require less power, making them suitable for smaller or less powerful saws. Full-kerf blades are more stable and durable but require more power. The best choice depends on your saw’s capabilities and the type of cutting you’re doing.
What if I can’t get the arbor nut loose?
If you can’t loosen the arbor nut, try applying penetrating oil and letting it soak for several minutes. You can also use a cheater bar for extra leverage, but be careful not to apply excessive force. If the nut is still stuck, consult a qualified repair technician.
By following this comprehensive guide, you can confidently and safely change your table saw blade, ensuring optimal performance and prolonging the life of your tool. Always prioritize safety, consult your saw’s manual, and take your time to perform the table saw blade change correctly.

Hi, I’m Tom Scalisi, and welcome to The Saw Blog! I started this blog to share my hands-on experience and insights about woodworking tools—especially saws and saw blades. Over the years, I’ve had the chance to work with a wide range of tools, and I’m here to help both professionals and hobbyists make informed decisions when it comes to selecting and using their equipment. Whether you’re looking for in-depth reviews, tips, or just advice on how to get the best performance out of your tools, you’ll find it here. I’m excited to be part of your woodworking journey!