
Have you ever spent hours painting a room, only to watch the fresh coat of paint peel or bubble just a few weeks later? It is a frustrating experience that often ruins a beautiful home project. Many people assume a quick roller application is all it takes to transform a space, but the secret to a professional finish actually hides beneath the surface. If your walls are covered in dust, grease, or grime, the new paint simply cannot stick properly.
Choosing the right way to clean your walls can feel overwhelming. You might worry about using the wrong chemicals, damaging your drywall, or wasting time on steps that do not really matter. Without a clear plan, you risk choosing a cleaning method that leaves behind residue or moisture, which causes even more problems for your paint job down the road.
In this guide, we will break down the best cleaning techniques for every type of room in your house. You will learn which tools you need, how to spot-clean tricky stains, and the exact steps to prep your surfaces for a smooth, long-lasting finish. By following these simple tips, you can skip the stress and ensure your paint stays looking perfect for years to come. Let’s look at the most effective ways to get your walls ready for their new look.
Top Way To Clean Wall Before Painting Recommendations

- 【Full Coverage】Formulated for perfect white wall paint, appliance paint white effectively hides dents, scratches, and scuffs on various surfaces. Whether you need to touch up interior or exterior surfaces, our products can do the job
- 【Multi Surface Touch Up Paint】The white paint for wall is perfect for furniture, windows, doors, cars, appliances, trim, porcelain, ceilings, cabinets, blinds, beds, tables, chairs, stoves, refrigerators, and more indoor and outdoor applications, providing a versatile solution for home repairs
- 【Easy Application】Clean the surface to remove dust, grease, and loose paint. Shake the bottle well for 1 minute before using touch up paint. Paint over the defect. Dry for 1 hour between coats, appliance paint may require multiple coats. Allow the repaired surface to dry for 24 hours. Wait 4 days before exposing it to water

- PRODUCT DETAILS – Dimensions: 11.8 in × 197 in / Roll (16.14 Square Feet / Roll) black wood wallpaper. Material: Vinyl / PVC black wood peel and stick wallpaper
- FEATURES - Realistic wood sensation, waterproof and oil proof, easy to clean, thick wear resistance, strong covering power
- MULTIPLE USE - Kitchen counter, backsplash, furniture, notebook, drawer, crafts, bookcase, door, wall. perfect for creating new looks and repairing existing surfaces, durable and non-fading
- PRODUCT DETAILS – Dimensions: 11.8 in × 393 in / Roll (32.2 Square Feet / Roll) black wood wallpaper. Material: Vinyl / PVC black wood peel and stick wallpaper
- FEATURES - Realistic wood sensation, waterproof and oil proof, easy to clean, thick wear resistance, strong covering power
- MULTIPLE USE - Kitchen counter, backsplash, furniture, notebook, drawer, crafts, bookcase, door, wall. perfect for creating new looks and repairing existing surfaces, durable and non-fading

- 【Full Coverage】Formulated for perfect white wall paint, appliance paint white effectively hides dents, scratches, and scuffs on various surfaces. Whether you need to touch up interior or exterior surfaces, our products can do the job
- 【Multi Surface Touch Up Paint】The white paint for wall is perfect for furniture, windows, doors, cars, appliances, trim, porcelain, ceilings, cabinets, blinds, beds, tables, chairs, stoves, refrigerators, and more indoor and outdoor applications, providing a versatile solution for home repairs
- 【Easy Application】Clean the surface to remove dust, grease, and loose paint. Shake the bottle well for 1 minute before using touch up paint. Paint over the defect. Dry for 1 hour between coats, appliance paint may require multiple coats. Allow the repaired surface to dry for 24 hours. Wait 4 days before exposing it to water
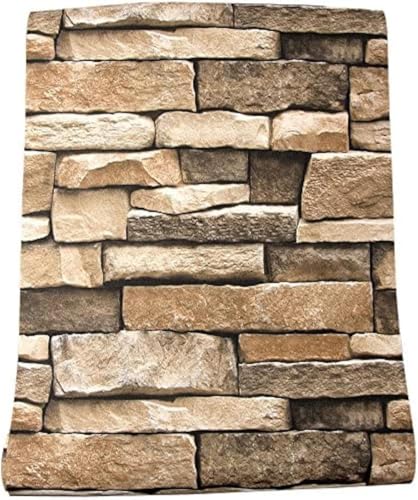
- PRODUCT DETAILS – Dimensions: 17.7” × 78.8” / Roll (9.45 Square Feet / Roll) Rustic 3D Rock wallpaper. Material: Vinyl / PVC stone peel and stick backsplash
- FEATURES – Realistic stone textured, waterproof and oil proof, easy to clean, thick wear resistance, strong covering power
- MULTIPLE USE -Wall, backsplash, notebook, door, etc. perfect for creating new looks and repairing existing surfaces, durable and non-fading
- PRODUCT DETAILS – Dimensions: 17.7 in × 590 in / Roll (72.7 Square Feet / Roll) black wood wallpaper. Material: Vinyl / PVC black wood peel and stick wallpaper
- FEATURES - Realistic wood sensation, waterproof and oil proof, easy to clean, thick wear resistance, strong covering power
- MULTIPLE USE - Kitchen counter, backsplash, furniture, notebook, drawer, crafts, bookcase, door, wall. perfect for creating new looks and repairing existing surfaces, durable and non-fading
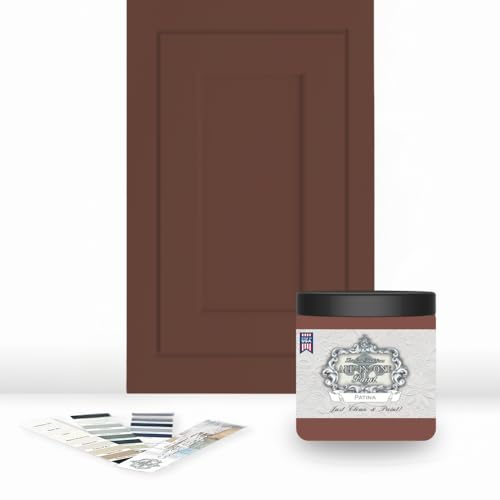
- Includes 30 featured and newest released color card. Sprayed on color to see our colors in your homes lighting for more accurate color choices.
- ALL-IN-ONE Paint - NO Sanding, NO Priming, NO Top Coat Required, Low Luster, Velvet Sheen Finish
- Interior/Exterior - Paint your whole house - Ideal for hard surfaces including walls, doors, cabinets, counters, furniture, metal, glass, ceramics and floor and wall tile
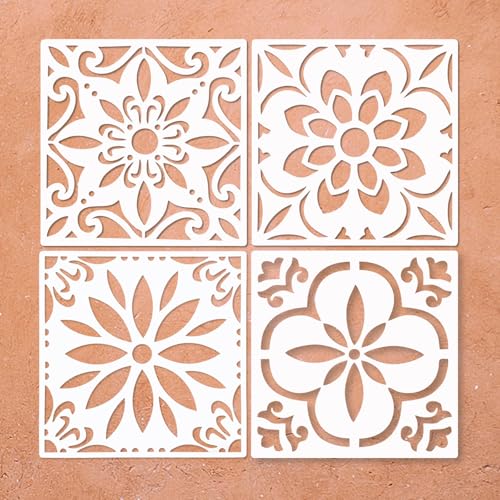
- Large Size for Big Pattern - You'll get mixed 4 pieces large floor tile stencils, each measures 8 x 8 inches to provide ample space for large-scale designs and generous coverage. The sizable spanish templates make painting projects quick and easy to save many hours of your time and lots of money.
- Reusable for Different Surfaces - This large reusable mandala stencils feature Mandala and Mexican-inspired patterns that can be reused to add decorative accents to floors, walls, tiles, patios, porch, furniture and various large smooth surfaces. Use your endless imagination to create multiple possibilities in your arts projects.
- High Quality and Easy to Clean - Made of premium PET plastic material, this ensures our Mexican stencils sturdy, waterproof, washable and flexible for bending to some degree for curved surfaces. You can clean it with mild soap and water after each use to remove any paint residue. It can be reused multiple times with proper cleaning without wearing out easily.
The Ultimate Guide to Cleaning Walls Before You Paint
Painting a room feels exciting, but the secret to a professional look is preparation. If you paint over dust or grease, your paint will peel or bubble. Follow this guide to get your walls ready for a fresh coat.
Key Features to Look For in Cleaning Supplies
When choosing products, look for versatility. You need a cleaner that cuts through grime without leaving a residue. Many professionals prefer phosphate-free cleaners because they are safer for the environment. If you deal with older homes, look for specialized mold and mildew removers to stop paint from bubbling later.
Essential Materials You Need
You do not need a store full of items. Keep this list simple:
- Mild Detergent: A basic dish soap works for most walls.
- TSP (Trisodium Phosphate): This is great for very greasy walls, like those in a kitchen.
- Microfiber Cloths: These trap dust better than paper towels.
- Large Sponges: Use a cellulose sponge for scrubbing.
- Two Buckets: One for your soapy water and one for clean rinsing water.
- Step Ladder: Always reach the top corners safely.
Factors That Affect Your Results
Several things change how well your cleaning goes. First, the type of paint currently on the wall matters. Glossy paint holds more dirt than flat paint. Second, the amount of water you use is vital. Never soak your drywall. If the wall gets too wet, it can soften and crumble. Finally, let the wall dry completely. If you paint while the surface is damp, the new paint will not stick.
User Experience and Use Cases
For most homeowners, a simple wash with soap and water is enough. If you are painting a kitchen, you must use a degreaser to remove cooking oils. If you are painting a bathroom, you must kill any hidden mold first. Always test your cleaning solution in a small, hidden spot before you wash the whole wall. This ensures the cleaner does not damage your current wall finish.
10 Frequently Asked Questions
Q: Do I really need to wash my walls before painting?
A: Yes. Dust and grease act like a barrier. Paint cannot stick to dirt, so it will peel off later.
Q: Can I use just water to clean the walls?
A: Water alone does not remove grease or smoke stains. Always add a mild soap to your water.
Q: What is TSP and is it safe?
A: TSP is a heavy-duty cleaner. It is very effective, but it can irritate your skin. Always wear gloves when using it.
Q: How long should I wait after cleaning to paint?
A: Wait at least 24 hours. The wall must be completely dry to the touch.
Q: Should I sand the walls after cleaning?
A: Yes, sanding creates a rough texture that helps the paint grip the surface. Sand after the wall is dry.
Q: What if I have holes in my wall?
A: Fill holes with spackle before you wash the walls. Sand the patches smooth once they dry.
Q: Can I use a pressure washer on indoor walls?
A: No. A pressure washer will destroy your drywall and soak your home.
Q: How do I remove crayon marks from walls?
A: Use a magic eraser or a little bit of toothpaste on a soft cloth to gently scrub the crayon marks away.
Q: Do I need to rinse the walls after using soap?
A: Yes. Any soap residue left on the wall will prevent your new paint from sticking properly.
Q: Is there a way to clean walls without getting them wet?
A: You can use a vacuum with a brush attachment to remove loose dust. However, you should still wipe them down with a damp cloth to remove oils.

Hi, I’m Tom Scalisi, and welcome to The Saw Blog! I started this blog to share my hands-on experience and insights about woodworking tools—especially saws and saw blades. Over the years, I’ve had the chance to work with a wide range of tools, and I’m here to help both professionals and hobbyists make informed decisions when it comes to selecting and using their equipment. Whether you’re looking for in-depth reviews, tips, or just advice on how to get the best performance out of your tools, you’ll find it here. I’m excited to be part of your woodworking journey!