
Do you dream of having fluttery, beautiful lashes without the daily hassle of mascara? Many people want that polished look, but staring at a wall of fake eyelashes can feel overwhelming. It’s easy to feel lost when you are just starting out. Which style is right for your eye shape? How do you even apply them without making a mess?
Choosing your first set of natural-looking false lashes should be exciting, not stressful! You want that subtle enhancement, not something that looks heavy or unnatural. This guide cuts through the confusion. We will explain everything you need to know to pick the perfect beginner-friendly lashes.
By the end of this post, you will know exactly what to look for, how to choose a comfortable fit, and feel confident about your first application. Ready to ditch the clumps and embrace easy elegance? Let’s dive into the world of natural fake eyelashes made simple.
Top Natural Fake Eyelashes For Beginners Recommendations

- Classroom-Ready Lashes: Natural looking lashes are perfect for back to school; lash styles include lash clusters, underlash extensions, DIY lash extensions, stick on lashes, wispy lashes, and reusable lash clusters
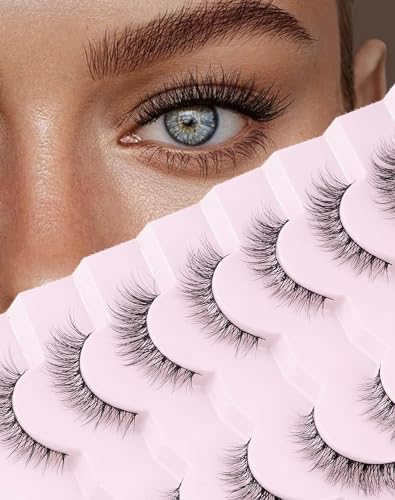
- Thinner band lashes: Onlyall False eyelashes feature ultra-thin lash bands that are more lightweight and natural looking than ever
- Weightless feel: Onlyall strip lashes are featherweight, and made of superfine fiber, you will feel comfortable and soft throughout the day
- Fits all eye shapes: The lash band is sturdy enough to hold the lash shape, suitable for almond-shaped, round, hooded, monolid, upturned, and downturned
- 5 pairs of long length, full on volume false eyelashes
- Reusable & hassle-free removal with no damage to natural lashes
- Light, comfortable false eyelashes that blend seamlessly with your own lashes.

- First Time Users - Great for anyone who is not experienced with false lashes, natural fullness and length Eylure lashes are super easy to apply and wear all day!
- Lightweight and Natural - Add subtle fullness and extra length to your lashes and achieve a natural, beautiful lash line with our wonderfully lightweight fake lashes
- No Irritation - Included lash glue is non-irritating and won't cause itching or puffiness, allowing you to easily wear your lashes all day
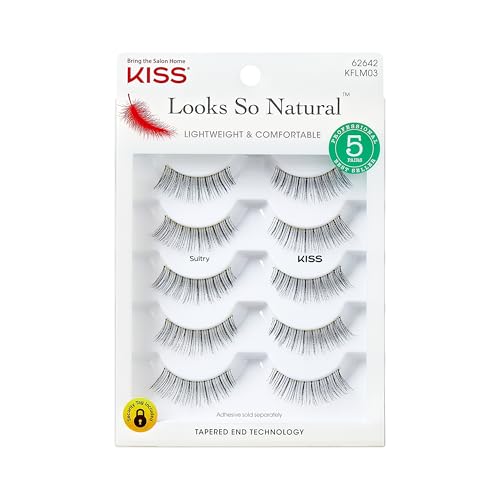
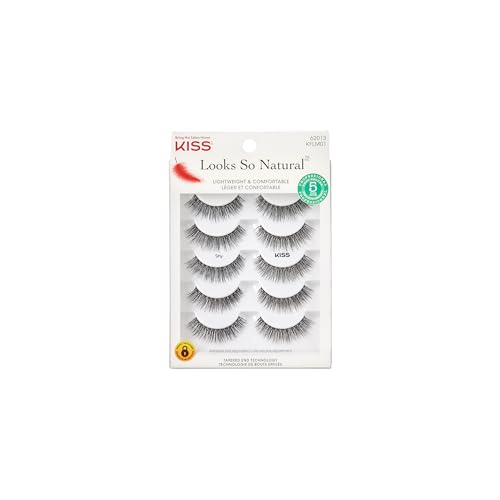
- More Than Mascara: Soft as a feather, these lightweight and comfortable strip lashes feature revolutionary Tapered End Technology for natural-looking eyelashes that blend beautifully with your own lashes; Range of styles for everyday look
- Lashes in a Flash: Easy to apply in minutes for a natural look and ultimate comfort; Cruelty-free, contact lens friendly, and reusable up to 10 times with special care; so comfortable you'll forget you're wearing them; Kiss lash glue sold separately
- Number 1 for False Eyelashes: Kiss offers an array of options to get the look of lash extensions in minutes: With magnetic lashes and eyeliner, Falscara, faux mink lashes, matte finish, and strip lashes – Kiss has it all

- Wispy Lashes: Thin eyelashes criss-cross at both ends. These lashes are made from the highest quality imported artificial mink fibers, which not only make them as soft as natural lashes, but also ensure that your lashes have full elasticity and curl.
- 5 Pairs of Clear Band Lashes: These clear band eyelashes come in five pairs, offering a natural appearance and optimum comfort while blending seamlessly with your natural lashes. They are ideal for both beginners and lash enthusiasts.
- Premium Quality Lashes: These lashes can be reused 3 to 10 times. The handmade cotton lash band is only 0.2mm thick, making it lightweight and soft for a natural look that won’t weigh down your eyes. This lash band allows for easy application and ensures maximum comfort for all-day wear.
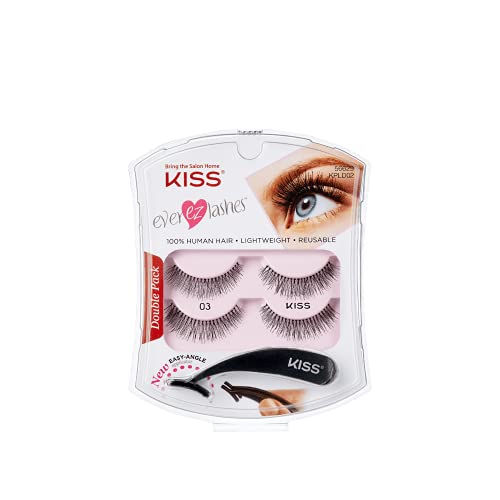
- 2-Pair Set: This money saving double-pack is the perfect starter kit to elevate your lush lash look; This set features 2 pairs of easy-to-apply lightweight false lashes that look incredibly natural; Reusable and contact lens friendly
- 100% Human Hair: These lightweight, natural false eyelashes are made with top-quality, cruelty-free human hair for a demi-wispy everyday look; Not too long, not too thick; Works best if used with Kiss Strip Lash Adhesive or GLUEliner (sold separately)
- Easy Starter Kit: Our EZ Lashes kits are a great value for the beginner “lashionista”; Includes 2 pairs of fake lashes and our Easy Angle False Eyelash Applicator with mistake-proof tips that makes putting on your eyelashes as easy and perfect as a salon professional

- Sultry, Flared Lash Style: Choose F1 fluffy lashes that are short and medium in length and fluttery, curled and elongate towards the outer end of the lashes. This not only adds glamour to your eyes, but opens them up, making them look brighter
- Light As A Feather: Designed with comfort in mind, these lashes and suitable for long wear throughout the day. Whether you’re wearing them for a special occasion like a wedding or for everyday activities, these lashes feel as good as they look
- Mink-Equivalent Quality with a Flattering Design: These fake eyelashes feature a flexible, thin cotton band that ensures a comfortable fit, and fine, meticulously crafted hairs that mimic the quality and texture of real mink
The Ultimate Buying Guide: Finding Your First Pair of Natural Fake Eyelashes
Welcome to the world of false lashes! They can make your eyes pop without heavy makeup. Choosing your first pair can feel tricky, but this guide makes it easy. We focus on natural-looking lashes perfect for beginners.
Key Features to Look For
When you shop, look closely at these important features. They decide how good your lashes look and how easy they are to wear.
1. Band Thickness and Flexibility
- Thin Band: A very thin, flexible band is your best friend. It blends right into your natural lash line. Thick bands look obvious and feel heavy.
- Comfort: A good band should curve easily to match the shape of your eye without poking you.
2. Lash Length and Density
- Graduated Length: Natural lashes usually get slightly longer toward the outer corner. Look for lashes that mimic this shape.
- Low Density (Wispy): Beginners should avoid super thick, dense strips. Choose lighter, wispier styles. These add volume without looking like a costume.
3. Reusability
Check the packaging. Quality lashes should last for several uses if you clean and store them correctly. This saves you money!
Important Materials Matter
What your lashes are made of changes everything about how they look and feel.
Synthetic vs. Natural Fibers
- Faux Mink/Silk Fibers: These are the most popular choices today. They are lightweight and look very realistic. They hold their curl well.
- Human Hair: While very soft, human hair lashes can be harder to maintain and often cost more.
- Avoid Stiff Plastic Fibers: These look shiny and unnatural. They feel scratchy against your skin.
The Adhesive (Glue)
The glue you use is almost as important as the lashes themselves. Always look for an adhesive that is:
- Latex-free (safer for sensitive skin).
- Clear drying or black drying, depending on your preference.
Factors That Improve or Reduce Quality
Quality isn’t just about the price tag. Small details make a big difference in the final look.
What Boosts Quality?
- Hand-Tied Strands: Higher quality lashes often have their individual hairs knotted by hand onto the band. This creates a more organic, less uniform look.
- Tapered Ends: The tips of the lashes should come to a fine, delicate point, just like real hair.
What Lowers Quality?
- Uniformity: If every single lash is the exact same length and curl, they look fake. Nature is messy!
- Visible Glue Spots: If you see globs of glue holding the hairs to the band, the quality is low. The band should look clean.
User Experience and Use Cases
Think about when and how you plan to wear your new lashes.
Beginner Application Tips
For your first time, choose lashes that are slightly shorter than your natural eye width. This makes trimming and placement much easier. Practice applying them in good light.
Best Use Cases for Natural Styles
- Everyday Wear: Light, wispy lashes add definition without looking overdone for school or work.
- Photos and Video: Even natural lashes show up beautifully on camera, giving your eyes depth.
- First Events: They are perfect for parties or dinners when you want a little extra something, but not a dramatic strip.
10 Frequently Asked Questions (FAQ) for Beginners
Q: How do I choose the right size for my eye?
A: Measure the lash strip against your actual eyelid. The lash band should match your lash line length exactly, or be slightly shorter. You must trim any excess from the outer corner.
Q: Should I curl fake lashes before or after application?
A: Usually, you do not need to curl natural-style lashes because they come pre-curled. If you want a slight blend, use your regular eyelash curler *before* applying the falsies, never after.
Q: How long does it take to apply them the first time?
A: Expect it to take 10 to 15 minutes for your very first try. Once you get the hang of it, you can do it in under two minutes.
Q: Can I wear mascara with these natural lashes?
A: Yes, but apply mascara to your *real* lashes first. Then, apply a thin coat of mascara to the falsies *after* they are glued on to help them blend.
Q: What is the best way to remove the lashes?
A: Never pull them off dry! Dip a cotton swab in oil-based makeup remover or micellar water. Gently press it along the lash band for 30 seconds. The glue will soften, and the lashes will peel right off.
Q: How many times can I reuse natural lashes?
A: If you clean off the old glue after every wear and store them carefully in their original case, you can often reuse good quality pairs 10 to 15 times.
Q: Will fake lashes hurt my real lashes?
A: No, they will not hurt your real lashes if you remove them gently and correctly. Rough removal is what causes real lashes to break.
Q: Why do my lashes look “crisscrossed” or messy after a few wears?
A: This happens when you sleep in them or don’t clean the dried glue off the band. Always store them back in their tray to keep their shape.
Q: Are magnetic lashes easier for beginners than glue lashes?
A: Magnetic lashes can be easier because you skip the messy glue step. However, getting the magnetic liner just right takes practice. Glue is often the traditional starting point.
Q: What should I do if the inner corner lifts up?
A: If the corner lifts, gently dab a tiny dot of lash glue right on the lifted spot. Hold it in place for 10 seconds until it sets. This is called “spot fixing.”

Hi, I’m Tom Scalisi, and welcome to The Saw Blog! I started this blog to share my hands-on experience and insights about woodworking tools—especially saws and saw blades. Over the years, I’ve had the chance to work with a wide range of tools, and I’m here to help both professionals and hobbyists make informed decisions when it comes to selecting and using their equipment. Whether you’re looking for in-depth reviews, tips, or just advice on how to get the best performance out of your tools, you’ll find it here. I’m excited to be part of your woodworking journey!