
A sliding compound miter saw is a powerful tool designed to help you make perfect cuts in wood and other materials. Whether you need straight cuts, angles, or tilted cuts, this saw handles it all. In this guide, I’ll walk you through exactly how to use one safely and effectively. We will cover everything from the basics to advanced tricks, making sure you get professional-looking results every time.
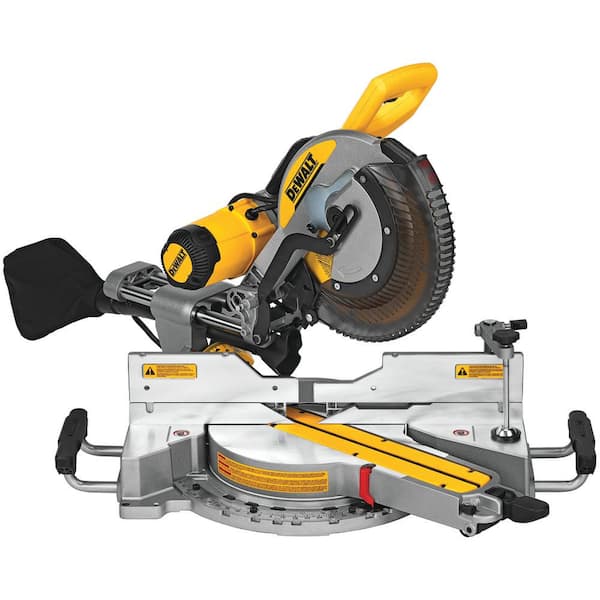
Image Source: images.thdstatic.com
Getting Acquainted with Your Sliding Compound Miter Saw
Before diving into specific cuts, it’s crucial to familiarize yourself with the components of your saw.
- Base: The stable platform upon which the saw rests.
- Fence: The vertical backstop that guides the workpiece.
- Table: The rotating surface that allows you to make miter cuts.
- Miter Scale: Indicates the angle of the table.
- Bevel Scale: Indicates the angle of the blade tilt.
- Blade: The circular saw blade that does the cutting.
- Motor: Powers the blade.
- Sliding Rails: Allow the blade to slide forward and backward, increasing the cutting capacity.
- Handle: Used to control the saw’s movement.
- Safety Trigger: Must be engaged to activate the saw.
- Blade Guard: A safety feature that covers the blade when not in use.
- Dust Port: Connects to a vacuum for dust collection.
- Clamp: Secures the workpiece.
Prioritizing Sliding Miter Saw Safety
Sliding miter saw safety is paramount. Before each use, inspect the saw for any damage or loose parts. Always wear safety glasses to protect your eyes from flying debris. Ear protection is also recommended due to the saw’s noise level.
- Read the Manual: Always refer to the manufacturer’s manual for specific safety guidelines related to your saw model.
- Eye Protection: Wear safety glasses or a face shield at all times.
- Ear Protection: Use earplugs or earmuffs to reduce noise exposure.
- Dust Mask: Wear a dust mask to avoid inhaling sawdust.
- Secure the Workpiece: Use clamps to hold the workpiece firmly against the fence.
- Keep Hands Clear: Never place your hands in the path of the blade.
- Don’t Reach Over the Blade: Avoid reaching over the blade while the saw is running.
- Maintain a Clean Work Area: Keep the work area free of clutter and debris.
- Disconnect Power: Always disconnect the power cord before making any adjustments or changing the blade.
- Inspect the Blade: Check the blade for damage before each use.
- Avoid Loose Clothing: Loose clothing or jewelry can get caught in the saw.
- Never Force the Saw: Let the blade do the work. Forcing the saw can cause kickback or damage the motor.
Miter Saw Blade Selection
Choosing the right miter saw blade selection is crucial for achieving clean and accurate cuts. Different blades are designed for specific materials and applications.
| Blade Type | Teeth Count | Material | Application |
|---|---|---|---|
| General Purpose | 40-60 | Wood, Plywood, Soft Metals | Crosscuts, Miter Cuts, Ripping |
| Fine Finish | 60-80 | Hardwoods, Melamine, Veneer | Smooth, Chip-Free Cuts |
| Metal Cutting | 70-90 | Aluminum, Brass, Copper | Cutting Non-Ferrous Metals |
| Framing | 24-40 | Softwoods | Rough Cuts, Framing Lumber |
| Combination | 50-80 | A variety of Materials | Versatile Performance |
Making Basic Cuts: Crosscuts and Miter Cuts
Crosscuts
A crosscut is a straight cut made perpendicular to the grain of the wood.
- Secure the Workpiece: Place the wood firmly against the fence and clamp it down.
- Align the Blade: Ensure the blade is aligned with the desired cut line.
- Start the Saw: Turn on the saw and let it reach full speed.
- Lower the Blade: Slowly lower the blade into the wood, keeping it perpendicular.
- Slide the Blade (If Necessary): If cutting a wider piece, pull the blade forward and push it through the wood in a smooth motion.
- Release the Trigger: Once the cut is complete, release the trigger and allow the blade to stop completely before raising it.
Miter Cuts
Miter cuts are angled cuts made by rotating the saw’s table.
- Adjust the Miter Angle: Loosen the miter lock and rotate the table to the desired angle. Use the miter scale for accurate miter saw angles.
- Secure the Workpiece: Place the wood against the fence and clamp it down.
- Align the Blade: Ensure the blade is aligned with the cut line at the set angle.
- Start the Saw: Turn on the saw and let it reach full speed.
- Lower the Blade: Slowly lower the blade into the wood.
- Slide the Blade (If Necessary): If cutting a wider piece, pull the blade forward and push it through the wood.
- Release the Trigger: Once the cut is complete, release the trigger and allow the blade to stop completely before raising it.
Executing Bevel Cuts with Miter Saw
Bevel cuts with miter saw involve tilting the saw blade to create an angled cut through the thickness of the material.
- Adjust the Bevel Angle: Loosen the bevel lock and tilt the blade to the desired angle. Use the bevel scale for accuracy.
- Secure the Workpiece: Place the wood against the fence and clamp it down.
- Align the Blade: Ensure the blade is aligned with the cut line at the set angle.
- Start the Saw: Turn on the saw and let it reach full speed.
- Lower the Blade: Slowly lower the blade into the wood.
- Slide the Blade (If Necessary): If cutting a wider piece, pull the blade forward and push it through the wood.
- Release the Trigger: Once the cut is complete, release the trigger and allow the blade to stop completely before raising it.
Mastering Compound Miter Saw Cuts
Compound miter saw cuts combine both miter and bevel angles simultaneously. This is commonly used for applications like cutting crown molding with miter saw.
- Set the Miter and Bevel Angles: Adjust both the miter and bevel angles to the desired settings.
- Secure the Workpiece: Place the wood against the fence and clamp it down. Make sure the wood is oriented correctly based on the miter and bevel angles.
- Align the Blade: Ensure the blade is aligned with the cut line at the set angles.
- Start the Saw: Turn on the saw and let it reach full speed.
- Lower the Blade: Slowly lower the blade into the wood.
- Slide the Blade (If Necessary): If cutting a wider piece, pull the blade forward and push it through the wood.
- Release the Trigger: Once the cut is complete, release the trigger and allow the blade to stop completely before raising it.
Advanced Miter Saw Projects and Miter Saw Techniques
Once you’re comfortable with basic cuts, you can tackle more advanced miter saw projects.
- Picture Frames: Use miter cuts to create the frame corners.
- Crown Molding: Compound miter cuts are essential for installing crown molding.
- Baseboard and Trim: Miter and bevel cuts are used to create seamless joints.
- Boxes and Joinery: Build boxes and other projects using precise miter and bevel cuts.
Cutting Crown Molding with Miter Saw
Cutting crown molding can be tricky, but with the right miter saw techniques, it can be done accurately.
- Determine the Correct Angle: Use a protractor or angle finder to determine the inside and outside corner angles.
- Set the Miter and Bevel Angles: Refer to a crown molding angle chart or calculator to determine the correct miter and bevel settings for your saw.
- Position the Molding: Place the molding upside down and backward on the saw.
- Make the Cut: Follow the same steps as for a compound miter cut.
Accurate Miter Saw Angles
- Use a Digital Angle Finder: A digital angle finder can provide precise angle measurements.
- Check the Saw’s Accuracy: Regularly check the saw’s miter and bevel scales for accuracy.
- Make Test Cuts: Before cutting your final piece, make a test cut on scrap wood to ensure the angles are correct.
Deciphering Common Cutting Challenges
Even with experience, you might encounter challenges. Here are solutions to common problems:
- Splintering: Use a fine-tooth blade and apply masking tape to the cut line.
- Inaccurate Angles: Double-check your measurements and the saw’s settings.
- Blade Binding: Ensure the blade is sharp and the wood is properly supported.
- Kickback: Maintain a firm grip on the saw and let the blade do the work.
Preserving Your Investment: Miter Saw Maintenance
Regular miter saw maintenance will prolong the life of your saw and ensure it operates safely and efficiently.
- Clean the Saw: Remove sawdust and debris after each use.
- Lubricate Moving Parts: Apply lubricant to the sliding rails and other moving parts.
- Inspect the Blade: Check the blade for damage and replace it when necessary.
- Check the Carbon Brushes: Inspect the carbon brushes in the motor and replace them when worn.
- Tighten Loose Parts: Regularly check and tighten any loose bolts or screws.
Grasping the Features of the Best Miter Saw for Beginners
Choosing the best miter saw for beginners can be overwhelming. Here are some factors to consider:
- Size and Weight: A smaller, lighter saw is easier to handle and transport.
- Ease of Use: Look for a saw with simple controls and clear markings.
- Accuracy: Choose a saw with a precise miter and bevel scale.
- Safety Features: Ensure the saw has a blade guard, safety trigger, and dust collection system.
- Price: Consider your budget and choose a saw that offers good value for the price.
Common Queries
What is the difference between a miter saw and a compound miter saw?
A miter saw makes angled cuts in one plane (miter cuts). A compound miter saw can make miter cuts and bevel cuts (angled cuts in a second plane) and combine the two for compound cuts.
Can I cut metal with a miter saw?
Yes, but you need a special metal-cutting blade designed for non-ferrous metals like aluminum and copper.
Who is the ideal user for a sliding compound miter saw?
The ideal user is anyone who needs to make accurate and versatile cuts in wood or other materials, including hobbyists, DIYers, and professional carpenters.
How often should I change my miter saw blade?
It depends on the frequency of use and the types of materials being cut. Replace the blade when it becomes dull, damaged, or when the cuts are no longer clean and accurate.
Is a sliding miter saw worth it?
Yes, if you frequently cut wider materials, a sliding miter saw is definitely worth the investment. The sliding feature significantly increases the saw’s cutting capacity.

Hi, I’m Tom Scalisi, and welcome to The Saw Blog! I started this blog to share my hands-on experience and insights about woodworking tools—especially saws and saw blades. Over the years, I’ve had the chance to work with a wide range of tools, and I’m here to help both professionals and hobbyists make informed decisions when it comes to selecting and using their equipment. Whether you’re looking for in-depth reviews, tips, or just advice on how to get the best performance out of your tools, you’ll find it here. I’m excited to be part of your woodworking journey!