
A Ryobi table saw is a handy tool that can handle all sorts of wood-cutting jobs. This guide is a complete walkthrough that covers everything you need to know. We’ll start with how to use it safely and move into more advanced stuff, like how to cut with the grain or across it. You’ll also learn how to adjust the fence, swap out the blade, and keep your saw running perfectly. Basically, if you have a question about using or fixing your saw, you’ll find the answer here.
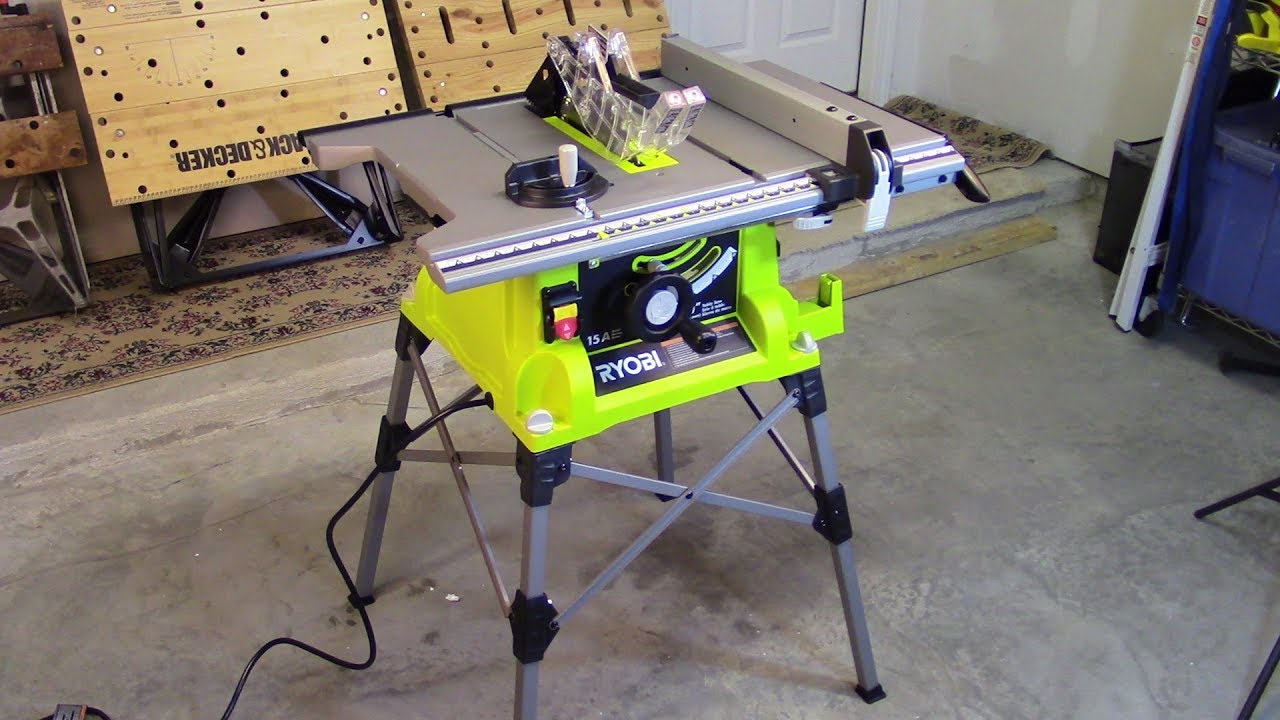
Image Source: i.ytimg.com
Table Saw Basics
A table saw is a woodworking tool with a circular saw blade mounted on an arbor and driven by a motor. The blade protrudes through the surface of a table, providing support for the material being cut.
Essential Parts of a Table Saw
Fathoming the parts of your Ryobi table saw is key to its safe and effective use. Here’s a breakdown:
- Table: The flat surface that supports the workpiece.
- Blade: The circular cutting tool.
- Arbor: The rotating shaft on which the blade is mounted.
- Motor: Provides power to the blade.
- Fence: A guide used for making straight, parallel cuts (ripping).
- Miter Gauge: A guide used for making angled cuts (crosscutting).
- Blade Guard: A safety device that covers the blade.
- Riving Knife/Splitter: Prevents the wood from pinching the blade.
- Anti-Kickback Pawls: Prevent the wood from being thrown back towards the operator.
- On/Off Switch: Controls the power to the saw.
- Blade Height Adjustment: Controls the height of the blade above the table.
- Bevel Adjustment: Allows the blade to be tilted for angled cuts.
- Dust Port: Allows connection to a dust collection system.
Ryobi Table Saw Safety: A Paramount Concern
Safety should always be your top priority when using any power tool, especially a table saw. The rotating blade poses significant risks. The goal of ryobi table saw safety is to avoid injuries.
Critical Safety Rules
- Read the Manual: Always read and follow the manufacturer’s instructions for your specific Ryobi table saw model.
- Wear Safety Glasses: Protect your eyes from flying debris.
- Use Hearing Protection: Prolonged exposure to the saw’s noise can damage your hearing.
- Wear a Dust Mask: Protect your lungs from sawdust.
- Avoid Loose Clothing and Jewelry: These can get caught in the blade.
- Keep Your Hands Away from the Blade: Use push sticks and push blocks to guide the workpiece.
- Never Reach Over the Blade: Turn off the saw and wait for the blade to stop before retrieving anything.
- Use the Blade Guard and Riving Knife: These safety devices are designed to prevent kickback and other accidents.
- Don’t Force the Wood: Let the blade do the work. If you have to force it, something is wrong.
- Unplug the Saw Before Making Adjustments: This prevents accidental starts.
- Stay Focused: Avoid distractions while operating the saw.
- Keep the Work Area Clean: A cluttered workspace can lead to accidents.
- Never Operate the Saw When Tired or Under the Influence: Judgment and reaction time are impaired.
- Inspect the Saw Before Each Use: Check for loose parts, damaged cords, and a sharp blade.
- Know Your Material: Different woods and materials behave differently when cut.
Preventing Kickback
Kickback is a dangerous situation where the wood being cut is suddenly thrown back towards the operator. It can cause serious injury.
- Use a Riving Knife or Splitter: This keeps the kerf (the slot cut by the blade) open, preventing the wood from pinching the blade.
- Use Anti-Kickback Pawls: These prevent the wood from moving backwards.
- Feed the Wood at a Consistent Speed: Don’t hesitate or stop mid-cut.
- Use a Featherboard: This holds the wood firmly against the fence.
- Ensure the Fence is Parallel to the Blade: An angled fence can cause the wood to bind and kick back.
- Don’t Rip Narrow Pieces Without Proper Support: Use a ripping jig or push stick.
- Be Extra Careful with Warped or Knotty Wood: These are more prone to binding and kickback.
- Never Stand Directly Behind the Blade: Position yourself to the side.
Using Push Sticks and Push Blocks
Push sticks and push blocks are essential safety tools that keep your hands away from the blade.
- Push Stick: A long, narrow piece of wood or plastic used to push the wood through the blade for ripping.
- Push Block: A wider, more stable tool used for crosscutting and for applying downward pressure on the wood.
Ryobi Table Saw Adjustments: Optimizing Performance
Proper ryobi table saw adjustments are key to achieving accurate cuts and ensuring safe operation.
Blade Height and Angle
- Blade Height: Adjust the blade height so that the teeth extend about 1/4 inch above the workpiece. This reduces the risk of kickback and produces a cleaner cut.
- Bevel Angle: Use the bevel adjustment to tilt the blade for angled cuts. Ensure the bevel lock is secure before starting the saw.
Fence Alignment
The fence must be perfectly parallel to the blade for accurate ripping.
- Check for Parallel: Use a precision measuring tool to measure the distance between the fence and the blade at the front and rear of the blade.
- Adjust the Fence: Loosen the fence locking mechanism and adjust the fence until it is parallel.
- Lock the Fence: Securely lock the fence in place.
- Verify Alignment: Recheck the alignment to ensure it hasn’t shifted.
Miter Gauge Adjustment
The miter gauge is used for making accurate crosscuts and angled cuts.
- Ensure Squareness: Use a square to check that the miter gauge is set at 90 degrees to the blade.
- Adjust if Necessary: Loosen the adjustment screws and adjust the angle until it is square.
- Tighten Screws: Securely tighten the adjustment screws.
- Test Cut: Make a test cut and check the angle with a square.
Ryobi Table Saw Blade Change: A Step-by-Step Guide
Changing the blade is a routine ryobi table saw maintenance task that allows you to use different types of blades for different cuts.
- Unplug the Saw: Always disconnect the power cord before changing the blade.
- Raise the Blade to its Highest Position: This makes it easier to access the arbor nut.
- Remove the Throat Plate: This is the insert around the blade.
- Engage the Arbor Lock: This prevents the arbor from rotating.
- Loosen the Arbor Nut: Use the wrench provided with your saw to loosen the nut. Note that the direction to loosen the nut may vary depending on the saw model.
- Remove the Outer Flange: This is the metal disc that holds the blade against the arbor.
- Remove the Old Blade: Carefully slide the old blade off the arbor.
- Install the New Blade: Ensure the blade is mounted with the teeth pointing in the direction of rotation.
- Replace the Outer Flange: Ensure it is seated properly.
- Tighten the Arbor Nut: Use the wrench to tighten the nut securely.
- Disengage the Arbor Lock: Release the arbor lock.
- Replace the Throat Plate: Securely reinstall the throat plate.
- Lower the Blade: Return the blade to its normal cutting height.
- Plug in the Saw: You are now ready to use the saw.
Table: Blade Selection Guide
| Blade Type | Teeth Count | Use | Material |
|---|---|---|---|
| General Purpose | 40-50 | Ripping and crosscutting | Wood |
| Ripping | 24-30 | Fast, efficient ripping | Wood |
| Crosscutting | 60-80 | Smooth, splinter-free crosscuts | Wood |
| Plywood/Laminate | 80+ | Cutting plywood, laminates, and delicate materials | Wood, Laminates |
| Metal Cutting | Varies | Cutting non-ferrous metals | Aluminum, Brass |
Ryobi Table Saw Operations: Mastering Cutting Techniques
Comprehending how to execute different cutting techniques is essential for using your Ryobi table saw effectively.
Ryobi Table Saw Ripping
Ripping is cutting wood parallel to the grain.
- Set the Fence: Adjust the fence to the desired width.
- Position the Wood: Place the wood against the fence.
- Use a Push Stick: Use a push stick to guide the wood through the blade.
- Maintain Consistent Pressure: Keep the wood firmly against the fence and feed it at a consistent speed.
- Avoid Stopping Mid-Cut: If you must stop, turn off the saw and wait for the blade to stop before removing the wood.
Ryobi Table Saw Crosscutting
Crosscutting is cutting wood perpendicular to the grain.
- Use the Miter Gauge: Place the wood against the miter gauge.
- Adjust the Angle: Set the miter gauge to the desired angle.
- Push the Miter Gauge: Push the miter gauge forward to guide the wood through the blade.
- Maintain Consistent Pressure: Keep the wood firmly against the miter gauge.
- Use a Backer Board: For splinter-free cuts, use a backer board behind the wood.
Making Angled Cuts
The table saw can be used to make angled cuts by tilting the blade or adjusting the miter gauge.
- Bevel Cuts: Tilt the blade to the desired angle using the bevel adjustment.
- Miter Cuts: Adjust the miter gauge to the desired angle.
Dado Cuts
A dado is a rectangular groove cut into the wood. To cut dados, you will need a dado blade set.
- Install the Dado Blade Set: Follow the instructions for your dado blade set to install it on the saw.
- Adjust the Width: Adjust the width of the dado blade set to the desired width of the dado.
- Adjust the Height: Adjust the height of the blade to the desired depth of the dado.
- Use the Fence: Use the fence to guide the wood through the blade.
- Make Multiple Passes: If necessary, make multiple passes to achieve the desired width and depth.
Ryobi Table Saw Maintenance: Keeping Your Saw in Top Shape
Regular ryobi table saw maintenance will extend the life of your saw and ensure it operates safely and efficiently.
Cleaning
- Remove Sawdust Regularly: Use a brush or vacuum to remove sawdust from the table, blade, and motor.
- Clean the Fence and Miter Gauge: Keep these clean and free of debris.
- Clean the Dust Port: Ensure the dust port is clear to maintain good dust collection.
Lubrication
- Lubricate Moving Parts: Use a dry lubricant on the fence rails, miter gauge slots, and other moving parts.
- Lubricate the Motor: Follow the manufacturer’s instructions for lubricating the motor.
Blade Maintenance
- Keep the Blade Sharp: A dull blade is more likely to cause kickback and produce poor cuts. Sharpen the blade regularly or replace it when it becomes dull.
- Clean the Blade: Use a blade cleaner to remove pitch and resin buildup.
Storage
- Store the Saw in a Dry Place: Protect the saw from moisture and extreme temperatures.
- Cover the Saw: Use a cover to protect the saw from dust and debris.
Ryobi Table Saw Troubleshooting: Diagnosing and Solving Problems
Even with proper maintenance, problems can arise. This section addresses common ryobi table saw troubleshooting scenarios.
Common Issues and Solutions
- Saw Won’t Start:
- Possible Causes: Power cord is unplugged, circuit breaker is tripped, on/off switch is faulty, motor is damaged.
- Solutions: Plug in the power cord, reset the circuit breaker, replace the switch, repair or replace the motor.
- Blade Vibrates Excessively:
- Possible Causes: Blade is damaged, arbor nut is loose, arbor is bent, blade is not properly balanced.
- Solutions: Replace the blade, tighten the arbor nut, repair or replace the arbor, balance the blade.
- Cuts are Not Square:
- Possible Causes: Fence is not parallel to the blade, miter gauge is not square, blade is not perpendicular to the table.
- Solutions: Adjust the fence, adjust the miter gauge, adjust the blade.
- Wood is Burning:
- Possible Causes: Blade is dull, feed rate is too slow, blade is not high enough, wood is too thick.
- Solutions: Sharpen or replace the blade, increase the feed rate, raise the blade, use a thinner piece of wood.
- Kickback:
- Possible Causes: Riving knife is not installed, wood is pinching the blade, feed rate is inconsistent, wood is warped or knotty.
- Solutions: Install the riving knife, ensure the kerf is open, maintain a consistent feed rate, use straight, knot-free wood.
Table: Troubleshooting Chart
| Problem | Possible Cause | Solution |
|---|---|---|
| Saw won’t start | Unplugged, tripped breaker | Plug in, reset breaker |
| Blade vibrates | Damaged blade, loose arbor nut | Replace blade, tighten nut |
| Cuts not square | Misaligned fence/miter gauge | Adjust fence/miter gauge |
| Burning wood | Dull blade, slow feed | Sharpen/replace blade, increase feed rate |
| Kickback | No riving knife, pinching wood | Install riving knife, ensure kerf is open |
| Excessive Dust | Poor dust collection setup | Connect or improve dust collection system |
| Blade Binding | Incorrect blade for material | Use a blade designed for the specific material being cut |
| Motor Overheating | Prolonged use, dull blade | Allow motor to cool, sharpen or replace blade |
| Difficult Adjustments | Dirt/debris, lack of lubrication | Clean parts, apply dry lubricant |
Frequently Asked Questions (FAQ)
- What is the best way to prevent kickback?
- Always use the riving knife or splitter, anti-kickback pawls, and feed the wood at a consistent speed. Ensure the fence is parallel to the blade.
- Can I cut metal with a Ryobi table saw?
- Yes, but you need to use a blade specifically designed for cutting metal. Non-ferrous metals like aluminum and brass can be cut with a metal-cutting blade. Never cut ferrous metals like steel, as this can damage the saw and create a fire hazard.
- How often should I sharpen or replace the blade?
- This depends on how often you use the saw and the type of wood you are cutting. Inspect the blade regularly for dullness or damage. If the blade is producing rough cuts or burning the wood, it’s time to sharpen or replace it.
- Who is responsible for safety when operating a table saw?
- The operator is always responsible for safety. It is crucial to follow all safety guidelines and use the saw properly.
- What is the purpose of the riving knife?
- The riving knife keeps the kerf open behind the blade, preventing the wood from pinching the blade and causing kickback.
- What are some common mistakes to avoid when using a table saw?
- Not wearing safety glasses, reaching over the blade, forcing the wood, using a dull blade, and neglecting safety devices are common mistakes.
- How do I choose the right blade for my project?
- Consider the type of wood you are cutting and the desired cut quality. Use a general-purpose blade for most tasks, a ripping blade for fast ripping, a crosscutting blade for smooth crosscuts, and a plywood/laminate blade for delicate materials.
By following these safety guidelines, mastering cutting techniques, and performing regular maintenance, you can use your Ryobi table saw effectively and safely for many years to come.

Hi, I’m Tom Scalisi, and welcome to The Saw Blog! I started this blog to share my hands-on experience and insights about woodworking tools—especially saws and saw blades. Over the years, I’ve had the chance to work with a wide range of tools, and I’m here to help both professionals and hobbyists make informed decisions when it comes to selecting and using their equipment. Whether you’re looking for in-depth reviews, tips, or just advice on how to get the best performance out of your tools, you’ll find it here. I’m excited to be part of your woodworking journey!