
A DeWalt table saw is a great tool for cutting wood, and even if you’re just starting out, you can definitely learn to use it safely. This guide covers the basics—like how to turn it on and run it—plus how to stay safe, change the blade, and adjust the fence. It’s everything you need to feel confident and get moving on your first woodworking projects.
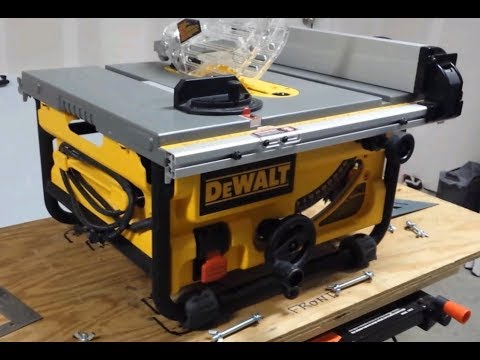
Image Source: i.ytimg.com
Your First Steps: Getting Acquainted with Your Dewalt Table Saw
Before you even think about cutting wood, spend time learning the parts of your Dewalt table saw.
Key Components of a Dewalt Table Saw
| Component | Function |
|---|---|
| Table | Provides a flat surface for supporting the workpiece. |
| Blade | The rotating cutting tool. |
| Motor | Powers the blade. |
| Fence | A guide used for making straight, parallel cuts. |
| Miter Gauge | A guide used for making accurate crosscuts at specific angles. |
| Blade Height Adjustment | Allows you to control the height of the blade above the table. |
| Blade Tilt Adjustment | Allows you to angle the blade for bevel cuts. |
| Power Switch | Turns the saw on and off. |
| Riving Knife | Helps prevent kickback by keeping the kerf (cut) open behind the blade. |
| Blade Guard | A protective cover for the blade, reducing the risk of accidental contact. |
Essential Safety Gear
Protecting yourself is the most important part of using a table saw. Make sure you have these items before starting:
- Safety Glasses: Protect your eyes from flying debris.
- Hearing Protection: Table saws are loud; earplugs or earmuffs are crucial.
- Dust Mask or Respirator: Sawdust can irritate your lungs.
- Push Stick: Used to safely guide wood past the blade, keeping your hands away.
- Appropriate Clothing: Avoid loose clothing and jewelry that could get caught in the saw. Wear closed-toe shoes.
Pre-Operation Checklist
Before each use, inspect your table saw. This quick check ensures safe Dewalt table saw operation:
- Blade Condition: Check for sharpness and any signs of damage.
- Riving Knife: Ensure it’s properly aligned and installed.
- Blade Guard: Make sure it’s in place and functioning correctly.
- Fence and Miter Gauge: Verify they are securely locked and properly aligned.
- Power Cord: Inspect for any damage or wear.
- Work Area: Keep the area around the saw clear of obstructions.
Grasping the Basics: How to Use a Dewalt Table Saw
Once you’re familiar with the parts and safety gear, you can start learning how to cut wood with Dewalt table saw.
How to Turn On and Off a Dewalt Table Saw
Most Dewalt table saws have a simple on/off switch. Familiarize yourself with its location before starting. Some models may have a paddle switch that can be easily bumped off with your knee in an emergency.
Adjusting the Blade Height
The blade height should be set so that the teeth extend no more than ¼ inch above the workpiece. This minimizes the amount of exposed blade and reduces the risk of kickback.
- Locate the blade height adjustment wheel or crank.
- Turn the wheel to raise or lower the blade to the desired height.
- Ensure the blade is securely locked in place before starting the saw.
Understanding Table Saw Fence Adjustment
The fence is crucial for making accurate, straight cuts. Learning table saw fence adjustment is key.
- Loosen the Fence Lock: Release the lever or knob that secures the fence.
- Position the Fence: Move the fence to the desired width using the measurement scale on the table.
- Lock the Fence: Securely tighten the fence lock.
- Verify Alignment: Double-check that the fence is parallel to the blade using a ruler or measuring tape.
Using the Miter Gauge
The miter gauge is used for crosscutting, which means cutting wood across the grain.
- Insert the Miter Gauge: Place the miter gauge into one of the slots on the table.
- Adjust the Angle: Set the desired angle using the miter gauge’s angle adjustment.
- Secure the Workpiece: Hold the workpiece firmly against the miter gauge.
- Make the Cut: Slowly push the miter gauge and workpiece through the blade.
Safety First: Table Saw Safety Tips
Safe Dewalt table saw operation demands constant vigilance. Always keep these table saw safety tips in mind:
- Never Reach Over the Blade: If you need to retrieve something on the other side, turn off the saw and wait for the blade to stop spinning.
- Use a Push Stick: Always use a push stick when ripping narrow pieces of wood to keep your hands away from the blade.
- Avoid Kickback: Kickback occurs when the wood is pinched between the blade and the fence, causing it to be thrown back towards the operator. To prevent kickback:
- Use a riving knife or splitter.
- Ensure the fence is parallel to the blade.
- Feed the wood smoothly and steadily.
- Never rip warped or twisted wood.
- Stay Focused: Avoid distractions and concentrate on the task at hand.
- Don’t Force the Wood: Let the blade do the work. Forcing the wood can lead to kickback or other accidents.
- Never Cut Freehand: Always use the fence or miter gauge to guide the wood.
- Know Your Limits: If you’re feeling tired or unsure about a cut, stop and take a break.
- Keep Your Hands Clear: Maintain a safe distance between your hands and the blade at all times.
- Unplug the Saw: Always unplug the saw before making any adjustments or performing maintenance.
- Proper Stance: Stand to the side of the blade, not directly behind it, to avoid being in the path of potential kickback.
Specific Techniques: Ripping and Crosscutting
These two methods form the foundation of most table saw projects.
Ripping Wood on Table Saw: Cutting with the Grain
Ripping is cutting wood lengthwise, parallel to the grain.
- Set the Fence: Adjust the fence to the desired width.
- Position the Wood: Place the wood against the fence.
- Use a Push Stick: Use a push stick to guide the wood past the blade, especially when cutting narrow pieces.
- Feed the Wood: Maintain a steady, consistent feed rate.
- Keep Pressure: Apply even pressure against the fence to ensure a straight cut.
Crosscutting with Dewalt Table Saw: Cutting Against the Grain
Crosscutting is cutting wood across the grain.
- Use the Miter Gauge: Insert the miter gauge into the table slot.
- Adjust the Angle: Set the desired angle if necessary.
- Secure the Wood: Hold the wood firmly against the miter gauge.
- Feed the Wood: Slowly push the miter gauge and wood through the blade.
- Maintain Control: Keep a firm grip on the miter gauge and wood throughout the cut.
Table Saw Push Stick Technique
The push stick is your best friend when ripping narrow boards. Here’s how to use it:
- Position the Push Stick: Place the push stick behind the wood, applying pressure near the end of the board.
- Guide the Wood: Use the push stick to push the wood past the blade, keeping your hands well away.
- Maintain Pressure: Keep consistent pressure against the fence and down on the table.
- Complete the Cut: Continue pushing the wood until it has completely cleared the blade.
Essential Maintenance: Keeping Your Dewalt Table Saw in Top Condition
Regular maintenance ensures the longevity and safe Dewalt table saw operation.
Dewalt Table Saw Blade Change
Changing the blade is a common task.
- Unplug the Saw: Always disconnect the saw from the power source.
- Raise the Blade: Elevate the blade to its highest position.
- Remove the Throat Plate: This is the insert around the blade.
- Lock the Arbor: Use the arbor wrench to lock the blade in place.
- Loosen the Arbor Nut: Turn the arbor nut counterclockwise to loosen it.
- Remove the Blade: Carefully remove the old blade.
- Install the New Blade: Ensure the blade is facing the correct direction (teeth pointing towards the front of the saw).
- Tighten the Arbor Nut: Securely tighten the arbor nut.
- Unlock the Arbor: Release the arbor lock.
- Replace the Throat Plate: Put the throat plate back in place.
- Test the Saw: Turn on the saw briefly to ensure the blade is running smoothly.
Cleaning Your Table Saw
- Dust Removal: Use a shop vacuum or compressed air to remove sawdust from the table, blade, and motor.
- Table Surface: Clean the table surface with a mild cleaner to remove any residue.
- Moving Parts: Lubricate moving parts, such as the fence rails and blade height adjustment mechanism, with a dry lubricant.
Inspecting for Wear and Tear
Regularly inspect your table saw for signs of wear and tear. Check the blade for sharpness, the fence for alignment, and the motor for unusual noises. Replace any worn or damaged parts immediately.
Advanced Techniques (Proceed with Caution)
Once you’re comfortable with the basics, you might explore these techniques. However, they require more experience and attention to safety.
Making Bevel Cuts
Bevel cuts are angled cuts made by tilting the blade.
- Adjust the Blade Angle: Use the blade tilt adjustment to set the desired angle.
- Secure the Fence: Ensure the fence is properly positioned and locked in place.
- Make the Cut: Follow the same procedures as for a straight rip cut, but be extra cautious due to the angled blade.
Using Featherboards
Featherboards hold the workpiece firmly against the fence, improving accuracy and safety.
- Mount the Featherboard: Attach the featherboard to the table or fence.
- Adjust the Pressure: Adjust the featherboard to apply the correct amount of pressure to the wood.
- Make the Cut: Feed the wood through the saw, allowing the featherboard to guide it.
Troubleshooting Common Issues
Even with proper care, you might encounter problems.
Kickback
As discussed, kickback is a serious hazard. If it occurs:
- Stop Immediately: Turn off the saw and let the blade come to a complete stop.
- Assess the Situation: Determine the cause of the kickback and take steps to prevent it from happening again.
- Check the Wood: Inspect the wood for any defects that may have contributed to the kickback.
Burning
Burning occurs when the blade overheats and scorches the wood.
- Sharpness: Ensure the blade is sharp. A dull blade requires more force, leading to friction and heat.
- Feed Rate: Avoid feeding the wood too slowly. A slower feed rate can cause the blade to dwell in one spot, leading to burning.
- Blade Height: Ensure the blade is set to the correct height.
- Dust Collection: Ensure dust collection system is properly removing sawdust.
Inaccurate Cuts
Inaccurate cuts can be frustrating.
- Fence Alignment: Verify the fence is parallel to the blade.
- Miter Gauge Accuracy: Check the miter gauge for squareness.
- Blade Runout: Inspect the blade for wobble or runout.
- Workpiece Stability: Ensure the workpiece is properly supported and stable during the cut.
Frequently Asked Questions (FAQ)
- What is the best Dewalt table saw for beginners? A contractor-style saw like the Dewalt DWE7485 is a good choice due to its portability, power, and ease of use.
- Can I cut metal with a Dewalt table saw? No, Dewalt table saws are designed for cutting wood. Cutting metal can damage the saw and create dangerous sparks.
- Who is liable for injuries caused by a table saw? Liability can depend on the situation, but generally, it falls on the operator if safety precautions weren’t followed. If the saw had a manufacturing defect, the manufacturer might be liable.
- How often should I change my table saw blade? Change your blade when it becomes dull, shows signs of damage, or when switching between different types of cuts.
- How do I choose the right table saw blade? Consider the type of wood you’ll be cutting, the thickness of the material, and the desired cut quality. A general-purpose blade is a good starting point for beginners.
Using a Dewalt table saw can be a rewarding experience. By following these guidelines on Dewalt table saw operation, practicing table saw safety tips, and maintaining your equipment, you can enjoy woodworking safely and effectively. Always prioritize safety and take your time to learn the proper techniques.

Hi, I’m Tom Scalisi, and welcome to The Saw Blog! I started this blog to share my hands-on experience and insights about woodworking tools—especially saws and saw blades. Over the years, I’ve had the chance to work with a wide range of tools, and I’m here to help both professionals and hobbyists make informed decisions when it comes to selecting and using their equipment. Whether you’re looking for in-depth reviews, tips, or just advice on how to get the best performance out of your tools, you’ll find it here. I’m excited to be part of your woodworking journey!