
A sliding compound miter saw is a powerful tool used for making precise crosscuts, miter cuts, and bevel cuts in wood and other materials. What is a sliding compound miter saw? It’s a circular saw mounted on a pivoting arm that can slide along rails, allowing for wider cuts than a standard miter saw, and capable of tilting for bevel cuts and rotating for miter cuts. This guide will walk you through everything you need to know about using a sliding compound miter saw safely and effectively to achieve accurate miter saw cuts.
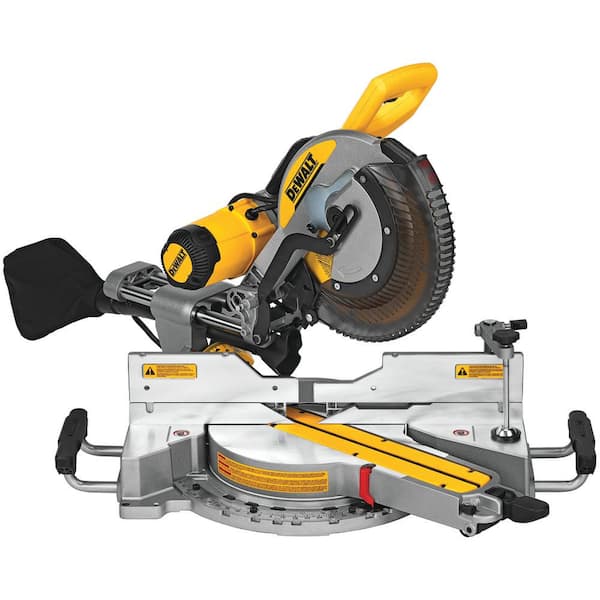
Image Source: images.thdstatic.com
Preparing for the Cut: Miter Saw Setup and Calibration
Proper setup is crucial for achieving the best miter saw practices. Take the time to calibrate your saw before each significant project.
Checking the Miter Scale
The miter scale indicates the angle of the cut relative to a perpendicular (90-degree) cut.
- Procedure: Use a reliable square to check if the 0-degree mark on the scale aligns perfectly with a 90-degree angle to the fence.
- Adjustment: If it’s off, loosen the adjustment screw (consult your saw’s manual) and align the scale. Tighten the screw securely.
Assessing the Bevel Angle
The bevel angle is the angle of the saw blade relative to the base.
- Procedure: Set the bevel to 0 degrees (vertical) and use a square to check if the blade is perfectly perpendicular to the table.
- Adjustment: If adjustment is needed, consult your saw’s manual for the bevel adjustment procedure. It usually involves loosening a bolt and tilting the saw head.
Ensuring Fence Straightness
The fence provides a reference surface for your workpiece.
- Procedure: Use a straight edge to check if the fence is perfectly straight along its entire length.
- Adjustment: If the fence is misaligned, check for loose screws or bolts connecting it to the saw’s base. Tighten them or adjust the fence position as needed.
Blade Condition
A sharp, clean blade is essential for clean cuts. Refer to miter saw blade selection for proper blade types and care.
- Inspection: Check the blade for missing teeth, excessive wear, or resin buildup.
- Replacement/Cleaning: Replace dull or damaged blades. Clean resin buildup with a blade cleaner and a stiff brush.
Secure Work Area
Keep your work area clear.
- Remove clutter and debris that could interfere with your work.
- Ensure adequate lighting to see your work clearly.
- Have dust collection set up.
The Fundamentals of Crosscutting with a Miter Saw
Crosscutting is making a cut perpendicular to the length of the workpiece.
Positioning the Workpiece
- Place the workpiece firmly against the fence. The fence should be straight.
- Make sure the piece is flat on the miter saw table.
- Use clamps to hold the material if needed, especially with longer pieces.
Blade Alignment
- Line up the blade with your cut mark.
- Double-check your measurements before cutting.
The Cutting Process
- Turn on the saw. Let the blade reach full speed.
- Grip the handle firmly. Pull the blade forward through the wood smoothly. Don’t force it.
- Push the blade back to its starting position after the cut.
- Turn off the saw. Wait for the blade to stop completely before removing the cut piece.
Mastering Miter Cuts: Miter Saw Angle Guide
Miter cuts are angled cuts across the width of the workpiece. Miter saw techniques will allow to make precise angled cuts.
Setting the Miter Angle
- Loosen the miter lock lever.
- Rotate the saw to the desired angle using the miter scale.
- Tighten the miter lock lever securely.
Accurate Angle Verification
- Use a protractor or angle finder to confirm the miter saw angle guide is correct.
- Small errors can accumulate, especially in complex projects.
Making the Cut
- Follow the same cutting process as crosscutting. Keep the piece held firm against the fence.
Delving into Bevel Cutting with a Miter Saw
Bevel cuts are angled cuts through the thickness of the workpiece.
Adjusting the Bevel Angle
- Loosen the bevel lock.
- Tilt the saw head to the desired bevel angle, using the bevel scale.
- Tighten the bevel lock firmly.
Supporting the Workpiece
- Make sure the workpiece is stable and supported, particularly with larger bevel angles.
- Clamps are helpful to prevent movement.
Making the Cut
- Operate the saw just like crosscuts and miter cuts. Keep the workpiece secure and blade moving smoothly.
Compound Miter Saw Cutting: Combining Miter and Bevel
Compound cuts combine both miter and bevel angles in a single cut.
Setting Both Angles
- Set the miter angle as described above.
- Set the bevel angle as described above.
- Double-check both angles before proceeding.
Planning the Cut
- Visualize the cut to ensure it will be oriented correctly.
- Practice on scrap material.
Executing the Cut
- Follow the same cutting procedures. Pay extra attention to stability.
Advanced Miter Saw Techniques
These miter saw techniques will enhance your cutting precision and project quality.
Using Stop Blocks
- Stop blocks are useful for making repetitive cuts of the same length.
- Clamp a block of wood to the fence. Place it at the desired length.
- Butt the workpiece against the stop block for each cut.
Featherboards for Control
- Featherboards apply consistent pressure to the workpiece against the fence. This enhances safety and cut quality.
- Mount featherboards to the fence and table.
Measuring Techniques
- Precise Measurements: Use a quality measuring tape or ruler.
- Double-Checking: Always double-check your measurements before cutting.
- Marking: Use a sharp pencil or marking knife for clear, thin cut lines.
Miter Saw Safety: A Paramount Concern
Miter saw safety should be your first priority.
Personal Protective Equipment (PPE)
- Eye Protection: Always wear safety glasses or a face shield.
- Hearing Protection: Use earplugs or earmuffs, especially for prolonged use.
- Dust Mask: Wear a dust mask to avoid inhaling sawdust.
Safe Operating Practices
- Keep Hands Clear: Never place your hands in the path of the blade.
- Secure Workpiece: Make sure the workpiece is firmly against the fence.
- No Reaching: Avoid reaching over the blade.
- Full Speed: Let the blade reach full speed before cutting.
- Wait to Stop: Wait for the blade to stop completely before removing material.
- Disconnect Power: Unplug the saw before making any adjustments.
Avoiding Kickback
Kickback happens when the blade binds in the wood. It can cause the saw to jump back violently.
- Sharp Blades: Use sharp blades.
- Smooth Cutting: Cut smoothly without forcing the saw.
- Proper Support: Provide adequate support for the workpiece.
Miter Saw Blade Selection
Selecting the right blade is key to successful cutting.
Tooth Count
- Higher Tooth Count: For fine cuts and smoother edges.
- Lower Tooth Count: For faster cuts, but rougher edges.
Blade Material
- High-Speed Steel (HSS): For cutting wood, plastic, and aluminum.
- Carbide-Tipped: For longer life and cutting harder materials.
Blade Diameter and Arbor Size
- Make sure the blade diameter matches your saw.
- Ensure the arbor size (center hole) matches the saw’s arbor.
Blade Type
| Blade Type | Application |
|---|---|
| General Purpose | Cutting a variety of wood types |
| Fine Finish | Making smooth, clean cuts in hardwoods and trim |
| Metal Cutting | Cutting aluminum, steel, and other non-ferrous metals |
| Plywood/Laminate | Preventing tear-out when cutting plywood and laminates |
| Framing | Fast, efficient cutting of lumber for framing |
Best Miter Saw Practices: Maintaining Accuracy and Longevity
Following these best miter saw practices will ensure lasting accuracy and extend the life of your tool.
Regular Cleaning
- Clean sawdust and debris from the saw after each use.
- Use a brush or vacuum to remove dust from the motor and vents.
Lubrication
- Lubricate moving parts. Use a dry lubricant to prevent dust buildup.
- Consult your saw’s manual for lubrication points.
Blade Maintenance
- Clean resin buildup from the blade regularly.
- Sharpen or replace dull blades.
Storage
- Store the saw in a dry place.
- Protect it from dust and moisture.
Troubleshooting Common Problems
- Inaccurate Cuts: Recalibrate the saw. Check the blade for sharpness.
- Rough Cuts: Use a finer-tooth blade. Reduce cutting speed.
- Saw Vibration: Check for loose bolts or screws. Ensure the blade is properly installed.
- Motor Overheating: Clean the motor vents. Let the saw cool down.
FAQ: Frequently Asked Questions
- Can I cut metal with my miter saw?
- Answer: Yes, but only with a metal-cutting blade specifically designed for your saw. Using the wrong blade can damage the saw and be dangerous.
- What is the best way to avoid tear-out when cutting plywood?
- Answer: Use a plywood blade with a high tooth count. Score the cut line with a utility knife before cutting. Use backer board.
- How often should I calibrate my miter saw?
- Answer: Check the calibration before each major project or if you notice any inaccuracies in your cuts.
- Who is responsible for miter saw safety on a job site?
- Answer: Everyone on the job site is responsible for safety. This includes the saw operator, supervisors, and anyone working nearby.
- What is the difference between a miter saw and a chop saw?
- Answer: A chop saw only makes straight cuts (90 degrees). A miter saw can make angled cuts (miter cuts).
If you stick to these guidelines, you can use a sliding compound miter saw safely and with total confidence. This will help you get accurate, professional-looking results on every woodworking project you tackle.

Hi, I’m Tom Scalisi, and welcome to The Saw Blog! I started this blog to share my hands-on experience and insights about woodworking tools—especially saws and saw blades. Over the years, I’ve had the chance to work with a wide range of tools, and I’m here to help both professionals and hobbyists make informed decisions when it comes to selecting and using their equipment. Whether you’re looking for in-depth reviews, tips, or just advice on how to get the best performance out of your tools, you’ll find it here. I’m excited to be part of your woodworking journey!