
Can I sharpen band saw blades? Yes, you can sharpen band saw blades. Sharpening your band saw blades is a great way to save money and extend the life of your blades. A sharp blade cuts cleaner, faster, and with less effort. This guide provides a comprehensive overview of band saw blade sharpening techniques, equipping you with the knowledge to maintain your blades effectively.
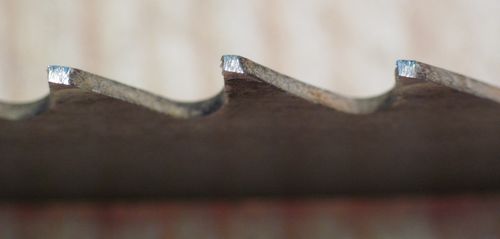
Image Source: woodgears.ca
Why Sharpen Band Saw Blades?
Sharpening your band saw blades offers several key advantages:
- Cost Savings: New blades can be expensive. Sharpening extends the life of your current blades, saving you money.
- Improved Cutting Performance: Sharp blades cut faster and more cleanly.
- Reduced Strain on Your Saw: A dull blade forces your saw to work harder, potentially causing damage.
- Better Quality Cuts: Sharp blades produce smoother, more accurate cuts.
- Reduced Blade Breakage: A sharp blade is less likely to bind and break.
When To Sharpen Your Band Saw Blade
Knowing when to sharpen your band saw blade is essential. Here are some indicators that your blade needs sharpening:
- Slow Cutting Speed: The saw takes longer to cut through materials.
- Burning: The blade produces smoke or burn marks on the wood.
- Wavy or Uneven Cuts: The blade wanders or produces inconsistent cuts.
- Excessive Vibration: The saw vibrates more than usual.
- Dull Teeth: Visually inspect the blade for rounded or damaged teeth.
Tools and Equipment for Sharpening Band Saw Blades
Before you begin sharpening band saw blades at home, you’ll need the right tools. Here’s a list of essential equipment:
- Band Saw Blade Sharpener: This is the most important tool. There are manual and automatic sharpeners available.
- Magnifying Glass or Jeweler’s Loupe: To inspect the teeth closely.
- Work Gloves: To protect your hands.
- Safety Glasses: To protect your eyes from metal filings.
- Rags or Shop Towels: For cleaning.
- Blade Welder (Optional): To rejoin blades after sharpening.
- Tooth Setter (Optional): To restore the set of the teeth.
- Depth Gauge (Optional): Ensures uniform tooth grinding.
- Coolant (For automatic sharpeners): Prevents overheating.
- Tooth Grinder: For blades with broken teeth, a tooth grinder can prepare the blade for sharpening.
Band Saw Blade Sharpening Tools: Choosing the Right Sharpener
The best band saw blade sharpener for you will depend on your budget, the frequency with which you sharpen blades, and the type of blades you use. Here are some options:
- Manual Sharpeners: These are typically hand-held files or jigs that guide the file. They are affordable and suitable for occasional sharpening.
- Automatic Sharpeners: These machines automate the sharpening process. They are more expensive but are ideal for frequent sharpening and offer greater precision. These generally use a grinding wheel to resharpen the blades.
- Grinding Wheels: Some sharpeners use small grinding wheels. Ensure you select a grinding wheel that is appropriate for your band saw blade. The grinding wheel should be designed for the material of your band saw.
- Diamond Files: Diamond files are a good choice for hardened steel blades.
Table: Comparing Manual and Automatic Sharpeners
| Feature | Manual Sharpener | Automatic Sharpener |
|---|---|---|
| Cost | Lower | Higher |
| Speed | Slower | Faster |
| Precision | Requires more skill | More Consistent and precise |
| Ease of Use | Steeper learning curve | Easier |
| Frequency of Use | Occasional | Frequent |
| Blade Type | Narrower blades | Wider blades |
Preparing the Band Saw Blade for Sharpening
Before resharpening band saw blades, it’s crucial to prepare the blade properly:
- Clean the Blade: Remove any dirt, resin, or debris from the blade using a wire brush and solvent.
- Inspect the Blade: Look for cracks, missing teeth, or other damage. Discard the blade if you find any significant damage.
- Identify the Tooth Geometry: Note the shape and angle of the teeth. This will help you match the sharpening angle. Most band saw blades feature a “hook” angle.
- Determine the Set: The “set” refers to how the teeth are bent to alternate sides. This provides blade clearance.
Deciphering Tooth Geometry
Different blades have different tooth geometries to optimize performance for cutting specific materials. Common tooth patterns include:
- Standard Tooth: Uniformly spaced teeth with a consistent gullet depth. Good for general-purpose cutting.
- Skip Tooth: Has a wider spacing between teeth, reducing friction and heat buildup. Ideal for cutting soft materials like wood and plastic.
- Hook Tooth: Features a more aggressive angle for faster cutting in thicker materials. Works well for wood and non-ferrous metals.
- Variable Pitch: Blades with variable pitch have a varying number of teeth per inch (TPI). This design reduces vibration and noise and provides smoother cuts in a variety of materials.
Band Saw Blade Sharpening Techniques
There are two primary methods for band saw blade sharpening: manual filing band saw blades and using an automatic sharpener.
Manual Sharpening with a File
This method is suitable for occasional sharpening and smaller blades.
- Secure the Blade: Clamp the blade securely in a vise, exposing only a few teeth at a time.
- Select the Correct File: Use a file with a shape that matches the tooth gullet. A mill bastard file or a specialized saw file works well.
- File at the Correct Angle: Match the original angle of the tooth face. Use slow, deliberate strokes, filing only on the forward stroke.
- Maintain Consistent Pressure: Apply even pressure to avoid uneven sharpening.
- Inspect Your Work: Use a magnifying glass to check the sharpness and uniformity of each tooth.
- Repeat: Move the blade and repeat the process for all teeth.
Sharpening with an Automatic Sharpener
This method is faster and more precise, especially for larger blades or frequent sharpening.
- Set Up the Sharpener: Follow the manufacturer’s instructions to set up the sharpener. This includes adjusting the grinding wheel angle, feed rate, and depth of cut.
- Mount the Blade: Place the blade in the sharpener, ensuring it is properly aligned.
- Start the Sharpener: Turn on the sharpener and allow it to cycle through the teeth.
- Monitor the Process: Watch the sharpening process closely and make any necessary adjustments.
- Coolant: If your sharpener uses coolant, ensure it is flowing properly to prevent overheating.
- Inspect and Adjust: After sharpening, inspect the blade and adjust the settings if needed.
- Deburr (If Necessary): Some sharpening processes can leave burrs on the blade’s edge. If this occurs, use a very fine file or deburring tool to gently remove the burrs.
Step-by-Step Band Saw Blade Sharpening Guide (Manual)
- Preparation: Gather tools: saw file, vise, magnifying glass, gloves, safety glasses.
- Blade Securing: Clamp the band saw blade in the vise, exposing 2-3 teeth.
- File Positioning: Place the file in the gullet, aligning with the original tooth angle.
- Filing Motion: Push the file forward with even pressure, lifting on the return stroke.
- Tooth Inspection: Check each tooth with a magnifying glass for sharpness.
- Repetition: Move the blade along the vise and repeat the process.
- Deburring (if needed): Remove any burrs with a fine file.
- Clean the Blade: Remove filings with a brush.
Step-by-Step Band Saw Blade Sharpening Guide (Automatic)
- Setup: Set up the automatic sharpener (angle, feed rate, depth).
- Blade Mounting: Securely mount the band saw blade in the sharpener.
- Coolant Check: Ensure coolant is flowing, if applicable.
- Machine Start: Turn on the sharpener and monitor the process.
- Process Monitoring: Adjust settings as needed for uniformity.
- Post-Sharpening Inspection: Check blade sharpness.
- Deburring (If Needed): Use a fine file or deburring tool.
- Blade Removal: Remove and clean the sharpened blade.
Maintaining Band Saw Blade Sharpness
Maintaining band saw blade sharpness involves several best practices:
- Proper Blade Selection: Use the correct blade for the material you are cutting.
- Correct Feed Rate: Avoid forcing the blade. Let the saw do the work.
- Blade Tension: Maintain proper blade tension according to the saw manufacturer’s recommendations.
- Coolant/Lubrication: Use coolant or lubricant when cutting metal to reduce friction and heat.
- Regular Cleaning: Keep the blade clean and free from debris.
- Proper Storage: Store blades in a dry place to prevent rust.
- Sharpening Frequency: Sharpen blades regularly before they become excessively dull.
- Check Guides: Ensure the blade guides are properly adjusted to prevent excessive wear.
Setting Band Saw Blade Teeth
When people talk about the “set” of a band saw blade, they are just referring to how the teeth lean slightly to the left and right. This creates a cut that is a little wider than the actual blade, which helps keep the saw from getting stuck in the wood. After you sharpen the blade—especially if you had to file away a lot of metal—you might need to adjust those teeth again. You can do this easily using a tool called a tooth setter.
Why Reset Teeth?
- Prevents Binding: Ensures the blade doesn’t bind in the cut.
- Improves Cut Quality: Provides cleaner, more accurate cuts.
- Reduces Heat and Friction: Reduces friction and heat buildup.
Types of Tooth Setters
- Manual Tooth Setters: These are hand-operated tools that bend the teeth individually.
- Automatic Tooth Setters: These machines automate the setting process, providing more consistent results.
How to Set Teeth Manually
- Secure the Blade: Clamp the blade in a vise, exposing only a few teeth.
- Position the Setter: Place the tooth setter on the tooth to be set.
- Apply Pressure: Apply pressure to the setter to bend the tooth to the correct angle.
- Alternate Sides: Alternate setting teeth to the left and right.
- Inspect Your Work: Use a gauge to ensure the set is consistent.
- Repeat: Move the blade and repeat the process for all teeth.
Troubleshooting Common Sharpening Problems
Here are some common problems encountered during band saw blade sharpening and how to solve them:
- Uneven Sharpening: Ensure consistent pressure and angle when sharpening.
- Overheating: Use coolant to prevent overheating, especially with automatic sharpeners.
- Broken Teeth: If a tooth is broken, consider using a tooth grinder to prepare the blade. If multiple teeth are broken, replace the blade.
- Inconsistent Set: Use a tooth setter to ensure the set is uniform.
- Blade Breakage: Dull blades are prone to breakage. Sharpen your blades regularly and use the correct blade for the material you are cutting.
- Wandering Cuts: Can be caused by a dull blade, improper tension, or misaligned guides.
Safety Precautions
- Always wear safety glasses to protect your eyes from metal filings.
- Wear work gloves to protect your hands.
- Work in a well-ventilated area.
- Follow the manufacturer’s instructions for your sharpener.
- Disconnect the power supply before making any adjustments to your band saw or sharpener.
- Use caution when handling sharp blades.
Cost Analysis: Sharpening vs. Replacing
Let’s compare the cost of sharpening versus replacing band saw blades:
| Item | Cost (USD) |
|---|---|
| New Band Saw Blade | \$20 – \$100 |
| Manual Sharpener | \$20 – \$50 |
| Automatic Sharpener | \$200 – \$1000+ |
| Sharpening Service | \$10 – \$30 per blade |
Over time, sharpening your own blades can save you significant money compared to constantly buying new blades or paying for a sharpening service. Sharpening band saw blades DIY is often more cost effective for frequent users.
Frequently Asked Questions (FAQ)
- How often should I sharpen my band saw blade?
- The frequency depends on the type of material you’re cutting and how often you use the saw. Sharpen when you notice a decrease in cutting performance or the blade shows signs of dullness.
- What is the best file for sharpening band saw blades?
- A mill bastard file or a specialized saw file with a shape that matches the tooth gullet is suitable. Diamond files work well for hardened steel blades.
- Can I use a Dremel to sharpen my band saw blade?
- While possible, using a Dremel is not recommended. It’s difficult to maintain a consistent angle and pressure, which can lead to uneven sharpening.
- How do I know if my blade is beyond sharpening?
- If the blade has significant damage, such as cracks, missing teeth, or excessive wear, it’s best to replace it.
- What is the correct tension for my band saw blade?
- Refer to your band saw manufacturer’s recommendations for the correct tension. Proper tension is crucial for blade performance and longevity.
- Can I sharpen bimetal band saw blades?
- Yes, you can sharpen bimetal blades, but it may require a diamond file or a specialized grinding wheel.
- Are automatic band saw blade sharpeners worth the investment?
- If you frequently sharpen blades or have a large number of blades to maintain, an automatic sharpener can be a worthwhile investment.
- Where can I get my band saw blades professionally sharpened?
- Search online for local saw sharpening services or check with your local hardware or woodworking supply store.
By following this band saw blade sharpening guide, you can effectively sharpen your band saw blades, save money, and extend their life. Remember to prioritize safety and take your time to achieve the best results.

Hi, I’m Tom Scalisi, and welcome to The Saw Blog! I started this blog to share my hands-on experience and insights about woodworking tools—especially saws and saw blades. Over the years, I’ve had the chance to work with a wide range of tools, and I’m here to help both professionals and hobbyists make informed decisions when it comes to selecting and using their equipment. Whether you’re looking for in-depth reviews, tips, or just advice on how to get the best performance out of your tools, you’ll find it here. I’m excited to be part of your woodworking journey!