
A table saw is a powerful tool for cutting wood. What is crucial before using one is knowing how to use it safely. Can I just jump in and start cutting? No. Who is responsible for your safety? You are! This guide covers table saw safety, basic operation, essential techniques, and maintenance for beginners.
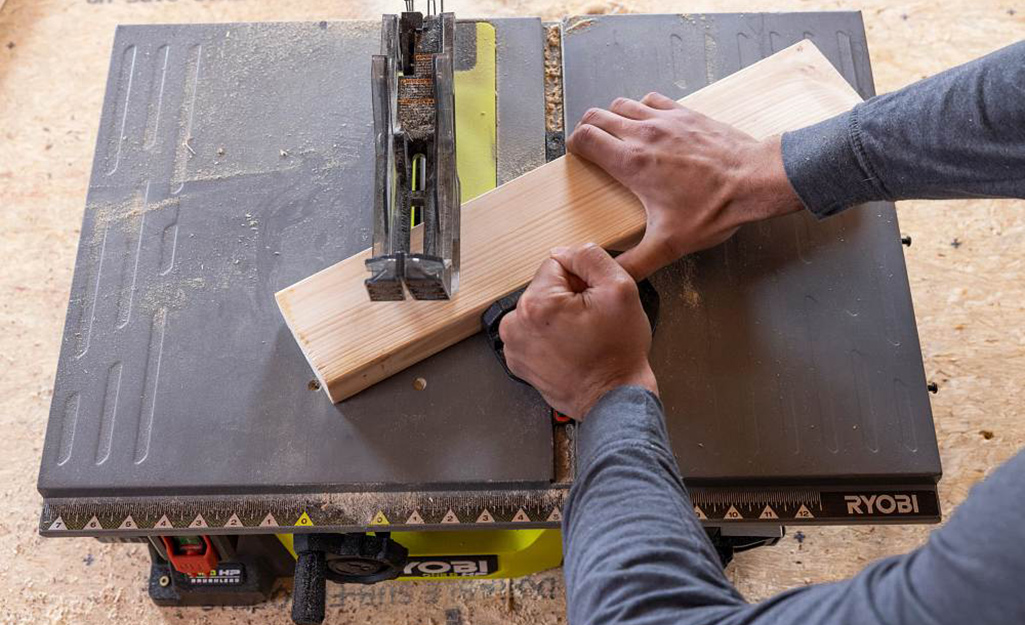
Image Source: contentgrid.homedepot-static.com
Table Saw Safety: Your Top Priority
Why Table Saw Safety Matters
Table saws can cause serious injuries if not used properly. These injuries can include cuts, amputations, and even death. Always take precautions to minimize the risks.
Essential Safety Gear
- Safety Glasses: Protect your eyes from flying debris.
- Hearing Protection: Table saws are loud, and prolonged exposure can damage your hearing.
- Dust Mask or Respirator: Sawdust can irritate your lungs.
- Push Sticks and Push Blocks: Keep your hands away from the blade.
- Featherboards: Maintain consistent pressure against the fence and table.
The Importance of a Safe Workspace
- Clear the Area: Remove clutter from around the table saw.
- Good Lighting: Make sure you can see what you are doing.
- Stable Footing: Wear shoes with good traction.
- No Distractions: Focus on the task at hand.
Before Every Cut: Safety Checks
- Inspect the Blade: Look for damage or missing teeth.
- Check the Fence and Miter Gauge: Ensure they are properly aligned and locked in place.
- Test the Power Switch: Make sure it works smoothly and is easily accessible.
- Anti-Kickback Pawls and Splitter/riving knife: Ensure these are installed and functioning correctly.
Common Table Saw Hazards and How to Avoid Them
| Hazard | Description | Prevention |
|---|---|---|
| Kickback | The workpiece is thrown back towards the operator. | Use a splitter/riving knife, anti-kickback pawls, and feed the wood at a consistent rate. |
| Blade Contact | Coming into contact with the spinning blade. | Always use push sticks/blocks when cutting close to the blade, and keep your hands away from the blade path. |
| Flying Debris | Small pieces of wood or saw dust thrown into the air. | Wear safety glasses and use dust collection. |
| Overreaching | Reaching over the blade to grab the workpiece. | Stop the saw and wait for the blade to stop spinning before retrieving the workpiece. |
| Loose Clothing | Clothing getting caught in the blade. | Wear tight-fitting clothing and remove any jewelry. |
Rules to Live By
- Never reach over the blade.
- Always use push sticks or push blocks when necessary.
- Keep your work area clean and well-lit.
- Never force the wood through the blade.
- Pay attention to what you are doing.
- If you are tired or distracted, stop working.
- Read the user manual for your specific table saw model.
Basic Table Saw Operation
Table Saw Components: A Quick Tour
- Table: The flat surface on which you place the workpiece.
- Blade: The circular cutting tool.
- Fence: A guide that runs parallel to the blade, used for ripping.
- Miter Gauge: A guide that slides in a slot, used for crosscutting.
- Blade Height Adjustment: A mechanism for raising and lowering the blade.
- Blade Tilt Adjustment: A mechanism for tilting the blade for bevel cuts.
- Power Switch: Turns the saw on and off.
- Riving Knife/Splitter: A safety device that prevents the wood from pinching the blade and causing kickback.
- Anti-Kickback Pawls: Another safety device that prevents the wood from being thrown back towards the operator.
- Dust Port: A connection point for a dust collection system.
Table Saw Setup: Getting Ready to Cut
- Level the Table: Make sure the table is level for accurate cuts.
- Install the Blade: Choose the right blade for the job and install it securely.
- Align the Fence: The fence should be parallel to the blade.
- Set the Blade Height: The blade should be high enough to cut through the workpiece, but not too high. As a general rule, the blade should extend no more than a ¼ inch above the material you are cutting.
- Attach Dust Collection: Connect a dust collector to minimize dust.
Basic Cutting Techniques
- Ripping: Cutting with the grain of the wood, using the fence as a guide.
- Set the fence to the desired width.
- Turn on the saw and feed the wood slowly and steadily, keeping it tight against the fence.
- Use a push stick to guide the wood through the last few inches.
- Crosscutting: Cutting against the grain of the wood, using the miter gauge as a guide.
- Set the miter gauge to the desired angle.
- Hold the wood firmly against the miter gauge.
- Turn on the saw and push the miter gauge forward, cutting through the wood.
Table Saw Cutting Methods
Ripping Straight Cuts
This is a fundamental table saw technique for cutting boards to a specific width.
- Measure and Mark: Accurately measure and mark the desired width on your board.
- Set the Fence: Adjust the fence to the marked measurement. Double-check the distance from the fence to the blade with a ruler or measuring tape.
- Position the Board: Place the board flat on the table saw, with one edge firmly against the fence.
- Power On: Turn on the table saw, ensuring it reaches full speed.
- Feed the Board: Slowly and steadily push the board through the blade, maintaining consistent pressure against the fence. Avoid stopping or changing speed mid-cut.
- Use Push Sticks: When the end of the board gets close to the blade, use a push stick to safely guide it through the rest of the cut. This keeps your hands away from the blade.
Crosscutting with a Miter Gauge
Crosscutting is used to make cuts perpendicular to the grain, typically for shortening boards or creating square ends.
- Attach the Miter Gauge: Insert the miter gauge into one of the miter slots on the table saw.
- Position the Board: Place the board against the miter gauge. For a simple 90-degree cut, ensure the miter gauge is set to zero degrees.
- Secure the Board: Hold the board firmly against the miter gauge to prevent it from shifting during the cut. You can use clamps for extra stability.
- Power On: Turn on the table saw.
- Feed the Board: Push the miter gauge and board together through the blade in a smooth, controlled motion. Maintain constant pressure to ensure a clean, accurate cut.
- Complete the Cut: Push the board completely through the blade. Turn off the saw and wait for the blade to stop before removing the cut piece.
Bevel Cutting
Bevel cuts create angled edges on your workpieces.
- Adjust Blade Angle: Loosen the blade tilt adjustment knob and tilt the blade to the desired angle. Use a protractor or angle gauge to ensure accuracy. Tighten the knob to secure the blade at the set angle.
- Set the Fence: Position the fence as needed, depending on the orientation of the bevel cut.
- Position the Board: Place the board against the fence, ensuring it’s stable and properly aligned for the bevel cut.
- Power On: Turn on the table saw.
- Feed the Board: Slowly and steadily push the board through the blade, maintaining consistent pressure against the fence.
- Use Push Sticks: Employ push sticks as needed to keep your hands safe and guide the board through the cut.
Table Saw Blade Selection
Choosing the Right Blade for the Job
- General Purpose Blades: Suitable for a variety of cuts in different types of wood.
- Ripping Blades: Designed for cutting with the grain of the wood.
- Crosscutting Blades: Designed for cutting against the grain of the wood.
- Plywood Blades: Designed for cutting plywood and other sheet goods without splintering.
- Dado Blades: Used for cutting wide grooves or dados.
- Non-Ferrous Metal Cutting Blades: For cutting materials like aluminum.
Blade Tooth Configuration
- Tooth Count: More teeth = smoother cut, slower cutting speed. Fewer teeth = rougher cut, faster cutting speed.
- Tooth Angle: Affects the aggressiveness of the cut.
- Tooth Grind: Different grinds are designed for different materials.
Table Saw Blade Selection Chart
| Blade Type | Material | Cut Quality | Speed |
|---|---|---|---|
| General Purpose | Wood, Plywood | Good | Medium |
| Ripping | Wood | Fair | Fast |
| Crosscutting | Wood | Excellent | Slow |
| Plywood | Plywood | Excellent | Medium |
| Dado | Wood | Good | Slow |
| Non-Ferrous Metal | Aluminum | Good | Slow |
Table Saw Jigs
What are Table Saw Jigs?
Table saw jigs are devices that help you make more accurate and repeatable cuts. They can also improve safety by keeping your hands further away from the blade.
Types of Table Saw Jigs
- Miter Sled: A large platform that slides in the miter slot, providing a stable base for crosscutting.
- Tenoning Jig: Used for cutting tenons (protruding pieces of wood that fit into mortises).
- Tapering Jig: Used for cutting tapers (gradual changes in width).
- Box Joint Jig: Used for cutting box joints (interlocking fingers of wood).
- Featherboard: Holds wood against the fence.
Building and Using Simple Jigs
Simple jigs can be made from scrap wood and hardware. Online plans are widely available.
How Jigs Improve Accuracy and Safety
Jigs provide stability, repeatability, and keep your hands further away from the blade.
Table Saw Maintenance
Keeping Your Table Saw in Top Condition
Regular maintenance will extend the life of your table saw and ensure it operates safely and accurately.
Cleaning
- Remove Sawdust: Use a brush, vacuum, or compressed air to remove sawdust from the table, fence, and motor.
- Clean the Blade: Use a blade cleaner to remove resin and pitch buildup.
Lubrication
- Lubricate Moving Parts: Apply a dry lubricant to the fence, miter gauge, and blade height adjustment mechanism.
- Wax the Table: Apply a coat of wax to the table surface to reduce friction.
Alignment
- Check Fence Alignment: Ensure the fence is parallel to the blade.
- Check Blade Alignment: Ensure the blade is perpendicular to the table.
Blade Maintenance
- Sharpen the Blade: A dull blade can cause kickback and poor cut quality.
- Replace the Blade: If the blade is damaged or excessively worn, replace it.
Maintenance Schedule
| Task | Frequency |
|---|---|
| Remove Sawdust | After Each Use |
| Clean the Blade | Monthly |
| Lubricate Moving Parts | Monthly |
| Wax the Table | Monthly |
| Check Fence Alignment | Every 3 Months |
| Check Blade Alignment | Every 3 Months |
| Sharpen/Replace Blade | As Needed |
Table Saw Techniques: Mastering Advanced Cuts
Cutting Dados and Rabbets
- Dado Blades: Using a dado blade set for wider cuts.
- Multiple Passes: Making multiple passes with a standard blade.
Cutting Curves
- Creating a Template: Making a template of the desired curve.
- Using a Jig: Designing a jig to hold the workpiece securely.
Cutting Thin Strips
- Specialized Jigs: Using a jig designed for cutting thin strips safely.
- Push Sticks/Blocks: Using push sticks and blocks to maintain control.
Cutting Large Panels
- Outfeed Support: Using outfeed tables or rollers to support large panels.
- Helper: Having a helper to assist with feeding the panel.
Table Saw Operation: Avoiding Common Mistakes
- Rushing the Cut: Slow and steady is always better.
- Forcing the Wood: If the wood is not cutting easily, stop and check the blade.
- Ignoring Safety Rules: Always follow safety rules, even if you are experienced.
- Using a Dull Blade: A dull blade is more likely to cause kickback.
- Improper Setup: Make sure the table saw is properly set up before you start cutting.
Frequently Asked Questions (FAQ)
- What is kickback and how can I prevent it?
Kickback is when the wood is thrown back towards the operator. To prevent kickback, use a splitter/riving knife, anti-kickback pawls, and feed the wood at a consistent rate. - Can I use a table saw to cut metal?
Yes, but only with a blade specifically designed for cutting metal. - How often should I sharpen my table saw blade?
It depends on how often you use the saw and what types of wood you are cutting. Sharpen the blade when it starts to dull or when you notice a decrease in cut quality. - What is the best way to clean my table saw?
Use a brush, vacuum, or compressed air to remove sawdust. Clean the blade with a blade cleaner. - Is it safe to cut freehand on a table saw?
No. Always use the fence or miter gauge to guide your cuts. - What do I do if my wood starts to bind in the middle of a cut?
Stop the saw immediately. Never try to force the wood through. Investigate the cause of the binding, and adjust accordingly. Ensure your riving knife/splitter is properly installed and aligned. - What is a riving knife, and why is it important?
A riving knife is a safety feature that sits behind the blade and moves with it, keeping the kerf (the cut made by the blade) open. This prevents the wood from pinching the blade and causing kickback. It is a critical safety component, and should always be used. - Why is dust collection important when using a table saw?
Dust collection is important to maintain a clean and safe workspace. Sawdust can be harmful to your lungs and can also create a fire hazard. Connecting your table saw to a dust collector helps remove this sawdust, improving visibility and reducing health risks.
If you stick to these safety rules, practice the basics, and take good care of your gear, you will be able to use your table saw for all kinds of projects. Safety is the most important thing here, so don’t rush. Take your time to really learn the right way to handle the saw, and you will do great.

Hi, I’m Tom Scalisi, and welcome to The Saw Blog! I started this blog to share my hands-on experience and insights about woodworking tools—especially saws and saw blades. Over the years, I’ve had the chance to work with a wide range of tools, and I’m here to help both professionals and hobbyists make informed decisions when it comes to selecting and using their equipment. Whether you’re looking for in-depth reviews, tips, or just advice on how to get the best performance out of your tools, you’ll find it here. I’m excited to be part of your woodworking journey!