
A circular saw table helps you make accurate and repeatable cuts. Can I make one myself? Yes, you can! Building a homemade circular saw table is a great way to improve your woodworking precision without investing in an expensive table saw. This guide provides comprehensive circular saw table plans and instructions.
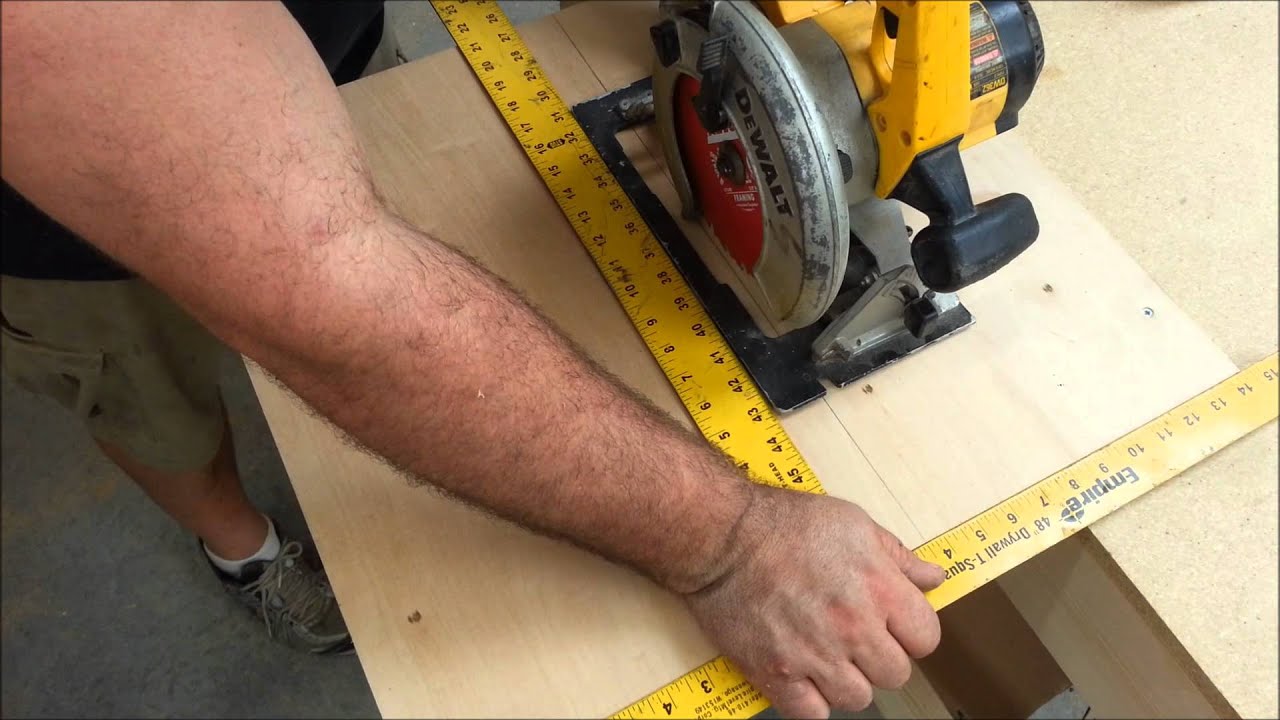
Image Source: i.ytimg.com
Why Build a Circular Saw Table?
Circular saws are powerful and versatile, but they can be challenging to control for precise cuts, especially when working with larger pieces of material. A circular saw table offers several advantages:
- Improved Accuracy: A stable platform and fence system allow for straighter, more accurate cuts.
- Increased Safety: Securing the saw reduces the risk of kickback and other accidents.
- Enhanced Control: You can focus on guiding the material rather than controlling the saw.
- Repeatable Cuts: A fence allows you to make multiple cuts of the same size quickly and accurately.
- Cost-Effective: Building your own table is much cheaper than buying a professional-grade table saw.
- Table Saw Alternative: It’s a fantastic alternative for those with limited space or budget.
Planning Your Circular Saw Table
Before you begin building, careful planning is crucial.
Circular Saw Table Dimensions
Consider the size of your workspace and the types of projects you’ll be working on. A good starting point for the table dimensions is:
- Length: 36-48 inches
- Width: 24-36 inches
- Height: 34-36 inches (standard table saw height)
These dimensions provide a good balance between workspace and portability.
Choosing Materials
- Tabletop: ¾-inch plywood or MDF (Medium-Density Fiberboard) provides a flat, stable surface.
- Frame: 2×4 lumber is strong and readily available.
- Legs: 2×4 lumber or metal legs can be used.
- Circular Saw Mounting Plate: Phenolic, acrylic, or sturdy plywood.
- Fasteners: Screws, bolts, and wood glue.
Essential Tools
- Circular Saw
- Drill/Driver
- Jigsaw
- Measuring Tape
- Square
- Safety Glasses
- Hearing Protection
Building the Circular Saw Table: Step-by-Step
Here are detailed instructions for building a basic circular saw table.
1. Constructing the Table Frame
The frame provides the structural support for the table.
-
Cut the 2×4 lumber to the desired dimensions for the frame. For example:
- Two pieces for the length of the table
- Two pieces for the width of the table
2. Assemble the frame using screws and wood glue. Ensure the frame is square by measuring the diagonals; they should be equal.
3. Add cross supports every 12-16 inches to prevent sagging. These supports should also be made from 2×4 lumber.
2. Attaching the Tabletop
The tabletop provides a flat surface for your work.
- Cut the plywood or MDF to the desired tabletop dimensions.
- Place the frame on the underside of the tabletop.
- Secure the tabletop to the frame using screws. Make sure the screws are short enough not to go through the top.
3. Adding the Legs
The legs provide stability and support.
- Cut the 2×4 lumber to the desired height for the legs.
- Attach the legs to the inside corners of the frame using screws and wood glue. Ensure the legs are plumb (vertical).
- For added stability, consider adding cross braces between the legs.
Table: Example Material List for Basic Table
| Material | Dimensions | Quantity |
|---|---|---|
| Plywood (Tabletop) | ¾” x 36″ x 24″ | 1 |
| 2×4 Lumber (Frame) | As needed for frame size | Varies |
| 2×4 Lumber (Legs) | As needed for table height | 4 |
| Mounting Plate Material | ¼” x 12″ x 12″ (estimated) | 1 |
| Screws | 1 ¼”, 2 ½” | Varies |
| Wood Glue | Any size | 1 |
4. Creating the Circular Saw Mounting Plate
The mounting plate is a critical component that holds the circular saw securely beneath the table.
- Choose Your Material: Phenolic is ideal due to its durability and flatness, but acrylic or sturdy plywood can also work.
- Cut the Plate: Cut the mounting plate to a size that is slightly larger than the base of your circular saw. A square shape, approximately 12″ x 12″, is a good starting point.
- Locate and Mark: Place your circular saw on the mounting plate and trace the outline of the saw’s base. Mark the location of the saw’s mounting holes.
- Drill Mounting Holes: Drill holes in the mounting plate to match the mounting holes on your circular saw.
- Create the Blade Slot: Carefully measure and mark the path of the saw blade on the mounting plate. Use a jigsaw to cut a slot wide enough for the blade to move freely. Start with a narrow slot; you can always widen it later.
- Counter Sink: Countersink the mounting holes from the top side of the plate, allowing the screw heads to sit flush with the surface.
5. Mounting the Circular Saw
- Position the Plate: Place the mounting plate on the underside of the tabletop, aligning the blade slot with the desired location on the table. Usually, centered side-to-side and about 6″-8″ from one end of the table.
- Secure the Plate: Use screws to attach the mounting plate to the tabletop. Make sure the screws are short enough not to protrude through the top of the table.
- Attach the Saw: Bolt the circular saw to the mounting plate using the pre-drilled holes. Ensure the saw is securely fastened and that the blade is perpendicular to the table surface.
6. Building a Circular Saw Table Fence
A fence is essential for making straight, accurate cuts.
- Simple Fence: A straight piece of wood clamped to the table can serve as a basic fence.
- Adjustable Fence: For more precision, build an adjustable fence:
- Cut two pieces of wood for the fence rails.
- Attach T-tracks to the tabletop, parallel to the blade slot.
- Attach T-bolts to the fence rails that slide into the T-tracks. This allows you to adjust the fence position and lock it in place.
- High Fence: Use thicker material or add bracing to the fence to keep it rigid and prevent flexing.
Tips for Accuracy
- Use a combination square to ensure the fence is perpendicular to the blade.
- Make small test cuts to fine-tune the fence position.
- Clamp the fence securely to the table before making each cut.
7. Fine-Tuning and Safety Checks
- Blade Alignment: Ensure the saw blade is perfectly perpendicular to the table surface and parallel to the miter slot (if you’ve added one).
- Secure Mounting: Double-check that the circular saw is securely mounted to the mounting plate.
- Fence Squareness: Verify that the fence is square to the blade.
- Test Cuts: Make several test cuts to ensure accuracy and identify any potential issues.
- Safety Measures: Always wear safety glasses and hearing protection when using the saw. Use push sticks to keep your hands away from the blade.
Advanced Features and Add-ons
Once you have a basic circular saw table, you can add advanced features to enhance its functionality.
Making a Circular Saw Sled
A circular saw sled is a platform that slides along the table, providing even greater accuracy and control for crosscuts and angled cuts.
- Build the Base: Cut a piece of plywood to the desired size for the sled base.
- Add Runners: Attach runners to the underside of the base that fit snugly into the miter slots on the table.
- Attach Fences: Add fences to the front and back of the base, perpendicular to the blade slot.
- Safety Features: Consider adding a handle and a blade guard for increased safety.
Dust Collection
Sawdust can be a nuisance and a health hazard. Adding a dust collection system to your circular saw table can help keep your workspace clean and safe.
- Enclose the Saw: Build an enclosure around the saw blade to contain the sawdust.
- Add a Dust Port: Attach a dust port to the enclosure that connects to a shop vacuum or dust collector.
- Improve Airflow: Consider adding vents to improve airflow and dust collection efficiency.
Portable Circular Saw Table
If you need to move your table easily, consider building a portable version.
- Folding Legs: Use folding legs that can be easily collapsed for transport.
- Lightweight Materials: Use lightweight materials such as thinner plywood and aluminum for the frame.
- Carry Handles: Add carry handles to make it easier to move the table.
Building Circular Saw Jig
A circular saw jig helps improve accuracy and safety when making specific cuts.
Types of Jigs
- Straight Line Rip Jig: For cutting long, straight edges.
- Circle Cutting Jig: For cutting perfect circles.
- Tapering Jig: For cutting tapered legs or other angled pieces.
How to Build a Simple Straight Line Rip Jig
- Cut a Base: Cut a piece of plywood slightly wider than your circular saw base.
- Attach a Guide Rail: Attach a straight piece of wood to the base, parallel to the edge of the plywood. This will guide the saw along the edge of the material.
- Secure the Material: Clamp the material to the jig, ensuring it is aligned with the guide rail.
- Make the Cut: Run the saw along the guide rail to make a straight, accurate cut.
Safety Precautions
Safety should always be your top priority when working with power tools.
- Wear Safety Glasses: Protect your eyes from flying debris.
- Use Hearing Protection: Protect your ears from the noise of the saw.
- Wear a Dust Mask: Protect your lungs from sawdust.
- Keep Hands Away from Blade: Use push sticks or push blocks to keep your hands away from the blade.
- Disconnect Power: Disconnect the power cord before making any adjustments or repairs.
- Read the Manual: Familiarize yourself with the saw’s operating instructions and safety guidelines.
Circular Saw Mounting Plate Materials
Choosing the right material for your circular saw mounting plate is crucial for safety and performance. The mounting plate must be strong, stable, and able to withstand the vibrations and forces generated by the circular saw. Here’s a breakdown of common materials and their pros and cons:
| Material | Pros | Cons |
|---|---|---|
| Phenolic | Extremely durable, dimensionally stable, resists warping, smooth surface for easy saw movement. | More expensive, can be harder to find. |
| Acrylic | Strong, clear (allowing visibility), relatively easy to work with. | Can be brittle, may crack under stress, susceptible to scratches. |
| Plywood (Baltic Birch) | Readily available, relatively inexpensive, strong, stable if high-quality. | Can warp or delaminate if exposed to moisture, may require sealing. |
| MDF (Medium-Density Fiberboard) | Inexpensive, very flat and smooth surface, easy to cut. | Less durable than other options, prone to swelling when exposed to moisture, less impact resistance. |
Tips for Selecting Mounting Plate
- Thickness: Choose a material that is at least ¼-inch thick for adequate strength and stability. Thicker plates will reduce vibration.
- Flatness: Ensure the material is perfectly flat to prevent the saw from rocking or tilting.
- Durability: Select a material that can withstand the wear and tear of regular use.
- Workability: Consider how easy the material is to cut, drill, and shape.
- Budget: Balance your performance requirements with your budget constraints.
Common Mistakes to Avoid
- Rushing the Build: Take your time and pay attention to detail. Accuracy is key.
- Using Low-Quality Materials: Invest in good quality materials that will last.
- Ignoring Safety Precautions: Always prioritize safety.
- Not Testing the Table: Make sure everything is aligned and working properly before using the table for a project.
- Loose Fasteners: Check for and tighten loose fasteners periodically.
Conclusion
Building your own circular saw table is a great project that really pays off by making your woodworking much more accurate and a lot faster. By using these plans, you can build a custom setup that works exactly the way you need it to. Whether you’re just making a basic workbench or adding a “sled” to help with tricky cuts, having that extra control will make your finished projects look way more professional. Plus, if you don’t have the space or money for a real table saw, a well-built table for your circular saw is a fantastic alternative.
Fathoming the Difference between a Circular Saw Table and a Table Saw
Many folks wonder about the real gap between these tools. Here’s a simple look:
| Feature | Circular Saw Table | Table Saw |
|---|---|---|
| Saw Mounting | Saw is mounted under the table. | Saw is built into the table from the start. |
| Accuracy | Good with proper fence and setup. | Generally higher, designed for precision. |
| Power | Limited by the saw’s power. | Often more powerful, for heavy tasks. |
| Portability | Can be designed to be highly portable. | Generally less portable. |
| Cost | Lower, if building your own. | Higher, especially for quality models. |
| Complexity | Simpler to build and maintain. | More complex, with more features. |
| Typical Tasks | Smaller projects, home improvement tasks. | Large projects, professional woodworking. |
| Safety | Can be safe when using a fence and push stick. | Generally safer due to integrated safety mechanisms. |
Frequently Asked Questions (FAQ)
What is the best material for a circular saw table top?
Plywood (¾-inch) or MDF are excellent choices due to their flatness and stability.
* How can I make my circular saw table more portable?Use folding legs, lightweight materials, and add carry handles.
* Can I use a circular saw table as a table saw alternative?Yes, a well-built circular saw table can be a good alternative for many woodworking tasks.
* Who is this guide for?This guide is tailored for beginner to intermediate woodworkers seeking to improve their cutting accuracy and efficiency with a homemade circular saw table.
* What is a circular saw sled?A circular saw sled is a platform that slides along the table, providing increased accuracy and control for crosscuts and angled cuts.
* How do I ensure my fence is square to the blade?Use a combination square to check the angle between the fence and the blade. Make small adjustments until it is perfectly square.
* What are some common circular saw table dimensions?A good starting point is 36-48 inches in length, 24-36 inches in width, and 34-36 inches in height.
* How thick should the circular saw mounting plate be?At least ¼-inch thick for adequate strength and stability.
* Is dust collection necessary for a circular saw table?While not essential, dust collection can significantly improve your workspace cleanliness and protect your health.
* What are the safety advantages?A circular saw table enhances safety by securing the saw, reducing the risk of kickback, and allowing you to focus on guiding the material, minimizing hand exposure to the blade.

Hi, I’m Tom Scalisi, and welcome to The Saw Blog! I started this blog to share my hands-on experience and insights about woodworking tools—especially saws and saw blades. Over the years, I’ve had the chance to work with a wide range of tools, and I’m here to help both professionals and hobbyists make informed decisions when it comes to selecting and using their equipment. Whether you’re looking for in-depth reviews, tips, or just advice on how to get the best performance out of your tools, you’ll find it here. I’m excited to be part of your woodworking journey!