
Can I build my own table saw fence? Yes, you definitely can! Building your own table saw fence is a fantastic project. It lets you create exactly what you need, making your cuts safer and much more accurate. A sturdy fence is the secret to getting perfect cuts, and making it yourself is a smart way to save money while learning more about how your machine works.
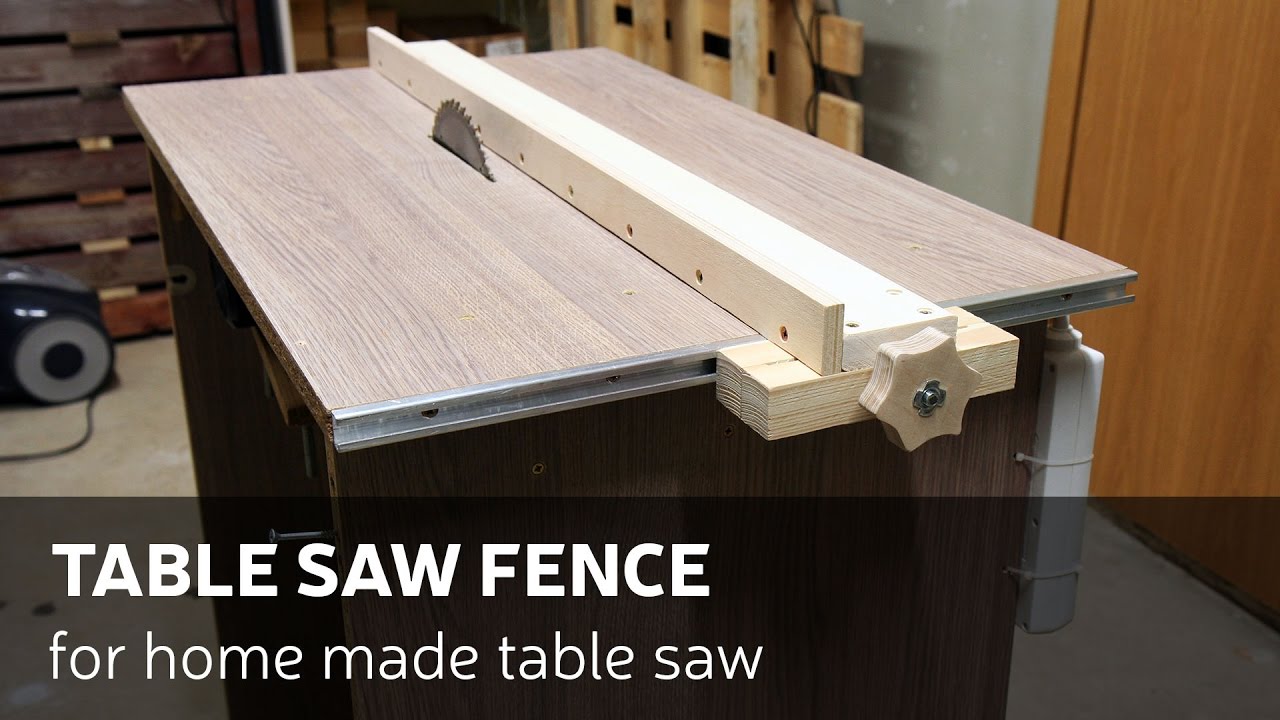
Image Source: i.ytimg.com
Why Build a Table Saw Fence?
A table saw fence upgrade is one of the best improvements you can make to your workshop. The stock fences that come with many table saws are often inaccurate and flimsy, leading to frustration and wasted material. A precision table saw fence, on the other hand, will give you consistent, repeatable cuts, making your woodworking projects much easier and more enjoyable. Here’s why you should consider building your own:
- Improved Accuracy: A homemade fence, when built and aligned correctly, can significantly improve the accuracy of your cuts.
- Cost Savings: Building your own fence can be much cheaper than buying a high-end aftermarket fence.
- Customization: You can customize the fence to fit your specific needs, such as adding storage or specialized features.
- Skill Development: The project provides valuable experience in woodworking and metalworking techniques.
- Enhanced Safety: A stable, well-aligned fence improves safety by providing a reliable guide for your workpiece.
Evaluating Your Needs
Before jumping into the table saw fence construction, take some time to evaluate your specific needs and how you use your table saw. Consider the following:
- What types of projects do you typically work on? Are you cutting large panels, small pieces, or a mix of both?
- What level of accuracy do you require? Do you need to make precise cuts for joinery, or are your projects more forgiving?
- What features are important to you? Do you want micro-adjustment capabilities, a T-track for accessories, or storage space?
- What is your budget?
- What materials and tools do I have available?
Answering these questions will help you determine the best design and materials for your homemade table saw fence.
Design Considerations for Your DIY Table Saw Fence
Many table saw fence plans are available online. Choosing the right design is key to building a fence that meets your needs. Here are some popular design types:
- T-Square Fence: This is a very common and accurate design. It features a fence that slides along a rail system, maintaining a perfect 90-degree angle to the blade.
- Biesemeyer-Style Fence: This is a heavy-duty design known for its rigidity and accuracy. It uses a single rail at the front of the table saw.
- Cam-Lock Fence: This design uses a cam mechanism to clamp the fence in place. It’s simple and effective but may not be as accurate as other designs.
Key Design Elements
Regardless of the specific design, several key elements are important for any accurate table saw fence:
- Straight and Flat Fence Face: The fence face must be perfectly straight and flat to ensure consistent contact with the workpiece.
- Rigid Construction: The fence must be rigid enough to resist deflection during cutting.
- Smooth Movement: The fence should slide smoothly along the rails without binding or catching.
- Secure Locking Mechanism: The locking mechanism must hold the fence firmly in place without any movement.
- Accurate Measurement System: The fence should have a clear and accurate measurement system for setting the fence position.
- Easy Adjustment: A good fence should be easy to adjust, both for large movements and fine-tuning.
Table Saw Fence Materials
Choosing the right table saw fence materials is crucial for the durability and accuracy of your fence. Here are some common options:
- Wood: Hardwoods like maple, oak, or birch are excellent choices for the fence face and other structural components.
- Metal: Steel or aluminum are often used for the rails, locking mechanisms, and other hardware.
- UHMW Plastic: Ultra-high-molecular-weight polyethylene (UHMW) is a slick, durable plastic that’s ideal for wear surfaces and sliding components.
Material Selection Table
| Material | Pros | Cons | Common Uses |
|---|---|---|---|
| Hardwood | Strong, stable, easy to work with, absorbs vibration | Can warp or move with changes in humidity, requires sealing | Fence face, structural components |
| Steel | Very strong, durable, precise | Can rust, requires welding or machining | Rails, locking mechanisms, hardware |
| Aluminum | Lightweight, corrosion-resistant, easy to machine | Not as strong as steel, can be more expensive | Rails, fence body, accessories |
| UHMW Plastic | Slick, durable, low friction | Can be difficult to bond to other materials, relatively expensive | Wear surfaces, sliding components, shims |
| Plywood | Stable, inexpensive, easy to work with | Not as strong as hardwood, edges can chip easily | Substrates for mounting hardware, internal supports |
Step-by-Step Guide to Building Your Own Table Saw Fence System
These steps outline the general process for table saw fence construction. Specific steps will vary depending on the design you choose.
Step 1: Planning and Design
- Choose a Design: Select the design that best meets your needs.
- Create a Detailed Plan: Draw a detailed plan, including dimensions, materials, and construction methods.
- Make a Cut List: Create a list of all the parts you’ll need, along with their dimensions.
Step 2: Preparing the Materials
- Gather Materials: Purchase all the necessary materials.
- Cut the Parts: Cut all the parts according to your cut list.
- Prepare the Wood: Mill the wood to the correct thickness and dimensions. Ensure all surfaces are flat and square.
Step 3: Building the Fence Face
- Assemble the Fence Face: Glue and screw the components of the fence face together.
- Ensure Flatness: Clamp the fence face to a flat surface while the glue dries to prevent warping.
- Sand and Finish: Sand the fence face smooth and apply a durable finish, such as polyurethane or lacquer.
Step 4: Building the Rail System
- Fabricate the Rails: Cut the steel or aluminum rails to the correct length.
- Drill Mounting Holes: Drill holes for mounting the rails to the table saw.
- Attach Hardware: Attach any necessary hardware, such as T-tracks or adjustment screws.
Step 5: Assembling the Fence Body
- Attach the Fence Face to the Body: Securely attach the fence face to the fence body using screws or bolts.
- Integrate the Locking Mechanism: Install the locking mechanism according to your chosen design.
- Ensure Smooth Movement: Make sure the fence slides smoothly along the rails.
Step 6: Installing the Measurement System
- Choose a Measurement System: Select a measurement system, such as a tape measure or a digital readout.
- Install the Measurement System: Install the measurement system according to the manufacturer’s instructions.
- Calibrate the System: Calibrate the measurement system to ensure accuracy.
Step 7: Mounting and Alignment
- Mount the Rails to the Table Saw: Attach the rails to your table saw using bolts or screws.
- Align the Fence: Table saw fence alignment is critical. Align the fence parallel to the saw blade using a precision square or dial indicator.
- Test the Fence: Test the fence by making several cuts and checking for accuracy.
Achieving Accurate Table Saw Fence Alignment
Even the best-built fence is useless if it’s not properly aligned. Here’s how to achieve perfect table saw fence alignment:
- Start with a Flat Table: Ensure your table saw surface is flat and level.
- Use a Precision Square: A high-quality machinist’s square is essential for accurate alignment.
- Align to the Miter Slot: Align the fence parallel to the miter slot using the square. The miter slot is typically parallel to the blade.
- Check Along the Entire Length: Check the alignment at multiple points along the fence to ensure it’s parallel to the miter slot from end to end.
- Make Fine Adjustments: Use shims or adjustment screws to make any necessary fine adjustments.
- Lock the Fence Securely: Once aligned, lock the fence securely in place and recheck the alignment to ensure it hasn’t shifted.
- Test Cuts: Make test cuts on scrap wood to verify the accuracy of the alignment.
- Repeat as Needed: Check the alignment periodically and readjust as needed.
Tips for Success
- Take Your Time: Don’t rush the process. Accurate measurements and careful construction are essential.
- Use Quality Materials: Invest in high-quality materials for a durable and accurate fence.
- Double-Check Everything: Double-check all measurements and alignments before proceeding.
- Seek Advice: Don’t hesitate to ask for help from experienced woodworkers or online forums.
- Practice on Scrap Wood: Practice cutting techniques on scrap wood before working on your final project.
- Safety First: Always wear appropriate safety gear, including eye protection and hearing protection.
Troubleshooting Common Problems
- Fence Won’t Stay Square: Check the locking mechanism and ensure it’s properly tightened. Also, check for loose connections in the fence body.
- Fence Slides Unevenly: Check the rails for debris or damage. Lubricate the rails with a dry lubricant.
- Inaccurate Measurements: Calibrate the measurement system and ensure it’s properly installed.
- Fence Face Isn’t Flat: Use shims to compensate for any irregularities in the fence face. Consider replacing the fence face with a straighter piece of wood.
Frequently Asked Questions (FAQ)
- What is the best material for a table saw fence?
- Hardwoods like maple or oak are excellent for the fence face. Steel or aluminum are good choices for the rails and hardware.
- How do I align my table saw fence?
- Use a precision square to align the fence parallel to the miter slot. Check the alignment at multiple points along the fence.
- How much does it cost to build a table saw fence?
- The cost can vary depending on the materials you choose, but it’s generally much cheaper than buying an aftermarket fence. Expect to spend between $50 and $200.
- What tools do I need to build a table saw fence?
- You’ll need basic woodworking tools, such as a table saw, miter saw, drill, sander, and measuring tools. If using metal, you may also need a welder or metal-cutting tools.
- Can I use plywood for the fence face?
- Plywood can be used, but it’s not as durable or stable as hardwood. If you use plywood, choose a high-quality grade and seal the edges.
- How important is micro-adjustment on a table saw fence?
- Micro-adjustment is extremely useful for achieving highly accurate cuts, especially for joinery. It allows you to make very small adjustments to the fence position.
Building your own table saw fence system is a challenging but rewarding project. With careful planning, accurate construction, and proper alignment, you can create a precision table saw fence that will improve the accuracy and safety of your table saw for years to come. By following these steps and tips, you’ll be well on your way to building a DIY table saw fence that meets your specific needs and enhances your woodworking experience.

Hi, I’m Tom Scalisi, and welcome to The Saw Blog! I started this blog to share my hands-on experience and insights about woodworking tools—especially saws and saw blades. Over the years, I’ve had the chance to work with a wide range of tools, and I’m here to help both professionals and hobbyists make informed decisions when it comes to selecting and using their equipment. Whether you’re looking for in-depth reviews, tips, or just advice on how to get the best performance out of your tools, you’ll find it here. I’m excited to be part of your woodworking journey!