
Can you actually use a circular saw to cut plexiglass? Yes, you sure can! But keep in mind that it’s not quite the same as cutting a piece of wood. To get a clean edge without any annoying chips or cracks, you really need to use the right blade and the right technique. I’ve put together this guide to show you exactly how to do it safely and get the job done right.
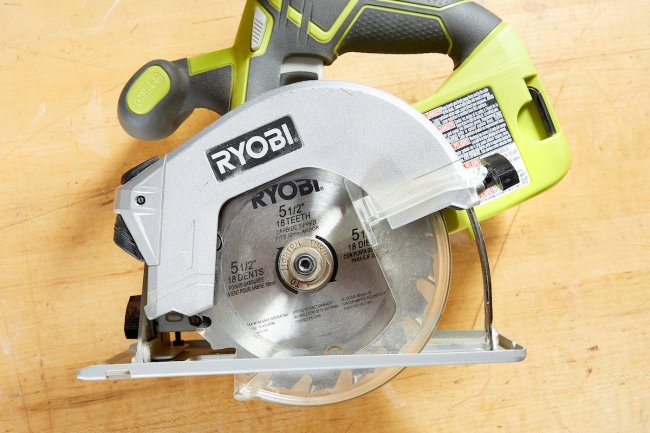
Image Source: www.bobvila.com
Choosing the Right Circular Saw Blade for Plexiglass
The most important factor in achieving a clean cut on plexiglass with a circular saw is selecting the correct blade. Using the wrong blade can lead to chipping, cracking, and a generally poor-quality cut. What is the best blade to cut acrylic? Here’s what to look for:
- Tooth Count: A high tooth count is crucial. Blades with 60 teeth or more are ideal. More teeth provide a smoother cut and reduce the likelihood of chipping.
- Tooth Geometry: Look for blades with a triple chip grind (TCG) or a modified triple chip grind. These blade designs are specifically made for cutting plastics and non-ferrous metals, minimizing heat buildup and producing cleaner edges.
- Blade Material: Carbide-tipped blades are recommended because they stay sharp longer and can withstand the heat generated when cutting plexiglass.
- Negative Rake Angle: Blades with a negative rake angle are designed to pull the material down into the cut, which helps to prevent lifting and chipping.
Here’s a table summarizing blade selection considerations:
| Feature | Recommendation | Reason |
|---|---|---|
| Tooth Count | 60 teeth or more | Smoother cut, reduces chipping |
| Tooth Geometry | Triple Chip Grind (TCG) | Designed for plastics, minimizes heat, cleaner edges |
| Blade Material | Carbide-tipped | Stays sharp longer, withstands heat |
| Rake Angle | Negative rake angle | Pulls material down, prevents lifting and chipping |
Finding a Circular Saw Blade Specifically for Acrylic
Many manufacturers offer blades specifically designed for cutting plastics like plexiglass (acrylic sheet). These blades often feature the characteristics described above and may be labeled as “plastic cutting” or “laminate cutting” blades. Before purchasing, read reviews and compare specifications to ensure the blade is suitable for your specific plexiglass cutting needs.
Preparing for Plexiglass Cutting Circular Saw
Before you start cutting, thorough preparation is essential for both safety and achieving a quality result. These steps include gathering your tools, ensuring a safe work environment, and properly preparing the plexiglass sheet.
Gathering Necessary Tools and Materials
Here’s a checklist of the tools and materials you’ll need:
- Circular Saw: A well-maintained circular saw with a sharp, appropriate blade.
- Plexiglass Cutting Blade: As discussed above, a high-tooth-count blade designed for plastics.
- Safety Glasses: Essential for protecting your eyes from flying debris.
- Hearing Protection: Circular saws can be loud; earplugs or earmuffs are recommended.
- Dust Mask: Cutting plexiglass can create fine dust particles.
- Clamps: To securely hold the plexiglass in place during cutting.
- Straight Edge or Guide: A metal ruler, level, or purpose-built cutting guide.
- Lubricant: WD-40 or a similar lubricant can help reduce friction and heat buildup.
- Painter’s Tape or Masking Tape: To protect the surface of the plexiglass and prevent chipping.
- Measuring Tape and Marker: For marking your cut lines accurately.
- Scrap Wood or Plywood: To support the plexiglass during cutting.
Creating a Safe Work Environment
Safety should always be your top priority. Here’s how to create a safe working environment:
- Work Area: Choose a well-ventilated area free from obstructions and distractions.
- Lighting: Ensure adequate lighting to clearly see your work area and cut lines.
- Cleanliness: Keep the work area clean and free of debris to prevent slips and falls.
- Personal Protective Equipment (PPE): Always wear safety glasses, hearing protection, and a dust mask.
- Power Cord Safety: Keep the power cord away from the cutting path.
Preparing the Plexiglass Sheet
Proper preparation of the plexiglass is essential for a successful cut.
- Cleaning: Clean the plexiglass sheet with a mild soap and water solution, then dry it thoroughly. This removes any dirt or debris that could interfere with the cut.
- Marking: Use a measuring tape and marker to accurately mark your cut lines. Double-check your measurements to ensure accuracy.
- Taping: Apply painter’s tape or masking tape along the cut lines on both sides of the plexiglass. This helps to prevent chipping and splintering. The tape should extend at least an inch on either side of the cut line.
- Securing: Place the plexiglass sheet on top of a piece of scrap wood or plywood. This provides support and prevents the plexiglass from vibrating during cutting. Use clamps to securely hold the plexiglass in place, ensuring that the cut line is aligned with the edge of the support material.
Step-by-Step Guide to Plexiglass Cutting with a Circular Saw
Now that you’ve gathered your tools, prepared your work environment, and prepped the plexiglass, it’s time to start cutting. Follow these steps carefully for a clean and accurate cut:
Step 1: Setting Up the Circular Saw
- Blade Installation: Ensure the circular saw is unplugged. Install the plexiglass cutting blade, making sure it’s securely tightened according to the manufacturer’s instructions.
- Depth Adjustment: Adjust the blade depth so that it extends just slightly beyond the thickness of the plexiglass. Exposing too much blade can increase the risk of chipping and vibration.
- Guide Rail Setup (Optional): If you have a guide rail or track saw system, set it up according to the manufacturer’s instructions. This can help ensure a perfectly straight cut.
Step 2: Applying Lubricant
- Lubrication: Apply a thin layer of lubricant (such as WD-40) along the cut line on the tape. This reduces friction and heat buildup during cutting. Reapply as needed during the cutting process.
Step 3: Making the Cut
- Starting the Cut: Position the circular saw so the blade is aligned with the cut line. Turn on the saw and allow it to reach full speed before contacting the plexiglass.
- Cutting Speed: Feed the saw slowly and steadily through the plexiglass. Avoid forcing the saw or stopping mid-cut, as this can cause chipping or cracking. What is the ideal circular saw speed for plexiglass? There isn’t a single “ideal” speed, but a slower, controlled feed rate is always better than a fast, aggressive one. Let the blade do the work.
- Following the Line: Carefully follow the marked cut line. If you’re using a straight edge or guide rail, keep the saw firmly against it.
- Completing the Cut: Continue cutting until you’ve completely separated the plexiglass piece. As you approach the end of the cut, support the piece being cut off to prevent it from breaking or splintering.
Step 4: Dealing with Heat Buildup
- Monitor Heat: Pay close attention to the temperature of the plexiglass and the blade. If you notice excessive heat buildup, stop cutting and allow the blade and plexiglass to cool down.
- Lubrication: Reapply lubricant as needed to help dissipate heat.
- Cutting Breaks: Take short breaks during long cuts to allow the materials to cool.
Step 5: Finishing the Edges
- Removing Tape: Carefully remove the painter’s tape or masking tape from the plexiglass.
- Sanding: If necessary, sand the edges of the cut plexiglass with fine-grit sandpaper (220 grit or higher) to remove any burrs or imperfections.
- Polishing: For a polished edge, use a plastic polishing compound and a soft cloth or polishing wheel.
Troubleshooting Common Problems
Even with careful preparation and technique, problems can sometimes arise when cutting plexiglass with a circular saw. Here are some common issues and how to address them:
- Chipping:
- Cause: Dull blade, incorrect blade type, too fast cutting speed, insufficient support.
- Solution: Replace the blade with a sharp, high-tooth-count blade designed for plastics. Reduce cutting speed and ensure the plexiglass is properly supported. Re-taping can also help. How can you prevent chipping plexiglass with a circular saw? Focus on blade selection, slow cutting speed, and adequate support.
- Cracking:
- Cause: Excessive heat buildup, forcing the saw, stress on the plexiglass.
- Solution: Reduce cutting speed, apply lubricant to dissipate heat, and avoid putting excessive pressure on the plexiglass. Ensure the plexiglass is properly supported to minimize stress.
- Melting:
- Cause: Excessive heat buildup due to friction.
- Solution: Reduce cutting speed, apply lubricant, and take breaks to allow the blade and plexiglass to cool down. A blade designed for plastics will also help.
- Uneven Cut:
- Cause: Inconsistent cutting speed, wobbling saw, lack of a straight edge or guide.
- Solution: Maintain a consistent cutting speed, ensure the saw is stable, and use a straight edge or guide rail to guide the saw.
- Rough Edges:
- Cause: Dull blade, incorrect blade type, too fast cutting speed.
- Solution: Replace the blade, reduce cutting speed, and sand the edges with fine-grit sandpaper.
Here’s a table summarizing troubleshooting tips:
| Problem | Possible Cause | Solution |
|---|---|---|
| Chipping | Dull blade, fast speed, insufficient support | Replace blade, slow down, provide better support, re-tape |
| Cracking | Heat, forcing saw, stress | Reduce speed, lubricate, support plexiglass, avoid pressure |
| Melting | Excessive heat | Slow down, lubricate, take breaks, use plastic-cutting blade |
| Uneven Cut | Inconsistent speed, wobbling, no guide | Maintain consistent speed, stabilize saw, use straight edge |
| Rough Edges | Dull blade, fast speed | Replace blade, slow down, sand edges |
Safety Tips for Cutting Plexiglass
Cutting plexiglass with a circular saw can be dangerous if proper safety precautions are not taken. Here are some essential safety tips:
- Wear appropriate PPE: Always wear safety glasses, hearing protection, and a dust mask.
- Secure the workpiece: Use clamps to firmly secure the plexiglass to prevent it from moving during cutting.
- Keep hands clear: Keep your hands away from the cutting path.
- Avoid loose clothing and jewelry: These can get caught in the saw blade.
- Inspect the saw and blade: Before each use, inspect the circular saw and blade for damage. Replace any damaged parts.
- Unplug the saw: Always unplug the saw before changing blades or making adjustments.
- Work in a well-ventilated area: Cutting plexiglass can create dust and fumes.
- Stay focused: Avoid distractions and concentrate on the task at hand.
- If unsure, seek professional help: If you’re not comfortable cutting plexiglass yourself, consider hiring a professional. What is the safe way to cut plexiglass with a circular saw? Prioritize PPE, secure the material, maintain focus, and inspect equipment.
Achieving a Smooth Cut on Plexiglass
Achieving a smooth cut plexiglass circular saw result requires a combination of the right tools, techniques, and attention to detail. Here are some tips for achieving a smooth, professional-looking cut:
- Use a high-quality blade: A sharp, high-tooth-count blade is essential for a smooth cut.
- Maintain a slow and steady cutting speed: Avoid forcing the saw or stopping mid-cut.
- Apply lubricant: Lubricant helps to reduce friction and heat buildup, which can lead to a rough cut.
- Use a straight edge or guide rail: This helps to ensure a perfectly straight cut.
- Sand the edges: After cutting, sand the edges with fine-grit sandpaper to remove any burrs or imperfections.
- Polish the edges: For a polished edge, use a plastic polishing compound and a soft cloth or polishing wheel.
- Practice: The more you practice cutting plexiglass, the better you’ll become at achieving smooth, clean cuts.
DIY Plexiglass Cutting Circular Saw: Is It For You?
DIY plexiglass cutting circular saw projects can be rewarding and cost-effective. However, it’s important to assess your skills, tools, and the complexity of the project before deciding to tackle it yourself. If you’re a beginner or have limited experience with power tools, consider starting with a smaller, less complex project. If you’re working with thick or large sheets of plexiglass, or if you require a very precise cut, it may be best to hire a professional.
Additional Plexiglass Cutting Techniques Circular Saw
While this guide focuses on using a circular saw, there are other plexiglass cutting techniques that you may want to consider:
- Table Saw: A table saw can be used to cut plexiglass, but it requires a specialized blade and careful technique.
- Jigsaw: A jigsaw can be used for cutting curves and intricate shapes in plexiglass.
- Laser Cutter: Laser cutters provide highly precise and clean cuts, but they are expensive and require specialized equipment.
- Scoring and Snapping: For thin sheets of plexiglass, you can score the surface with a utility knife and then snap the sheet along the score line.
The best cutting technique will depend on the thickness of the plexiglass, the shape of the cut, and the desired level of precision.
Frequently Asked Questions (FAQ)
- Can I use a regular wood-cutting blade to cut plexiglass?
No, a regular wood-cutting blade will likely cause chipping and cracking. You need a high-tooth-count blade designed for plastics. - How thick of plexiglass can I cut with a circular saw?
It depends on the power of your saw and the blade you’re using, but generally, you can cut plexiglass up to 1/2 inch thick with a circular saw. - What if my plexiglass keeps cracking?
Reduce your cutting speed, apply lubricant, and ensure the plexiglass is properly supported. - How do I clean plexiglass after cutting?
Use a mild soap and water solution and a soft cloth. Avoid using harsh chemicals or abrasive cleaners. - Can I cut plexiglass indoors?
It’s best to cut plexiglass outdoors or in a well-ventilated area to avoid inhaling dust and fumes. - Is it safe to cut plexiglass with a circular saw?
Yes, if you follow proper safety precautions, wear appropriate PPE, and use the correct techniques.

Hi, I’m Tom Scalisi, and welcome to The Saw Blog! I started this blog to share my hands-on experience and insights about woodworking tools—especially saws and saw blades. Over the years, I’ve had the chance to work with a wide range of tools, and I’m here to help both professionals and hobbyists make informed decisions when it comes to selecting and using their equipment. Whether you’re looking for in-depth reviews, tips, or just advice on how to get the best performance out of your tools, you’ll find it here. I’m excited to be part of your woodworking journey!