
Are you wondering how to cut crown molding with a miter saw? The answer is that it requires understanding angles, mastering your saw, and using the right techniques. Successfully installing crown molding elevates the look of any room, but mistakes can be costly. This guide provides a step-by-step approach to cutting crown molding with a miter saw, helping you avoid common pitfalls and achieve professional-looking results.
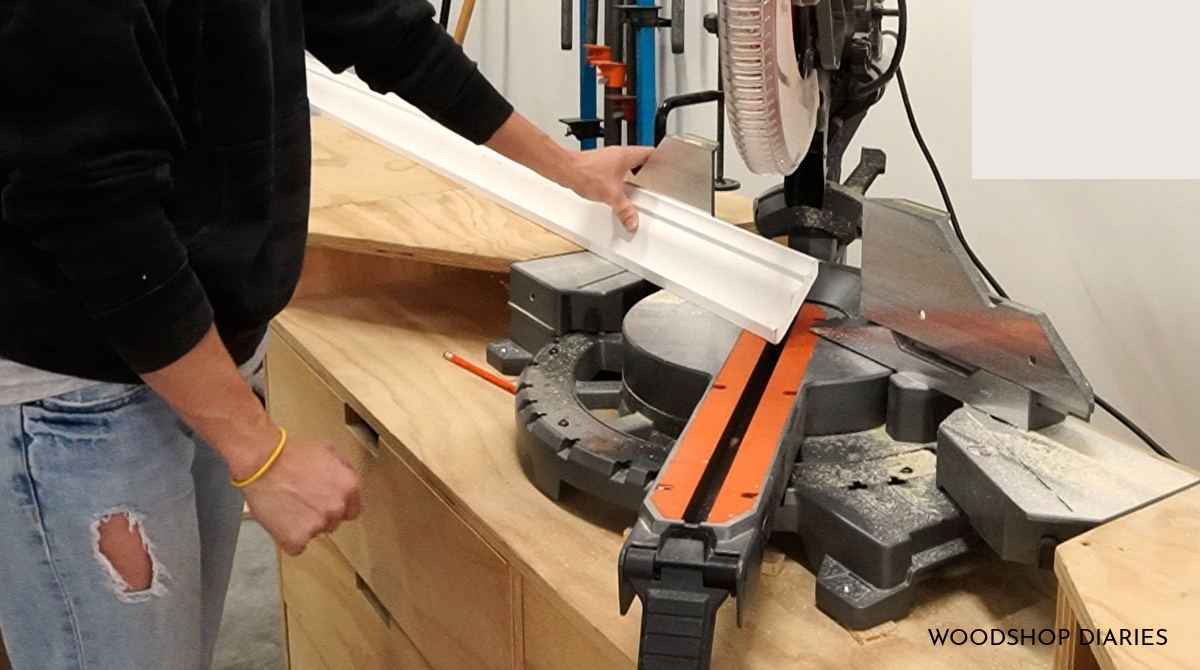
Image Source: www.woodshopdiaries.com
Deciphering Crown Moulding Basics
Before you grab your saw, it’s crucial to understand what crown molding is and how it sits.
What is Crown Moulding?
Crown molding is basically that decorative trim you see covering the spot where the wall meets the ceiling. It makes any room look more elegant and complete. You can find it in all sorts of styles and sizes, and it comes in different materials like real wood, MDF, or polyurethane.
Fathoming the “Spring Angle”
The spring angle, also known as the wall angle, is the angle at which the crown molding sits against the wall. Common spring angles are 38 degrees and 45 degrees. Knowing the spring angle of your crown molding is vital for accurate cuts. You can typically find this information on the packaging or by using a protractor.
Miter Saw Essentials
A miter saw is a power tool used to make accurate crosscuts and angled cuts. It’s the best tool for cutting crown molding because it allows you to make precise cuts at specific angles. There are different types of miter saws. What is the best miter saw for crown molding? A compound miter saw is recommended because it can make both miter and bevel cuts simultaneously, which are often needed for crown molding.
Gearing Up for Success: Tools and Materials
Gather these tools and materials before you start:
- Crown Molding: Purchase enough to account for waste.
- Miter Saw: Preferably a compound miter saw.
- Miter Saw Blade for Crown Molding: A fine-tooth blade (60-80 teeth) ensures clean cuts.
- Measuring Tape: For accurate measurements.
- Pencil: For marking cuts.
- Safety Glasses: Protect your eyes.
- Ear Protection: Protect your ears from the saw’s noise.
- Clamps: To secure the molding.
- Protractor or Angle Finder: To measure spring angles.
- Crown Molding Cutting Chart: A reference chart for angles (more on this later).
- Coping Saw (Optional): For coping joints.
- Wood Glue: For strong joints.
- Nail Gun (Optional): For installing the molding.
- Wood Filler or Caulk: To fill gaps.
Cutting Crown Moulding: The Step-by-Step Guide
Here’s a detailed breakdown of how to cut crown molding using a miter saw, focusing on inside and outside corners.
Step 1: Measuring and Planning
- Measure the Walls: Accurately measure each wall where you’ll install the crown molding.
- Plan Your Cuts: Determine the locations of inside and outside corners.
- Account for Overlap: When measuring, add a bit of extra length to each piece of crown molding. It’s easier to trim than to add.
Step 2: Setting Up Your Miter Saw
- Safety First: Always wear safety glasses and ear protection.
- Secure the Saw: Make sure the miter saw is stable and on a level surface.
- Install the Blade: Install the fine-tooth miter saw blade for clean cuts.
- Calibrate the Saw: Ensure your miter saw is accurately calibrated. Use a speed square to verify the 90-degree setting.
Step 3: Cutting Inside Corners (Miter Method)
The “nested” method is the most common for cutting crown molding. It involves positioning the crown molding in the miter saw in the same orientation as it would be installed on the wall.
- Positioning: Place the crown molding upside down and at the same angle it will be installed against the wall and ceiling. The bottom edge rests against the saw fence.
- Inside Left Corner: For an inside left corner (when facing the corner), set the miter saw to 45 degrees to the left (or half of the corner angle if it’s not a perfect 90-degree corner).
- Inside Right Corner: For an inside right corner, set the miter saw to 45 degrees to the right.
- Cutting: Make the cut slowly and carefully. Use clamps to hold the molding in place for added stability.
Step 4: Cutting Outside Corners (Miter Method)
- Positioning: Again, place the crown molding upside down and at the same angle as it will be installed.
- Outside Left Corner: For an outside left corner (when facing the corner), set the miter saw to 45 degrees to the right.
- Outside Right Corner: For an outside right corner, set the miter saw to 45 degrees to the left.
- Cutting: Make the cut carefully, using clamps for support.
Step 5: Fine-Tuning and Fitting
- Test Fit: Before applying glue or nails, test fit each piece of crown molding.
- Adjustments: If the fit isn’t perfect, make small adjustments with the miter saw. Shaving off tiny amounts can make a big difference.
- Coping (Optional): How to cope crown molding? Coping is a technique where you cut away the back of one piece of molding to match the profile of the adjacent piece, creating a seamless joint, primarily for inside corners. It’s more forgiving than a mitered inside corner. Use a coping saw to carefully remove the back of the molding, following the contour of the profile.
Step 6: Installing the Crown Moulding
- Apply Glue: Apply wood glue to the mitered ends of the crown molding before joining them.
- Nail in Place: Use a nail gun to secure the crown molding to the wall and ceiling. Aim for studs in the wall and ceiling joists for a strong hold.
- Fill Gaps: Use wood filler or caulk to fill any gaps in the joints or along the edges of the molding.
- Sand and Finish: Once the filler or caulk is dry, sand it smooth and paint or stain the crown molding to match your room’s decor.
Grasping Compound Miter Saw Crown Molding Cuts
Compound miter saw crown molding involves adjusting both the miter angle and the bevel angle simultaneously. This is often necessary when the spring angle of your crown molding isn’t a standard 45 degrees or 38 degrees.
Here’s how to approach compound cuts:
- Determine Miter and Bevel Angles: Use a crown molding cutting chart or an online calculator to determine the correct miter and bevel angles for your specific crown molding and corner type.
- Adjust the Saw: Set the miter saw to the calculated miter angle and the bevel angle.
- Position the Molding: Place the crown molding upside down and against the fence, ensuring it’s properly supported.
- Make the Cut: Carefully make the cut, using clamps for stability.
Navigating Common Pitfalls and Errors
Several common mistakes can lead to frustration and wasted material. Here’s how to avoid them:
- Inaccurate Measurements: Double-check your measurements before cutting. A small error can throw off the entire project.
- Incorrect Angles: Using the wrong miter or bevel angles is a common mistake. Always refer to a crown molding cutting chart or calculator.
- Moving the Molding During the Cut: Ensure the molding is firmly held in place, either by hand or with clamps, to prevent it from shifting during the cut.
- Dull Blade: A dull blade can cause splintering and uneven cuts. Replace or sharpen your blade regularly.
- Rushing the Cut: Take your time and make slow, controlled cuts. Rushing can lead to mistakes and injuries.
The Utility of Crown Molding Cutting Charts
A crown molding cutting chart is an invaluable tool for determining the correct miter and bevel angles for various corner types and spring angles. These charts provide a quick reference, saving you time and reducing the risk of errors.
Here’s an example of a simplified crown molding cutting chart for a 45-degree spring angle:
| Corner Type | Miter Angle | Bevel Angle |
|---|---|---|
| Inside Left | 31.6° | 33.9° |
| Inside Right | 31.6° | 33.9° |
| Outside Left | 31.6° | 33.9° |
| Outside Right | 31.6° | 33.9° |
Note: Always verify the angles with your specific crown molding and miter saw. Charts are intended as guidelines.
Is DIY Crown Molding Installation Right for You?
Can I tackle crown molding installation myself? DIY crown molding installation can save you money, but it requires patience, precision, and attention to detail. If you’re comfortable using power tools, have experience with woodworking, and are willing to learn, you can successfully install crown molding yourself. However, if you’re unsure about your skills, consider hiring a professional.
Resources to Enhance Your Skillset
- Online Tutorials: Numerous video tutorials on YouTube and other platforms demonstrate how to cut and install crown molding.
- Woodworking Forums: Online forums provide a space to ask questions, share tips, and learn from experienced woodworkers.
- Books and Guides: Many books and guides offer detailed instructions and illustrations on crown molding installation.
FAQs: Addressing Common Queries
- What is the best way to cut crown molding? The best way is to use a compound miter saw with a fine-tooth blade, following accurate measurements and angle settings.
- How do I find the spring angle of my crown molding? Check the packaging or use a protractor to measure the angle at which the molding sits against the wall.
- Can I use a hand saw to cut crown molding? While possible, it’s not recommended. A miter saw provides the accuracy and precision needed for professional-looking results.
- What size miter saw do I need for crown molding? A 10-inch or 12-inch miter saw is suitable for most crown molding projects.
- How do I fix gaps in crown molding joints? Use wood filler or caulk to fill the gaps. Sand smooth and paint or stain to match the molding.
Conclusion
Mastering how to cut crown molding with a miter saw takes practice, but with the right tools, techniques, and knowledge, you can achieve beautiful, professional-looking results. By carefully measuring, accurately setting your saw angles, and avoiding common mistakes, you can transform your rooms with elegant crown molding. Don’t be afraid to experiment and learn from your mistakes. With persistence and attention to detail, you’ll be installing crown molding like a pro in no time.

Hi, I’m Tom Scalisi, and welcome to The Saw Blog! I started this blog to share my hands-on experience and insights about woodworking tools—especially saws and saw blades. Over the years, I’ve had the chance to work with a wide range of tools, and I’m here to help both professionals and hobbyists make informed decisions when it comes to selecting and using their equipment. Whether you’re looking for in-depth reviews, tips, or just advice on how to get the best performance out of your tools, you’ll find it here. I’m excited to be part of your woodworking journey!