
Changing a table saw blade is a necessary task for any woodworker. What is the best way to change a table saw blade? The best way involves unplugging the saw, using the correct wrenches, carefully removing the old blade, cleaning the arbor, installing the new blade facing the correct direction, and securely tightening everything before plugging the saw back in. This guide will provide step-by-step table saw blade change instructions along with crucial table saw blade change safety tips to ensure a safe and efficient table saw blade replacement.
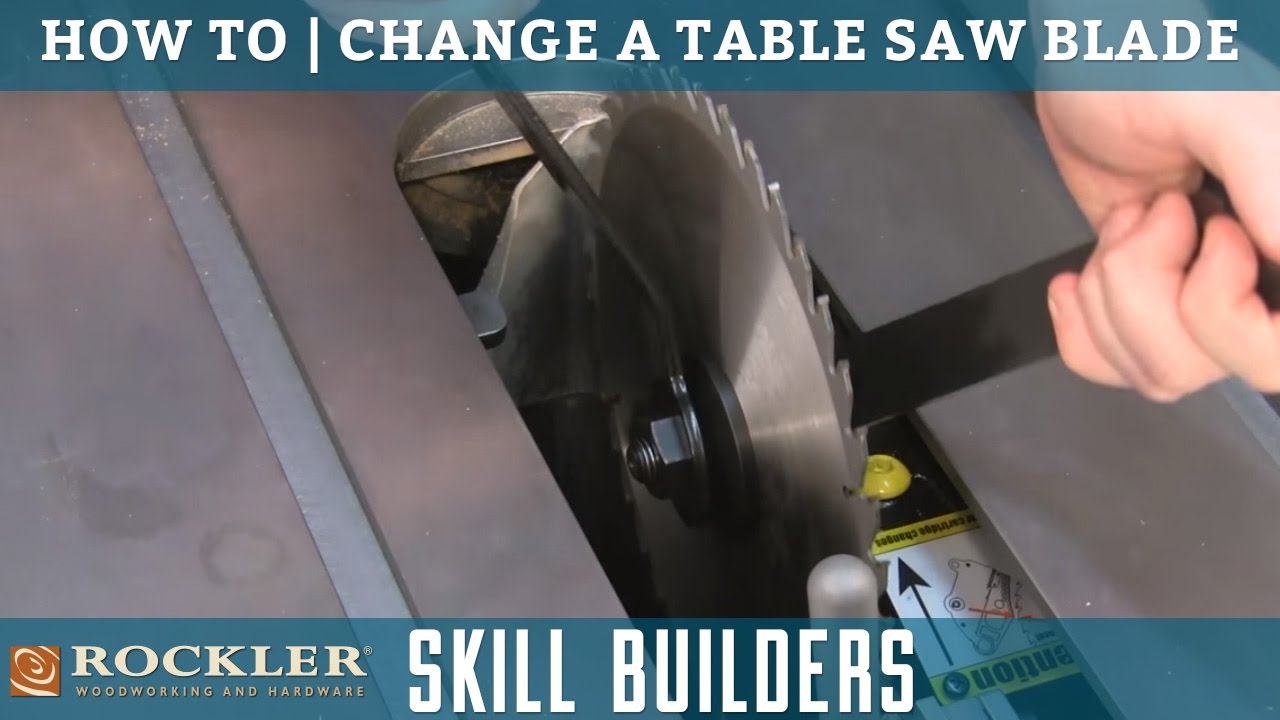
Image Source: i.ytimg.com
Why Replacing Table Saw Blade Matters
Replacing table saw blade is more than just routine maintenance; it’s crucial for achieving clean cuts, preventing kickback, and ensuring your safety. A dull or damaged blade can lead to:
- Splintered edges
- Burn marks on the wood
- Increased risk of kickback
- Motor strain
- Inaccurate cuts
Choosing the right blade for your project is also critical. Different blade types are designed for specific tasks, such as ripping, crosscutting, or cutting dadoes. Using the wrong blade can compromise the quality of your work and even damage your saw.
Gathering Your Tools and Ensuring Safety
Before starting the table saw blade change procedure, gather the necessary tools and prioritize safety.
Essential Tools
- Table Saw Blade Wrench: Most saws come with two wrenches. Know your table saw blade wrench size, if you lost it, you can easily purchase replacements.
- Gloves: Protect your hands from sharp blade edges.
- Safety Glasses: Shield your eyes from debris.
- Clean Rags or Brush: For cleaning the arbor and blade.
- Blade Stabilizer (Optional): Can help reduce vibration for cleaner cuts.
Crucial Safety Precautions
- Disconnect the Power: Unplug the saw from the power outlet. This is the most important safety step.
- Wear Safety Gear: Always wear safety glasses and gloves.
- Read the Manual: Familiarize yourself with your saw’s specific instructions for blade changes.
- Clear the Work Area: Remove any obstructions around the saw.
- Stay Focused: Avoid distractions and concentrate on the task at hand.
Table Saw Blade Change Steps: A Detailed Guide
This section provides a comprehensive, step-by-step guide to removing table saw blade and installing table saw blade.
Step 1: Unplug the Saw
Make sure the saw is completely disconnected from the power source. Double-check that the switch is in the “OFF” position and the plug is removed from the wall.
Step 2: Raise the Blade to its Maximum Height
Raising the blade provides more clearance for removing and installing the new blade. Use the blade height adjustment knob to raise the blade as high as it will go.
Step 3: Remove the Throat Plate
The throat plate is the insert surrounding the blade. Different saws have different mechanisms for removing it. Some lift out, while others require loosening a screw or lever. Consult your saw’s manual for specific instructions.
Step 4: Lock the Arbor
Most table saws come with a built-in feature called an arbor lock, which is usually just a simple button or lever. You’ll want to use this lock to stop the blade from spinning around while you loosen the nut. If your saw doesn’t have one, don’t worry—you can just wedge a piece of scrap wood against the blade to hold it steady instead.
Step 5: Loosen the Arbor Nut
Using the correct wrench, loosen the arbor nut. The direction to loosen the nut can be confusing. Most table saws use a left-handed thread or a reverse thread. This means that you turn the wrench clockwise to loosen the nut. This seems backward, but it’s designed to prevent the nut from loosening during operation.
Important Note: Some older saws might have a standard right-handed thread. Check your owner’s manual to confirm the correct direction.
Step 6: Remove the Outer Flange and Old Blade
Once the nut is loose, carefully remove the outer flange (the washer-like piece behind the nut). Then, gently slide the old blade off the arbor. Be careful of the teeth, as they can be very sharp.
Step 7: Clean the Arbor and Flanges
Use a clean rag or brush to remove any sawdust, pitch, or grime from the arbor, flanges, and throat plate. A clean surface ensures the new blade sits flush and runs true.
Step 8: Install the New Blade
Carefully slide the new blade onto the arbor. Ensure that the blade is facing the correct direction. The teeth should point towards the front of the saw, and the rotation arrow on the blade should match the direction of rotation indicated on the saw.
Step 9: Reinstall the Outer Flange and Arbor Nut
Place the outer flange back onto the arbor, followed by the arbor nut. Tighten the nut by hand first.
Step 10: Tighten the Arbor Nut Securely
Engage the arbor lock again and use the wrench to tighten the arbor nut securely. Remember that because of the left-handed or reverse thread, you’ll be turning the wrench counter-clockwise to tighten. Don’t overtighten, but make sure it’s snug and secure.
Step 11: Reinstall the Throat Plate
Replace the throat plate, ensuring it is properly seated and locked in place.
Step 12: Lower the Blade and Test the Rotation
Lower the blade to its lowest position and manually rotate it to ensure it spins freely without any obstructions.
Step 13: Reconnect the Power and Test Cut
Plug the saw back in and turn it on briefly to test the blade rotation. Make a test cut on a piece of scrap wood to ensure the blade is cutting cleanly and accurately.
Deciphering Blade Direction
Can I install a table saw blade backwards? Yes, but you absolutely shouldn’t! Installing a table saw blade backward is extremely dangerous. The blade is designed to cut in a specific direction. Installing it backward will result in:
- Increased risk of kickback
- Poor cutting performance
- Potential damage to the saw
- Possible injury
Always double-check the rotation arrow on the blade and the saw to ensure the blade is installed correctly. The teeth should be pointing towards the direction the wood will be fed into the blade.
Choosing the Right Table Saw Blade
Selecting the appropriate blade is essential for achieving optimal results and ensuring safety.
| Blade Type | Tooth Count | Application | Material |
|---|---|---|---|
| Ripping Blade | 24-30 | Cutting with the grain of the wood (Ripping) | Softwoods and hardwoods |
| Crosscut Blade | 60-80 | Cutting across the grain of the wood (Crosscutting) | Hardwoods, plywood, and melamine |
| Combination Blade | 40-50 | General-purpose cutting | Softwoods, hardwoods, and plywood |
| Dado Blade Set | Varies | Cutting wide grooves (Dadoes) | Softwoods, hardwoods, and plywood |
| Metal Cutting Blade | Varies | Cutting non-ferrous metals (Aluminum, brass, etc.) | Non-ferrous metals |
Higher tooth counts generally produce smoother cuts but are slower. Lower tooth counts are faster for ripping but may result in rougher edges.
Maintaining Your Table Saw Blades
Proper blade maintenance is vital for extending the life of your blades and ensuring optimal performance.
- Cleaning: Regularly clean your blades with a blade cleaner to remove pitch and resin buildup.
- Sharpening: Sharpen your blades when they become dull. You can either sharpen them yourself with a sharpening jig or take them to a professional sharpening service.
- Storage: Store your blades in a dry place, preferably in a blade case or rack, to protect them from damage and rust.
- Inspection: Regularly inspect your blades for signs of damage, such as cracked teeth or a warped blade body. Replace damaged blades immediately.
Table Saw Blade Change Safety: A Recap
Safety is paramount when working with power tools. Here’s a quick review of critical safety points:
- Always disconnect the power before making any adjustments or blade changes.
- Wear safety glasses and gloves at all times.
- Read and follow the manufacturer’s instructions for your saw and blades.
- Ensure the blade is installed correctly and securely.
- Never force the blade during cutting.
- Use push sticks and feather boards to keep your hands away from the blade.
- Be aware of the risk of kickback and take precautions to prevent it.
- Keep your work area clean and organized.
- Never operate the saw if you are tired, distracted, or under the influence of drugs or alcohol.
Frequently Asked Questions (FAQ)
- What size wrench do I need for my table saw blade? The table saw blade wrench size varies depending on the saw model. Consult your owner’s manual or check the size markings on the arbor nut. Most saws use a wrench between 13mm and 22mm.
- How often should I change my table saw blade? The frequency depends on usage and the type of material you’re cutting. Change the blade when you notice a decrease in cutting performance, such as splintering, burning, or excessive vibration.
- Can I use a dull blade? No. Using a dull blade is dangerous and can lead to kickback, splintering, and motor strain. Always use a sharp, well-maintained blade.
- Why is my table saw blade vibrating? Vibration can be caused by a dull blade, a loose arbor nut, a warped blade, or an imbalance in the blade. Check these factors and address the issue accordingly.
How do I prevent kickback? Kickback is a sudden and dangerous ejection of the workpiece. To prevent kickback:
- Use a sharp blade.
- Use a splitter or riving knife.
- Use feather boards and push sticks.
- Stand to the side of the blade.
- Avoid cutting warped or twisted wood.
- Feed the wood at a consistent rate.
By following these table saw blade change steps and adhering to the table saw blade change safety guidelines, you can ensure a safe and efficient table saw blade replacement. Remember, prioritizing safety and proper maintenance will prolong the life of your saw and help you achieve high-quality results in your woodworking projects.

Hi, I’m Tom Scalisi, and welcome to The Saw Blog! I started this blog to share my hands-on experience and insights about woodworking tools—especially saws and saw blades. Over the years, I’ve had the chance to work with a wide range of tools, and I’m here to help both professionals and hobbyists make informed decisions when it comes to selecting and using their equipment. Whether you’re looking for in-depth reviews, tips, or just advice on how to get the best performance out of your tools, you’ll find it here. I’m excited to be part of your woodworking journey!