
What is involved in changing a Dewalt table saw blade? Changing the blade on a Dewalt table saw is really just about safely taking off the old one and putting a new one on. You need the right tools and should follow a specific routine to keep things safe and accurate. This guide walks you through the whole process, step-by-step, so you can easily replace the blade yourself.
A table saw is a vital tool for any woodworking enthusiast or professional. One of the most frequent tasks is changing the blade. This process, while seemingly straightforward, needs to be done correctly to avoid injuries and ensure the saw operates at its best. This guide walks you through the process of dewalt table saw blade change with clarity and safety as top priorities. Whether you’re replacing a worn-out blade or switching to one designed for a specific cut, this dewalt table saw blade replacement guide provides the information you need.
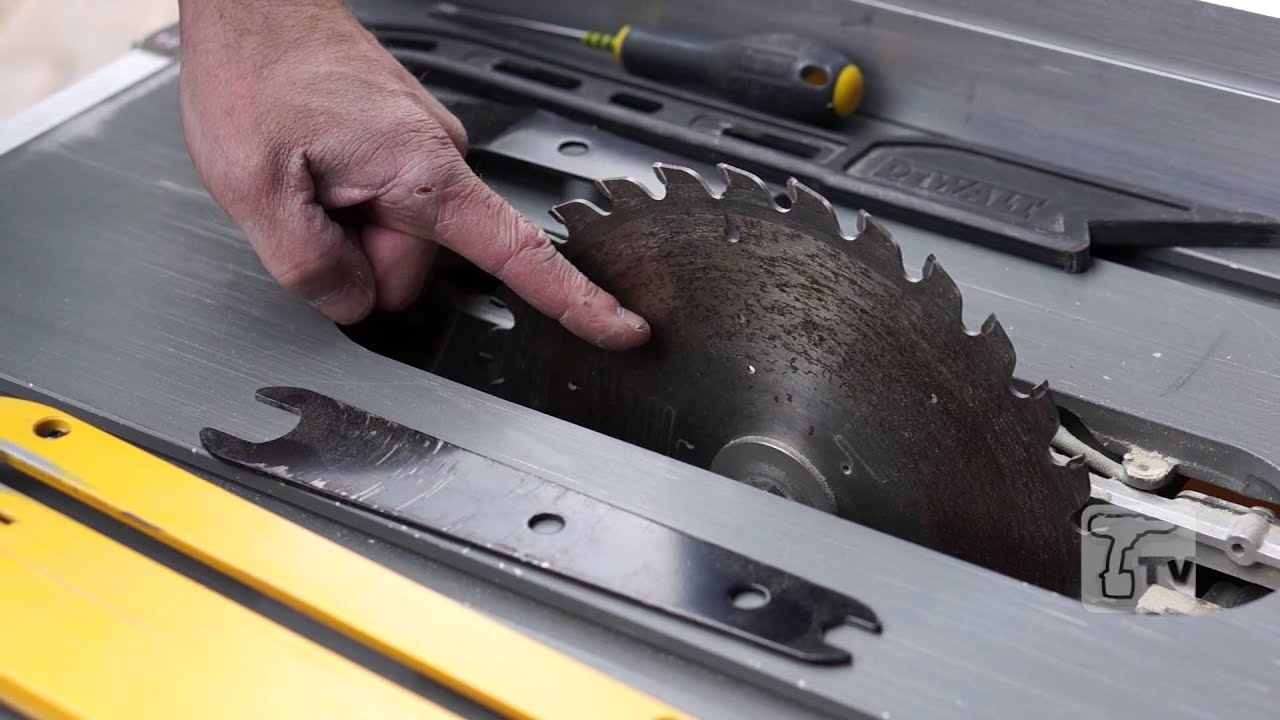
Image Source: i.ytimg.com
Essential Safety Precautions
Before diving into the dewalt table saw blade change procedure, safety must be your number one concern.
- Disconnect Power: Always unplug the saw from the power outlet. This prevents accidental start-ups while you’re working on it.
- Wear Safety Glasses: Protect your eyes from flying debris.
- Wear Gloves: Protect your hands from sharp blade edges and splinters.
- Read the Manual: Familiarize yourself with your specific Dewalt model’s instructions.
- Stay Focused: Avoid distractions. Changing the blade requires your full attention.
Tools and Materials Needed
Before you begin replacing dewalt table saw blade, gather these essential tools and materials:
- Wrench or Wrenches: The correct size wrench(es) to loosen the arbor nut. Your Dewalt saw manual will specify the correct size. Often, two wrenches are needed: one to hold the arbor and one to loosen the nut.
- Arbor Lock Tool (if applicable): Some Dewalt saws have an arbor lock feature.
- New Table Saw Blade: The correct size and type for your saw and the material you’ll be cutting.
- Gloves: To protect your hands.
- Safety Glasses: To protect your eyes.
- Clean Cloth: For wiping down the saw and blade.
- Blade Wipes or Cleaner (Optional): For cleaning the new blade before use.
- Soft Brush: For removing sawdust from the saw.
Step-by-Step Guide: Changing Your Dewalt Table Saw Blade
Follow these steps for safely and effectively changing blade on dewalt table saw.
Step 1: Prepare the Saw
- Unplug the Saw: Ensure the saw is completely disconnected from the power source.
- Raise the Blade: Elevate the blade to its highest position. This gives you more room to work.
- Clear the Table: Remove any materials or tools from the table saw surface.
Step 2: Accessing the Arbor Nut
-
Remove Throat Plate: The throat plate is the insert surrounding the blade. Most Dewalt saws have a simple latch or require lifting it out.
- Different types of throat plates include standard, dado, and zero-clearance plates. Use the correct one for the job.
2. Locate the Arbor Nut: The arbor nut is the nut that secures the blade to the arbor (the rotating shaft).
- Different types of throat plates include standard, dado, and zero-clearance plates. Use the correct one for the job.
Step 3: Locking the Arbor
This step is crucial for dewalt table saw blade removal.
- Engage the Arbor Lock (If Applicable): Many Dewalt table saws have an arbor lock button. Press and hold this button. You might need to rotate the blade slightly until the lock engages.
- Using Two Wrenches (If No Arbor Lock): If your saw doesn’t have an arbor lock, you’ll need two wrenches. One wrench holds the arbor steady, while the other loosens the nut.
- Place one wrench on the arbor nut.
- Place the second wrench on the flat spot on the arbor shaft.
- Hold the arbor wrench firmly in place.
Step 4: Loosening the Arbor Nut
- Important Note: Table saw arbor nuts usually have a left-handed thread. This means you turn the nut clockwise to loosen it and counter-clockwise to tighten it.
- Applying Force: Use the wrench to turn the arbor nut clockwise (to loosen). It might be tight, so apply steady, controlled pressure. Avoid jerking the wrench.
Step 5: Removing the Old Blade
- Remove the Arbor Nut: Once the nut is loose, remove it completely by hand. Be careful not to drop it.
- Remove the Washer/Flange: There’s usually a washer or flange behind the nut. Remove this as well. Note its orientation for reassembly.
- Carefully Remove the Blade: Gently slide the old blade off the arbor. Handle it carefully, as the teeth are sharp.
Step 6: Installing the New Blade
- Clean the Arbor and Flange: Use a clean cloth to wipe down the arbor and the flange. This removes any sawdust or debris that could interfere with proper seating.
- Mount the New Blade: Place the new blade onto the arbor. Ensure the blade is facing the correct direction. An arrow on the blade indicates the direction of rotation. It should match the saw’s direction of rotation.
- Reinstall the Flange/Washer: Place the flange/washer back onto the arbor, ensuring it’s oriented correctly (as noted during removal).
- Reinstall the Arbor Nut: Thread the arbor nut back onto the arbor by hand, turning it counter-clockwise (to tighten initially).
Step 7: Tightening the Arbor Nut
- Lock the Arbor Again: Engage the arbor lock (if applicable) or use two wrenches as before.
- Tighten the Nut: Use the wrench to tighten the arbor nut counter-clockwise. Tighten it firmly, but don’t overtighten. Refer to your saw’s manual for the correct torque specification, if available.
- Remove the Wrenches: Remove the wrenches or disengage the arbor lock.
Step 8: Final Checks and Adjustments
- Spin the Blade by Hand: Rotate the blade by hand to ensure it spins freely and doesn’t wobble.
- Reinstall the Throat Plate: Place the throat plate back into position. Ensure it’s seated correctly.
- Adjust Blade Height: Lower the blade to its desired cutting height.
- Double-Check Everything: Before plugging in the saw, visually inspect everything to ensure it’s properly assembled.
Step 9: Test the Saw
- Plug in the Saw: Plug the saw back into the power outlet.
- Turn on the Saw: Turn on the saw and let it run for a few seconds to ensure the blade runs smoothly and quietly.
- Make a Test Cut: Cut a piece of scrap wood to verify the blade is cutting correctly and the fence is aligned.
Tips for Optimal Blade Performance
- Blade Selection: Choose the right blade for the material you’re cutting. Different blades are designed for ripping (cutting with the grain), crosscutting (cutting against the grain), plywood, and other materials.
- Blade Cleaning: Regularly clean your blades to remove resin and pitch buildup. This improves cutting performance and extends blade life.
- Blade Sharpening: Sharpening dull blades restores their cutting ability. You can sharpen them yourself or have them professionally sharpened.
- Proper Alignment: Ensure your fence and miter slot are properly aligned to the blade. Misalignment can cause inaccurate cuts and dangerous kickback.
- Feed Rate: Use the correct feed rate for the material and blade. Forcing the material can cause the blade to bind or kick back.
Troubleshooting Common Issues
- Arbor Nut Stuck: If the arbor nut is stuck, try applying penetrating oil and let it soak for a few minutes. Use a longer wrench for more leverage. If it still won’t budge, consult a professional.
- Blade Wobbles: If the blade wobbles, check to ensure the arbor nut is tight and the flange is properly seated. Also, inspect the blade for damage.
- Saw Vibrates Excessively: Excessive vibration can be caused by a dull or damaged blade, loose components, or an uneven table.
- Blade Binding: Blade binding occurs when the wood pinches the blade. This can be caused by improper feed rate, misaligned fence, or warped wood.
- Burning: Burning indicates the blade is dull or the feed rate is too slow.
Choosing the Right Dewalt Table Saw Blade
Selecting the correct blade significantly impacts cut quality and safety. Dewalt offers a range of blades designed for different applications.
| Blade Type | Tooth Count | Application | Material |
|---|---|---|---|
| Ripping Blade | 24-30 | Cutting with the grain (ripping) | Softwoods, hardwoods |
| Crosscut Blade | 60-80 | Cutting against the grain (crosscutting) | Softwoods, hardwoods, plywood |
| Combination Blade | 40-50 | General-purpose cutting | Softwoods, hardwoods, plywood |
| Plywood Blade | 80+ | Cutting plywood and other sheet goods | Plywood, MDF, melamine |
| Dado Blade Set | Varies | Cutting grooves and dados | Softwoods, hardwoods |
Consider these factors when choosing a blade:
- Tooth Count: Higher tooth counts produce smoother cuts but cut slower. Lower tooth counts cut faster but produce rougher cuts.
- Tooth Grind: Different tooth grinds are designed for specific materials and cutting tasks.
- Kerf: The kerf is the width of the cut the blade makes. Full kerf blades are more stable, while thin kerf blades require less power.
- Blade Diameter: Use the correct blade diameter for your saw.
Frequently Asked Questions (FAQ)
- How often should I change my table saw blade?
- You should change your blade when it becomes dull, damaged, or when you need a different blade for a specific cutting task. The frequency depends on how often you use the saw and the materials you cut.
- Can I use any brand of blade on my Dewalt table saw?
- Yes, you can use blades from other brands, as long as they are the correct diameter and have the correct arbor size for your Dewalt saw.
- What is the best way to clean a table saw blade?
- Use a blade cleaner or mineral spirits and a stiff brush to remove resin and pitch buildup. Always wear gloves and eye protection when cleaning blades.
- How do I know if my table saw blade is dull?
- Signs of a dull blade include burning, splintering, requiring excessive force to push the wood through, and increased vibration.
- Is it safe to sharpen my own table saw blades?
- Sharpening table saw blades requires specialized tools and knowledge. If you’re not experienced, it’s best to have them professionally sharpened.
- How tight should the arbor nut be?
- The arbor nut should be firmly tightened, but not overtightened. Refer to your saw’s manual for the correct torque specification, if available.
- What should I do if I can’t get the arbor nut loose?
- Try applying penetrating oil and let it soak for a few minutes. Use a longer wrench for more leverage. If it still won’t budge, consult a professional.
- Where can I find the manual for my Dewalt table saw?
- You can usually find the manual on the Dewalt website or by searching online for your specific model number.
- Is it safe to use a warped table saw blade?
- No, using a warped table saw blade is extremely dangerous and can cause kickback or blade failure. Replace any warped blades immediately.
- What is kickback, and how can I prevent it?
- Kickback is when the wood is violently thrown back towards the operator. Prevent kickback by using the riving knife or splitter, using the correct feed rate, and ensuring the fence is properly aligned.
Changing your Dewalt table saw blade is a crucial maintenance task. By following these steps and safety precautions, you can ensure your saw operates safely and efficiently for years to come. Remember, proper blade selection and maintenance are key to achieving optimal cutting performance and extending blade life. This comprehensive dewalt table saw blade replacement guide aims to equip you with the knowledge and confidence to tackle this task effectively. Whether you’re a seasoned woodworker or just starting out, mastering this process is an important step in your woodworking journey. This guide helps ensure safe and efficient dewalt table saw blade installation every time. With these instructions, how to remove dewalt table saw blade and install a new one will be a breeze. Following the best way to change dewalt table saw blade, you’ll always have optimal performance from your saw.

Hi, I’m Tom Scalisi, and welcome to The Saw Blog! I started this blog to share my hands-on experience and insights about woodworking tools—especially saws and saw blades. Over the years, I’ve had the chance to work with a wide range of tools, and I’m here to help both professionals and hobbyists make informed decisions when it comes to selecting and using their equipment. Whether you’re looking for in-depth reviews, tips, or just advice on how to get the best performance out of your tools, you’ll find it here. I’m excited to be part of your woodworking journey!