
What is the best way to change a table saw blade? The best way to change a table saw blade involves unplugging the saw, using proper tools to loosen the arbor nut, carefully removing the old blade, cleaning the arbor and flanges, installing the new blade with the teeth pointing in the correct direction, tightening the arbor nut securely, and verifying blade alignment before plugging the saw back in. This guide provides a detailed table saw blade replacement guide to safely changing a table saw blade.
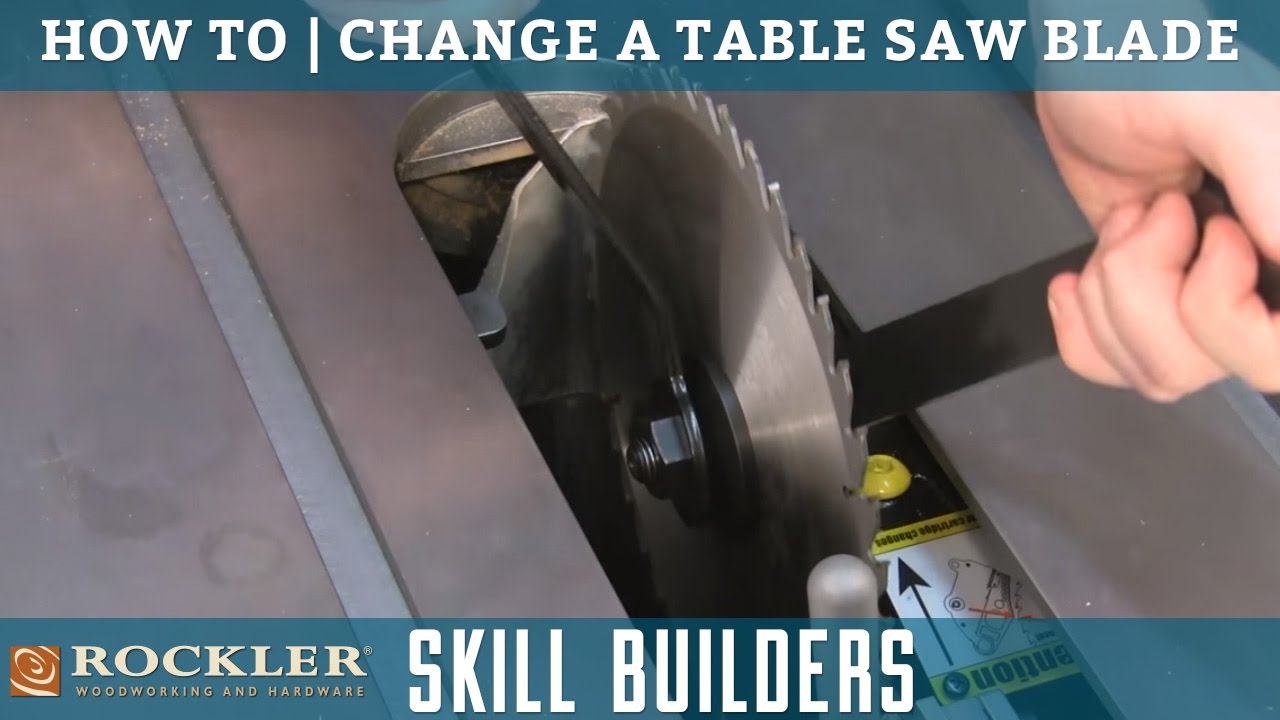
Image Source: i.ytimg.com
The Paramount Importance of Safety
Before you start changing the blade on your table saw, safety has to be your number one priority. These machines are very powerful, and if you aren’t careful, you can get badly hurt. This section will walk you through the safety steps you need to take before, during, and after the swap. Sticking to these rules is the key to changing your blade safely.
Key Safety Precautions
- Disconnect the Power: This is the single most important step. Unplug the table saw from the power outlet. Don’t just turn it off; physically disconnect it. This prevents accidental starts during the blade change.
- Wear Safety Glasses: Flying debris can cause serious eye damage. Always wear safety glasses or a face shield.
- Wear Gloves: Protect your hands from sharp blade edges. Work gloves provide a better grip and minimize the risk of cuts.
- Read the Manual: Refer to your table saw’s manual for specific instructions and safety guidelines. Each saw model may have slightly different procedures.
- Stay Focused: Avoid distractions and concentrate solely on the task at hand.
- Keep Your Workspace Clear: Ensure your workspace is clean and free from clutter. This prevents tripping hazards and allows you to move freely.
- Use Push Sticks and Blocks: Never place your hands directly in the path of the blade. Use push sticks and blocks when testing the blade.
Emergency Preparedness
Even with precautions, accidents can happen. Be prepared for emergencies.
- First Aid Kit: Keep a well-stocked first aid kit readily available in your workshop.
- Emergency Contact Information: Have emergency contact numbers posted prominently.
- Know Your Limits: If you’re feeling tired, unwell, or distracted, postpone the blade change.
Gathering Your Tools and Materials
Before you begin the table saw blade change procedure, gather all the necessary tools and materials. This will streamline the process and minimize interruptions.
Essential Tools
- Wrench or Wrenches: You’ll need the correct size wrench (or two wrenches depending on your saw model) to loosen and tighten the arbor nut. Check your saw’s manual for the appropriate sizes.
- Arbor Lock (If applicable): Some table saws have an arbor lock that holds the blade in place while you loosen the nut.
- Blade Wipes or Cleaner: To clean the blade and arbor.
- Clean Cloths or Rags: For wiping down the arbor and flanges.
- Blade Stabilizer (Optional): This reduces vibration and improves cut quality.
Choosing the Right Blade
Selecting the appropriate blade is crucial for achieving the desired results. Consider the material you’ll be cutting and the type of cut you need to make.
- General Purpose Blades: Suitable for a variety of cuts in different types of wood.
- Rip Blades: Designed for cutting with the grain of the wood.
- Crosscut Blades: Optimized for cutting across the grain of the wood.
- Plywood Blades: Feature a high tooth count to minimize tear-out when cutting plywood and other sheet goods.
- Dado Blades: Used for creating grooves and rabbets.
Table Saw Blade Removal: Step-by-Step
Now that you’ve taken the necessary safety precautions and gathered your tools, you can proceed with removing the old table saw blade. This is a critical part of the changing table saw blade process.
Step 1: Lower the Blade
Lower the blade completely below the table surface. This reduces the risk of accidental contact with the blade during the removal process.
Step 2: Unplug the Saw (Again!)
Double-check that the saw is unplugged from the power outlet. Never assume it’s disconnected.
Step 3: Remove the Throat Plate
The throat plate is the insert surrounding the blade. Depending on your saw model, it may be held in place by latches, screws, or simply friction. Remove it carefully and set it aside.
Step 4: Engage the Arbor Lock (If Applicable)
If your table saw has an arbor lock, engage it to prevent the blade from rotating while you loosen the arbor nut. The arbor lock is a HUGE help for removing table saw blade.
Step 5: Loosen the Arbor Nut
- Direction: The direction to turn the wrench to loosen the arbor nut varies depending on the saw model. Most table saws have a standard right-hand thread, meaning you turn the nut counterclockwise to loosen it. However, some saws have a left-hand thread, requiring you to turn the nut clockwise. Consult your saw’s manual to determine the correct direction.
- Technique: Use a wrench of the correct size. Apply steady pressure. If the nut is tight, avoid jerking or straining. You may need to use a cheater bar for extra leverage.
- Two-Wrench Method: If your saw doesn’t have an arbor lock, you may need to use two wrenches. Use one wrench to hold the arbor in place while you use the other wrench to loosen the nut.
Step 6: Remove the Arbor Nut, Washer, and Outer Flange
Once the arbor nut is loose, carefully remove it, along with any washers or outer flanges. Keep these components in a safe place, as you’ll need them to install the new blade.
Step 7: Remove the Old Blade
Carefully lift the old blade off the arbor. Be mindful of the sharp teeth. Dispose of the old blade properly.
Preparing for the New Blade
Before you install the new blade, take the time to clean the arbor and flanges. This will ensure proper blade alignment and prevent vibration.
Cleaning the Arbor and Flanges
- Inspect for Damage: Examine the arbor and flanges for any signs of damage, such as rust, burrs, or nicks. Replace any damaged components.
- Clean Thoroughly: Use a clean cloth or rag to wipe down the arbor and flanges. Remove any dust, debris, or grease. You can use a blade cleaner or degreaser for stubborn residue.
Confirming Blade Rotation Direction
The teeth of the table saw blade must point in the correct direction. This is usually marked on the blade itself.
- Standard Table Saws: The teeth should point toward the direction of rotation (which is usually forward).
- Reverse Rotation Saws: Some specialty saws have a reverse rotation. In this case, the teeth should point backward. Always consult your saw’s manual to verify the correct blade direction.
Installing a Table Saw Blade: A Careful Process
Installing a table saw blade requires precision and care. Follow these steps to ensure proper installation and safe operation.
Step 1: Slide the New Blade Onto the Arbor
Carefully slide the new blade onto the arbor, ensuring that it sits flush against the inner flange. Make sure the teeth are pointing in the correct direction. How to install a table saw blade properly is crucial for safety.
Step 2: Reinstall the Outer Flange, Washer, and Arbor Nut
Reinstall the outer flange, washer (if applicable), and arbor nut in the correct order. Ensure that the flange sits flush against the blade.
Step 3: Tighten the Arbor Nut
- Engage the Arbor Lock (If Applicable): Engage the arbor lock to prevent the blade from rotating.
- Tighten Securely: Use the correct size wrench to tighten the arbor nut securely. Avoid overtightening, which can damage the arbor or nut.
- Two-Wrench Method: If your saw doesn’t have an arbor lock, use two wrenches as described earlier.
Step 4: Verify Blade Alignment
After tightening the arbor nut, visually inspect the blade to ensure it’s properly aligned and not wobbling. A slight wobble can indicate a bent blade or a misaligned flange.
Step 5: Replace the Throat Plate
Reinstall the throat plate, ensuring it sits flush with the table surface.
Post-Installation Checks and Adjustments
Before you plug in the saw and start cutting, perform a few final checks and adjustments to ensure everything is working correctly.
Blade Alignment Check
Use a square or combination square to check that the blade is perpendicular to the table surface. If it’s not, you may need to adjust the saw’s trunnion.
Fence Alignment Check
Ensure that the fence is parallel to the blade. An improperly aligned fence can cause kickback, a dangerous situation where the workpiece is thrown back at the operator.
Test Cuts
Make a few test cuts on scrap wood to verify that the blade is cutting smoothly and accurately. Listen for any unusual noises or vibrations.
Blade Height Adjustment
Adjust the blade height to the appropriate setting for the thickness of the material you’ll be cutting. As a general rule, the blade should extend about ¼ inch above the top of the workpiece.
Maintaining Your Table Saw Blade
Proper maintenance will extend the life of your table saw blades and ensure optimal performance.
Cleaning
Clean your blades regularly to remove resin, pitch, and sawdust. Use a blade cleaner or degreaser and a stiff brush.
Sharpening
Dull blades can cause splintering, burning, and kickback. Sharpen your blades regularly to maintain a clean cut. You can sharpen your blades yourself or take them to a professional sharpening service.
Storage
Store your blades in a dry, protected location to prevent rust and damage. Use blade guards or cases to protect the teeth.
Common Issues and Troubleshooting
Even with careful installation and maintenance, you may encounter some common issues with your table saw blades.
Blade Wobble
A blade wobble can be caused by a bent blade, a misaligned flange, or a loose arbor nut. Check each of these components and correct any problems.
Burning
Burning can be caused by a dull blade, a slow feed rate, or improper blade height. Ensure your blade is sharp, feed the wood at a steady pace, and adjust the blade height as needed.
Splintering
Splintering can be caused by a dull blade, cutting against the grain, or using the wrong type of blade. Use a sharp blade, cut with the grain, and select the appropriate blade for the material you’re cutting.
Kickback
Kickback is a dangerous situation where the workpiece is thrown back at the operator. It can be caused by an improperly aligned fence, a dull blade, or binding of the workpiece. Ensure your fence is parallel to the blade, use a sharp blade, and use push sticks and blocks to keep your hands away from the blade.
Choosing the Right Table Saw Blade for the Job
Selecting the right blade for the task at hand is critical for achieving optimal results and ensuring safety. Different blade designs are optimized for different cutting tasks and materials. Here’s a more detailed look at common blade types:
| Blade Type | Application | Tooth Count | Characteristics |
|---|---|---|---|
| General Purpose | Versatile for ripping and crosscutting various wood types. Good for everyday projects. | 40-50 | Moderate tooth count offers a balance between ripping speed and crosscutting quality. |
| Ripping | Designed for cutting with the grain (ripping) of solid wood. Provides fast cuts with minimal tear-out. | 24-30 | Fewer teeth with larger gullets (spaces between teeth) for efficient chip removal. Aggressive cutting angle. |
| Crosscut | Optimized for cutting across the grain (crosscutting) of solid wood. Produces clean, smooth cuts with minimal splintering. | 60-80 | Higher tooth count for smoother cuts. Smaller gullets. Often features an alternating top bevel (ATB) tooth grind. |
| Plywood/Laminate | Specifically designed for cutting plywood, laminates, and other sheet goods. Minimizes tear-out and chipping on the surface. | 80+ | Very high tooth count with a triple chip grind (TCG) for scoring the material ahead of the cut. |
| Dado | Used for cutting wide grooves (dadoes) or rabbets in wood. Can be a stacked dado set or a wobble dado. | Variable | Stacked dado sets consist of multiple blades and chippers to achieve different widths. Wobble dados use an adjustable angle to vary the cut width. |
| Non-Ferrous Metals | Used for cutting aluminum, brass, copper, and other non-ferrous metals. | 60-80+ | High tooth count with a triple chip grind (TCG) for clean cuts and to reduce the risk of the blade grabbing the metal. |
| Metal Cutting (Steel) | Designed for cutting steel and other ferrous metals. Requires a specialized blade and a slower cutting speed. | Variable | Often uses a carbide-tipped blade with a negative hook angle to prevent the blade from grabbing the metal. |
| Combination | A compromise between a dedicated ripping and crosscut blade. Can handle a variety of cuts but may not perform as well as specialized blades. | 40-50 | Features a combination of ripping and crosscutting teeth. |
| Thin Kerf | Blades with a thinner kerf (cutting width) reduce material waste and require less power from the saw. | Variable | Reduces the amount of material removed during the cut, resulting in less waste and easier feeding. |
Frequently Asked Questions (FAQ)
Q: How often should I change my table saw blade?
A: Change your table saw blade when it becomes dull, damaged, or when you need a different blade type for a specific project. A dull blade will cause burning, splintering, and can be dangerous.
Q: Can I use any table saw blade on my saw?
A: No, you must use a blade that is the correct size (diameter) and has the correct arbor size for your table saw. Consult your saw’s manual for specifications.
Q: What is the best way to dispose of old table saw blades?
A: Wrap the blade securely in cardboard or heavy paper and tape it closed. Label the package clearly as “Sharp – Table Saw Blade” to alert waste handlers. You can also take it to a metal recycling center.
Q: How do I know if my table saw blade is dull?
A: Signs of a dull blade include burning, splintering, requiring excessive force to feed the wood, and producing rough cuts.
Q: What is blade runout?
A: Blade runout is the amount of wobble or deviation in the blade’s rotation. Excessive runout can cause inaccurate cuts and increase the risk of kickback.
Q: What is the kerf of a table saw blade?
A: The kerf is the width of the cut made by the blade. Thin-kerf blades remove less material and require less power.
Q: My arbor nut is stuck. What should I do?
A: Try using a longer wrench or a cheater bar for more leverage. You can also try applying penetrating oil to the threads. If the nut is still stuck, consult a qualified repair technician.
Q: What is a stabilizer and do I need one?
A: A blade stabilizer is a large, thick washer that fits between the blade and the outer flange. It reduces vibration and improves cut quality, especially with thin-kerf blades. They are optional but can be beneficial.
Q: Is it okay to sharpen table saw blades myself?
A: You can sharpen table saw blades yourself with the right tools and knowledge. However, it’s often best to have them professionally sharpened to ensure accuracy and longevity.
Q: Where can I find the right wrench size for my table saw’s arbor nut?
A: Consult your table saw’s owner’s manual for the correct wrench size. If you don’t have the manual, you may be able to find it online on the manufacturer’s website.
Q: What causes a table saw blade to get hot?
A: Friction causes heat build-up in table saw blades. Dull blades, slow feed rates, and cutting thick or dense materials can all contribute to overheating.
This comprehensive guide provides the information you need for safely changing table saw blade, but remember to always prioritize safety, consult your saw’s manual, and seek professional help if needed.

Hi, I’m Tom Scalisi, and welcome to The Saw Blog! I started this blog to share my hands-on experience and insights about woodworking tools—especially saws and saw blades. Over the years, I’ve had the chance to work with a wide range of tools, and I’m here to help both professionals and hobbyists make informed decisions when it comes to selecting and using their equipment. Whether you’re looking for in-depth reviews, tips, or just advice on how to get the best performance out of your tools, you’ll find it here. I’m excited to be part of your woodworking journey!