
What is the best way to change a table saw blade? The best way involves unplugging the saw, using the right tools to loosen the arbor nut, carefully removing the old blade, cleaning the arbor, installing the new blade with the teeth pointing in the correct direction, and securely tightening the arbor nut. Always refer to your saw’s manual for specific instructions.
Table saws are powerful tools, but to keep them working their best, you need to change the blade from time to time. Knowing how to swap out a blade safely and quickly is a skill every woodworker needs. This guide will take you through every step of the process so you can do it safely and correctly.
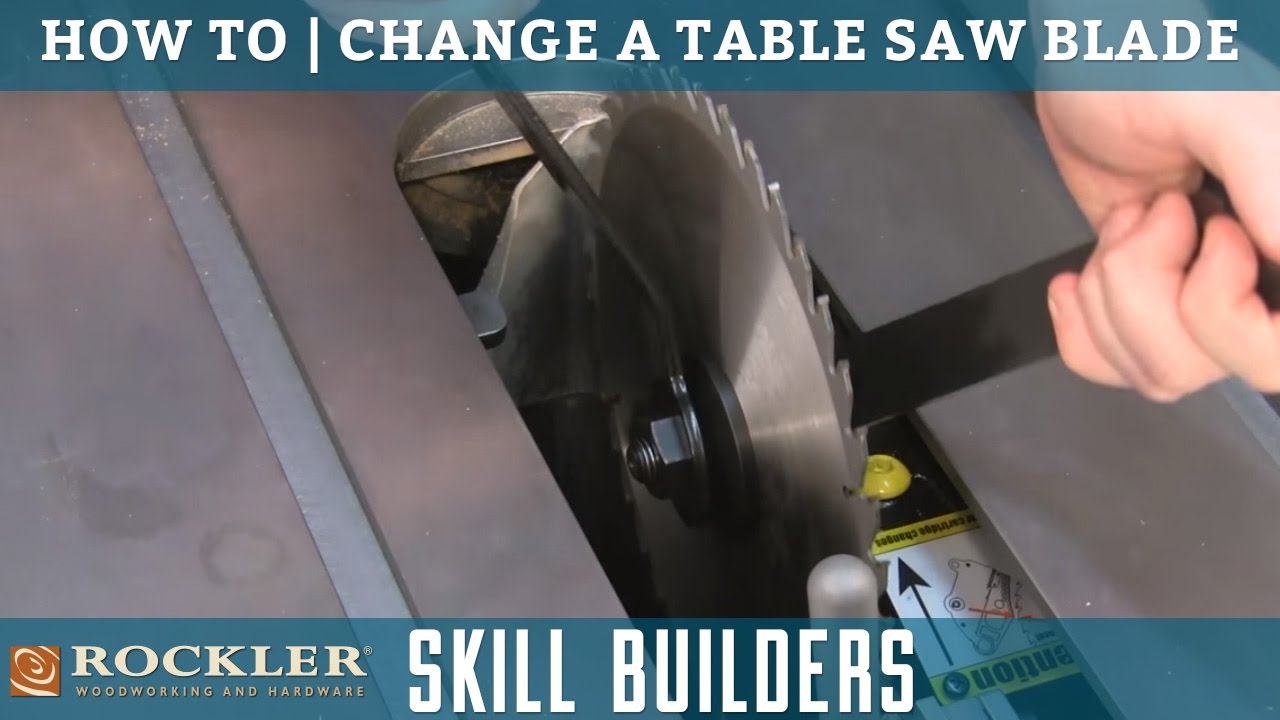
Image Source: i.ytimg.com
The Importance of Safe Table Saw Blade Replacement
Changing blades on a table saw safely isn’t just about getting the job done; it’s about preventing accidents. A dull or damaged blade can lead to kickback, splintering, and even serious injury. Regular table saw blade removal and replacement ensures clean cuts, smooth operation, and, most importantly, your safety.
When to Change Your Table Saw Blade
Several signs indicate it’s time for a table saw blade replacement:
- Burning: If the wood is burning as you cut, the blade is likely dull.
- Excessive Splintering: A dull blade can cause splintering on the edges of the wood.
- Difficulty Cutting: If you have to force the wood through the blade, it’s time for a change.
- Visible Damage: Any cracks, missing teeth, or warping are signs that the blade needs replacing.
Preparing for the Saw Blade Change Procedure
Before diving into the table saw blade installation steps, proper preparation is key. This includes gathering the necessary tools and ensuring a safe workspace.
Essential Tools & Materials
- Table Saw Wrench: Typically, two wrenches come with your saw to loosen and tighten the arbor nut.
- Arbor Lock: Many table saws have an arbor lock to prevent the blade from turning during blade changes.
- Gloves: To protect your hands from sharp teeth.
- Eye Protection: Safety glasses are essential to prevent debris from entering your eyes.
- Clean Cloth: For cleaning the arbor and blade.
- New Saw Blade: Choose the right blade for the task.
Creating a Safe Workspace
- Disconnect the Power: Always unplug the table saw from the power outlet. This is the most important safety step.
- Clear the Area: Remove any scrap wood or tools from the table saw surface.
- Good Lighting: Ensure you have adequate lighting to see what you’re doing.
- Stable Surface: Make sure the table saw is on a stable and level surface.
Step-by-Step Guide: Removing the Table Saw Blade
The table saw blade removal process needs precision to avoid damaging the saw or injuring yourself. Here’s a breakdown of how to remove a saw blade:
Step 1: Raising the Blade
Raise the blade to its maximum height. This provides better access to the arbor nut. Use the blade height adjustment crank on your saw.
Step 2: Engaging the Arbor Lock
Most table saws have an arbor lock. Engage it to prevent the blade from turning while you loosen the arbor nut. The location and operation of the arbor lock vary by model, so consult your saw’s manual.
Step 3: Loosening the Arbor Nut
- Place one wrench on the arbor nut and the other on the arbor flange (if your saw has one).
- Important Note: The direction to loosen the arbor nut can vary. Some saws have a standard right-hand thread, while others have a left-hand thread. Typically, saws where the blade spins towards you require turning the wrench clockwise to loosen (left-hand thread). Consult your saw’s manual.
- Apply firm, steady pressure to loosen the nut. It may require some force.
Step 4: Removing the Outer Flange and Blade
Once the arbor nut is loose, fully unscrew it and remove the outer flange (if applicable). Carefully slide the old blade off the arbor. Be mindful of the sharp teeth.
Step 5: Cleaning the Arbor
Use a clean cloth to wipe down the arbor and flanges. Remove any sawdust, resin, or debris. This ensures the new blade sits flush and true.
Step-by-Step Guide: Installing the Table Saw Blade
With the old blade removed, it’s time for installing table saw blade properly.
Step 1: Inspecting the New Blade
Before installing the new blade, inspect it for any damage, such as cracks or missing teeth. A damaged blade should not be used.
Step 2: Mounting the New Blade
Carefully slide the new blade onto the arbor. Ensure the teeth are pointing in the correct direction. The direction is usually indicated by an arrow on the blade guard or saw table. The teeth should point in the direction of the blade’s rotation.
Step 3: Replacing the Outer Flange and Arbor Nut
Replace the outer flange (if applicable) and then thread the arbor nut back onto the arbor. Tighten the nut by hand initially.
Step 4: Tightening the Arbor Nut
Engage the arbor lock again. Use the wrenches to firmly tighten the arbor nut. Be careful not to overtighten, as this can damage the arbor or nut. Tighten until snug, but not excessively.
Step 5: Testing the Blade
Before using the saw, manually rotate the blade to ensure it spins freely and doesn’t wobble. Disengage the arbor lock.
Important Safety Considerations During Blade Changes
- Always Disconnect Power: This cannot be stressed enough.
- Wear Safety Gear: Gloves and eye protection are a must.
- Use the Right Tools: Don’t improvise with tools that don’t fit properly.
- Consult the Manual: Refer to your table saw’s manual for specific instructions and torque specifications.
- Double-Check Everything: Before plugging the saw back in, double-check that the blade is securely installed and the arbor nut is properly tightened.
Choosing the Right Table Saw Blade
Selecting the right blade is crucial for achieving the best results in your woodworking projects. Different blades are designed for different materials and applications.
Types of Table Saw Blades
| Blade Type | Description | Best For |
|---|---|---|
| General Purpose | A good all-around blade with a moderate tooth count. | Ripping and crosscutting both hard and softwoods. |
| Ripping Blade | Designed for cutting with the grain. Has fewer teeth with larger gullets for efficient waste removal. | Ripping thick stock of hardwoods. |
| Crosscut Blade | Designed for cutting across the grain. Has a higher tooth count for cleaner cuts. | Crosscutting hardwoods and softwoods, plywood, and melamine. |
| Plywood Blade | Features very high tooth count and specialized tooth geometry to minimize splintering. | Cutting plywood, veneer, and other delicate sheet goods. |
| Combination Blade | A compromise between ripping and crosscutting blades. | Suitable for a variety of tasks but may not excel at any specific one. |
| Dado Blade Set | Used for cutting wide grooves or rabbets. Consists of multiple blades and chippers. | Creating dados and rabbets in wood. |
| Metal Cutting Blade | Carbide-tipped blades designed specifically for cutting non-ferrous metals like aluminum. | Cutting aluminum, brass, and other non-ferrous metals. |
Factors to Consider When Choosing a Blade
- Tooth Count: Higher tooth counts produce smoother cuts but cut slower. Lower tooth counts are faster but can be rougher.
- Tooth Grind: The shape of the blade’s teeth affects the cutting performance. Common grinds include ATB (Alternating Top Bevel), FTG (Flat Top Grind), and TCG (Triple Chip Grind).
- Kerf: The width of the cut made by the blade. Full-kerf blades are more stable, while thin-kerf blades require less power.
- Material: Choose a blade designed for the material you’ll be cutting (e.g., wood, metal, plastic).
Troubleshooting Common Issues
Even with careful attention, you may encounter some issues during the saw blade change procedure. Here’s how to troubleshoot them.
Problem: Arbor Nut Won’t Budge
- Solution: Ensure you’re turning the nut in the correct direction (check your manual). Apply more leverage using longer wrenches or a cheater bar. If the nut is rusted, apply penetrating oil and let it soak for a while.
Problem: Blade Wobbles After Installation
- Solution: Make sure the blade is properly seated on the arbor and the flanges are clean and free of debris. Ensure the arbor nut is tightened securely. If the wobble persists, the blade may be damaged.
Problem: Burning Wood During Cuts
- Solution: The blade is likely dull. Replace it with a sharp blade. Also, ensure you’re feeding the wood at the correct speed.
Problem: Excessive Vibration
- Solution: Check that the blade is properly balanced and the arbor nut is tight. Inspect the blade for damage. Vibration can also be caused by loose components in the saw itself.
Table Saw Blade Installation Steps: Summary Checklist
- [ ] Unplug the table saw.
- [ ] Gather the necessary tools.
- [ ] Raise the blade to its maximum height.
- [ ] Engage the arbor lock.
- [ ] Loosen and remove the arbor nut and outer flange.
- [ ] Carefully remove the old blade.
- [ ] Clean the arbor and flanges.
- [ ] Inspect the new blade for damage.
- [ ] Mount the new blade, ensuring the teeth point in the correct direction.
- [ ] Replace the outer flange and arbor nut.
- [ ] Tighten the arbor nut securely.
- [ ] Manually rotate the blade to check for free movement.
- [ ] Plug in the table saw (only after all checks are complete).
Best Way To Change Table Saw Blade: Regular Maintenance
Regular maintenance is essential for keeping your table saw in top condition and ensuring safe operation.
Blade Cleaning
Clean your blades regularly to remove resin and pitch buildup. Use a blade cleaner or a mixture of water and ammonia. Avoid using abrasive cleaners that can damage the blade.
Arbor Inspection
Inspect the arbor regularly for damage or wear. A damaged arbor can cause the blade to wobble or vibrate.
Table Saw Alignment
Check the alignment of the table saw fence and miter slots periodically. Misalignment can lead to inaccurate cuts and increased risk of kickback.
FAQ: Changing Blades on a Table Saw
Here are some frequently asked questions about changing blades on a table saw.
Q: How often should I change my table saw blade?
A: It depends on how often you use the saw and the types of materials you cut. Change the blade when you notice signs of dullness, such as burning or splintering, or when the blade is visibly damaged.
Q: Can I use any type of blade on my table saw?
A: No, you should only use blades that are designed for your table saw’s arbor size and maximum RPM. Using the wrong blade can be dangerous.
Q: What direction should the blade teeth point when installing a new blade?
A: The teeth should point in the direction of the blade’s rotation. This is usually indicated by an arrow on the blade guard or saw table.
Q: How tight should I tighten the arbor nut?
A: Tighten the arbor nut firmly, but don’t overtighten it. Overtightening can damage the arbor or nut. Refer to your saw’s manual for specific torque specifications.
Q: What should I do with my old table saw blade?
A: Dispose of old blades safely by wrapping them in cardboard or a protective cover to prevent injury. Some recycling centers may accept used saw blades.
By following this detailed table saw blade replacement guide, you can safely and efficiently change the blades on your table saw, ensuring optimal performance and extending the life of your equipment. Always prioritize safety and consult your saw’s manual for specific instructions.

Hi, I’m Tom Scalisi, and welcome to The Saw Blog! I started this blog to share my hands-on experience and insights about woodworking tools—especially saws and saw blades. Over the years, I’ve had the chance to work with a wide range of tools, and I’m here to help both professionals and hobbyists make informed decisions when it comes to selecting and using their equipment. Whether you’re looking for in-depth reviews, tips, or just advice on how to get the best performance out of your tools, you’ll find it here. I’m excited to be part of your woodworking journey!