
A table saw sled is a handy tool that slides right in the grooves of your saw table. It helps you make cuts across the grain that are perfectly straight and, more importantly, keeps your hands safe while you work. In this guide, I’m going to show you exactly how to build one for yourself. Let’s get started!
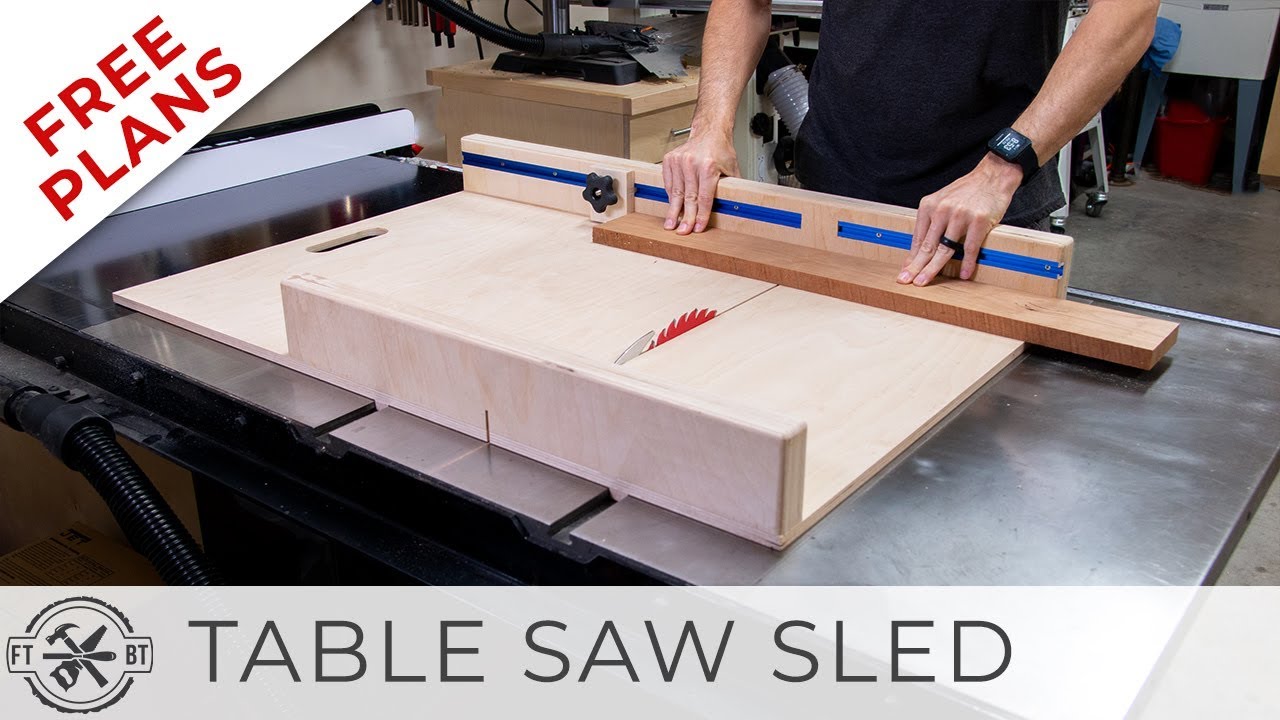
Image Source: i.ytimg.com
Why Build a Table Saw Sled?
Building a table saw sled is a worthwhile project for any woodworker looking to improve the accuracy and safety of their crosscuts. A sled provides a stable and controlled platform for your workpiece, resulting in cleaner cuts and reducing the risk of kickback. Here’s why it’s an essential tool for your workshop:
- Accuracy: Sleds eliminate the play found in standard miter gauges, leading to precise, repeatable cuts.
- Safety: By holding the workpiece firmly against the fence, sleds minimize the chance of kickback and keep your hands away from the blade.
- Versatility: You can use sleds for a variety of cuts, including crosscuts, miters, and even small parts.
- Cost-Effectiveness: Building your own sled is much cheaper than buying a high-end miter gauge or sliding table attachment.
Benefits of Using a Table Saw Sled:
| Benefit | Description |
|---|---|
| Increased Accuracy | Sleds offer precise cuts with minimal blade deflection. |
| Enhanced Safety | They keep your hands away from the blade and reduce kickback risk. |
| Improved Cut Quality | Sleds prevent tear-out and splintering, resulting in cleaner cuts. |
| Repeatable Cuts | The design allows for easily repeatable, accurate cuts. |
Planning Your Table Saw Sled: Key Considerations
Before you start cutting wood, it’s important to plan your sled. Consider these factors:
- Table Saw Sled Dimensions: Base your dimensions on the size of your table saw and the type of cuts you’ll be making. A larger sled is better for larger workpieces, while a smaller sled is easier to store and maneuver.
- Table Saw Sled Materials: Choose stable, flat materials like plywood or MDF. Avoid using solid wood for the base, as it can warp over time.
- Table Saw Sled Plans: You can find many free or paid table saw sled plans online. Select one that suits your needs and skill level. Consider designing your own table saw sled to perfectly match your needs.
- Intended Use: What will you primarily use the sled for? Crosscuts? Miters? Small parts? This will influence the size and features of your sled.
Essential Table Saw Sled Materials
Selecting the right materials is crucial for building a durable and accurate table saw sled. Here’s a breakdown of what you’ll need:
- Base: 3/4″ plywood or MDF (Medium-Density Fiberboard). Plywood offers good strength and stability. MDF is very flat and smooth but can be more susceptible to moisture.
- Runners: Hardwood or plastic/UHMW (Ultra-High Molecular Weight) runners. Hardwood runners can be made from maple, oak, or other dense wood. Plastic/UHMW runners slide very smoothly and are less prone to swelling or shrinking with humidity changes.
- Fence: 3/4″ plywood, MDF, or hardwood. The fence needs to be straight and square to the base.
- Fasteners: Wood screws, glue, and potentially T-track (optional).
- Finishing: Paste wax or other lubricant to reduce friction between the sled and the table saw surface.
Step-by-Step Guide: Making a Table Saw Sled
Follow these steps to build your own table saw sled:
Step 1: Prepare the Base
- Cut the base to your desired dimensions. A common size is around 24″ deep by 30″ wide, but adjust based on your needs.
- Ensure the base is flat and square.
Step 2: Create and Install the Runners
- Cut the runners to fit snugly in your table saw’s miter slots. They should slide smoothly without any slop.
- Attach the runners to the base with glue and screws. Make sure they are perfectly parallel to each other. Use clamps to hold them in place while the glue dries.
- Countersink the screws so they don’t interfere with the sled’s movement.
Step 3: Attach the Back Fence
- Cut the back fence to the width of the base.
- Position the back fence square to the runners. Use a reliable square to ensure accuracy.
- Attach the back fence with glue and screws. Reinforce with corner braces if desired.
Step 4: Initial Cut
- Carefully raise the blade to cut through the base. This creates a zero-clearance slot for the blade.
Step 5: Attach the Front Fence
- This is the most critical step for accuracy. Use the five-cut method to square the front fence to the blade. This method involves making five cuts and measuring the resulting pieces to determine the amount of error.
- Adjust the fence until it is perfectly square.
- Attach the front fence with glue and screws.
Step 6: Reinforce the Sled
- Add corner braces to the fences for extra stability.
- Consider adding a handle to the sled for easier maneuvering.
Step 7: Finish and Tune
- Apply a coat of paste wax to the base to reduce friction.
- Check the sled for squareness and accuracy. Make any necessary adjustments.
Ensuring an Accurate Table Saw Sled
Accuracy is paramount when building a table saw sled. Here are some tips to ensure your sled is as accurate as possible:
- Use the Five-Cut Method: As mentioned earlier, this is the most reliable way to square the fence to the blade.
- Take Your Time: Don’t rush the process. Double-check your measurements and cuts at each step.
- Use Quality Tools: Invest in a good square, measuring tape, and marking gauge.
- Check for Parallelism: Ensure the runners are perfectly parallel to each other and the miter slots.
- Compensate for Blade Kerf: When measuring and cutting, account for the width of the saw blade (kerf).
Enhancing Table Saw Sled Safety
Safety should always be your top priority when working with power tools. Here are some tips for using your table saw sled safely:
- Never Reach Over the Blade: Always keep your hands away from the path of the blade.
- Use Push Sticks or Blocks: Use these tools to guide the workpiece through the cut, especially when working with small pieces.
- Ensure a Secure Grip: Hold the workpiece firmly against the fence to prevent it from shifting during the cut.
- Check for Obstructions: Make sure there are no obstructions in the path of the sled before making a cut.
- Wear Safety Glasses: Always wear safety glasses to protect your eyes from flying debris.
- Use Hearing Protection: Table saws can be loud, so wear hearing protection to prevent hearing damage.
- Never Force the Sled: If the sled is not moving smoothly, stop and investigate the cause. Forcing it can lead to accidents.
Advanced Table Saw Sled Techniques
Once you’ve mastered the basics of building and using a table saw sled, you can explore some advanced techniques:
- Miter Sled: Build a sled with an adjustable fence for making accurate miter cuts.
- Small Parts Sled: Design a sled specifically for cutting small parts safely and accurately.
- Tapering Jig: Create a jig that attaches to your sled for cutting tapers.
- Dado Sled: Build a sled with adjustable fences for cutting dados and grooves.
- Stop Blocks: Use stop blocks to make repeatable cuts at a specific length.
Troubleshooting Common Table Saw Sled Issues
Even with careful planning and construction, you may encounter some issues with your table saw sled. Here are some common problems and how to fix them:
- Sled is Sticking or Binding: This is usually caused by friction between the runners and the miter slots. Apply paste wax or adjust the runners to fit more smoothly.
- Cuts are Not Square: This indicates that the fence is not square to the blade. Use the five-cut method to re-square the fence.
- Runners are Loose: This can cause the sled to wobble and produce inaccurate cuts. Tighten the screws or replace the runners if necessary.
- Base is Warped: This can be caused by using unstable materials or exposing the sled to moisture. Replace the base with a more stable material.
Table: Comparing Different Table Saw Sled Designs
| Design Feature | Pros | Cons |
|---|---|---|
| Single Fence Sled | Simple to build, good for basic crosscuts. | Limited versatility, not ideal for miter cuts. |
| Double Fence Sled | More stable and accurate, better for larger workpieces. | More complex to build, requires more material. |
| Miter Sled | Allows for accurate miter cuts. | Requires an adjustable fence, can be more difficult to set up. |
| Small Parts Sled | Safe and accurate for cutting small pieces. | Limited to small parts, may not be suitable for larger workpieces. |
| Adjustable Stop Block | Makes repeatable cuts simple and easy. | Need to check position each time the sled is used. |
Interpreting Different Table Saw Sleds for Crosscuts
What is the best table saw sled for crosscuts? The best table saw sled for crosscuts is one that is accurate, stable, and sized appropriately for the workpieces you will be cutting. A double-fence sled is a good choice for general crosscutting, while a dedicated small parts sled is ideal for cutting small pieces safely.
Can I use my table saw sled for other types of cuts? Yes, you can use your table saw sled for other types of cuts, such as miters, tapers, and dados, by adding specialized jigs or features. For example, you can add an adjustable fence to create a miter sled or a tapering jig to cut tapers.
Who is the ideal user for a table saw sled? The ideal user for a table saw sled is any woodworker who wants to improve the accuracy and safety of their crosscuts. Whether you are a beginner or an experienced woodworker, a table saw sled can be a valuable addition to your workshop.
Frequently Asked Questions (FAQ)
Q: What is the best material for table saw sled runners?
- A: Hardwood (maple, oak) or UHMW plastic are both good choices. UHMW slides very smoothly and is less affected by humidity.
Q: How do I square the fence to the blade?
A: Use the five-cut method. This is the most accurate way to ensure your fence is perfectly square.
Q: How do I prevent kickback when using a table saw sled?
A: Always hold the workpiece firmly against the fence, use push sticks or blocks, and never reach over the blade.
Q: Can I use a table saw sled with a portable table saw?
A: Yes, but you may need to modify the sled to fit the smaller miter slots and table size of a portable table saw.
Q: How often should I wax my table saw sled?
A: Wax the sled whenever it starts to stick or bind. Regular waxing will keep it sliding smoothly.
Q: What are the common mistakes in building a table saw sled?
A: Not squaring the fence properly, using unstable materials, and not ensuring the runners fit snugly in the miter slots.
Q: What is the benefit of having an adjustable stop block?
A: Adjustable stop blocks make repeat cuts easy and simple without having to measure and mark each time.
By following these instructions and tips, you can build a table saw sled that will improve the accuracy, safety, and versatility of your woodworking projects. Happy building!

Hi, I’m Tom Scalisi, and welcome to The Saw Blog! I started this blog to share my hands-on experience and insights about woodworking tools—especially saws and saw blades. Over the years, I’ve had the chance to work with a wide range of tools, and I’m here to help both professionals and hobbyists make informed decisions when it comes to selecting and using their equipment. Whether you’re looking for in-depth reviews, tips, or just advice on how to get the best performance out of your tools, you’ll find it here. I’m excited to be part of your woodworking journey!