
Do you need a safer and more accurate way to make crosscuts on your table saw? Yes, building a table saw crosscut sled is an excellent project for improving both safety and accuracy in your woodworking. This guide provides detailed instructions and considerations for crafting your own diy crosscut sled. A precision crosscut sled can dramatically improve your accurate cuts woodworking, offering a miter saw alternative with enhanced control and repeatability. It’s a valuable addition to your table saw accessories and essential woodworking jigs.
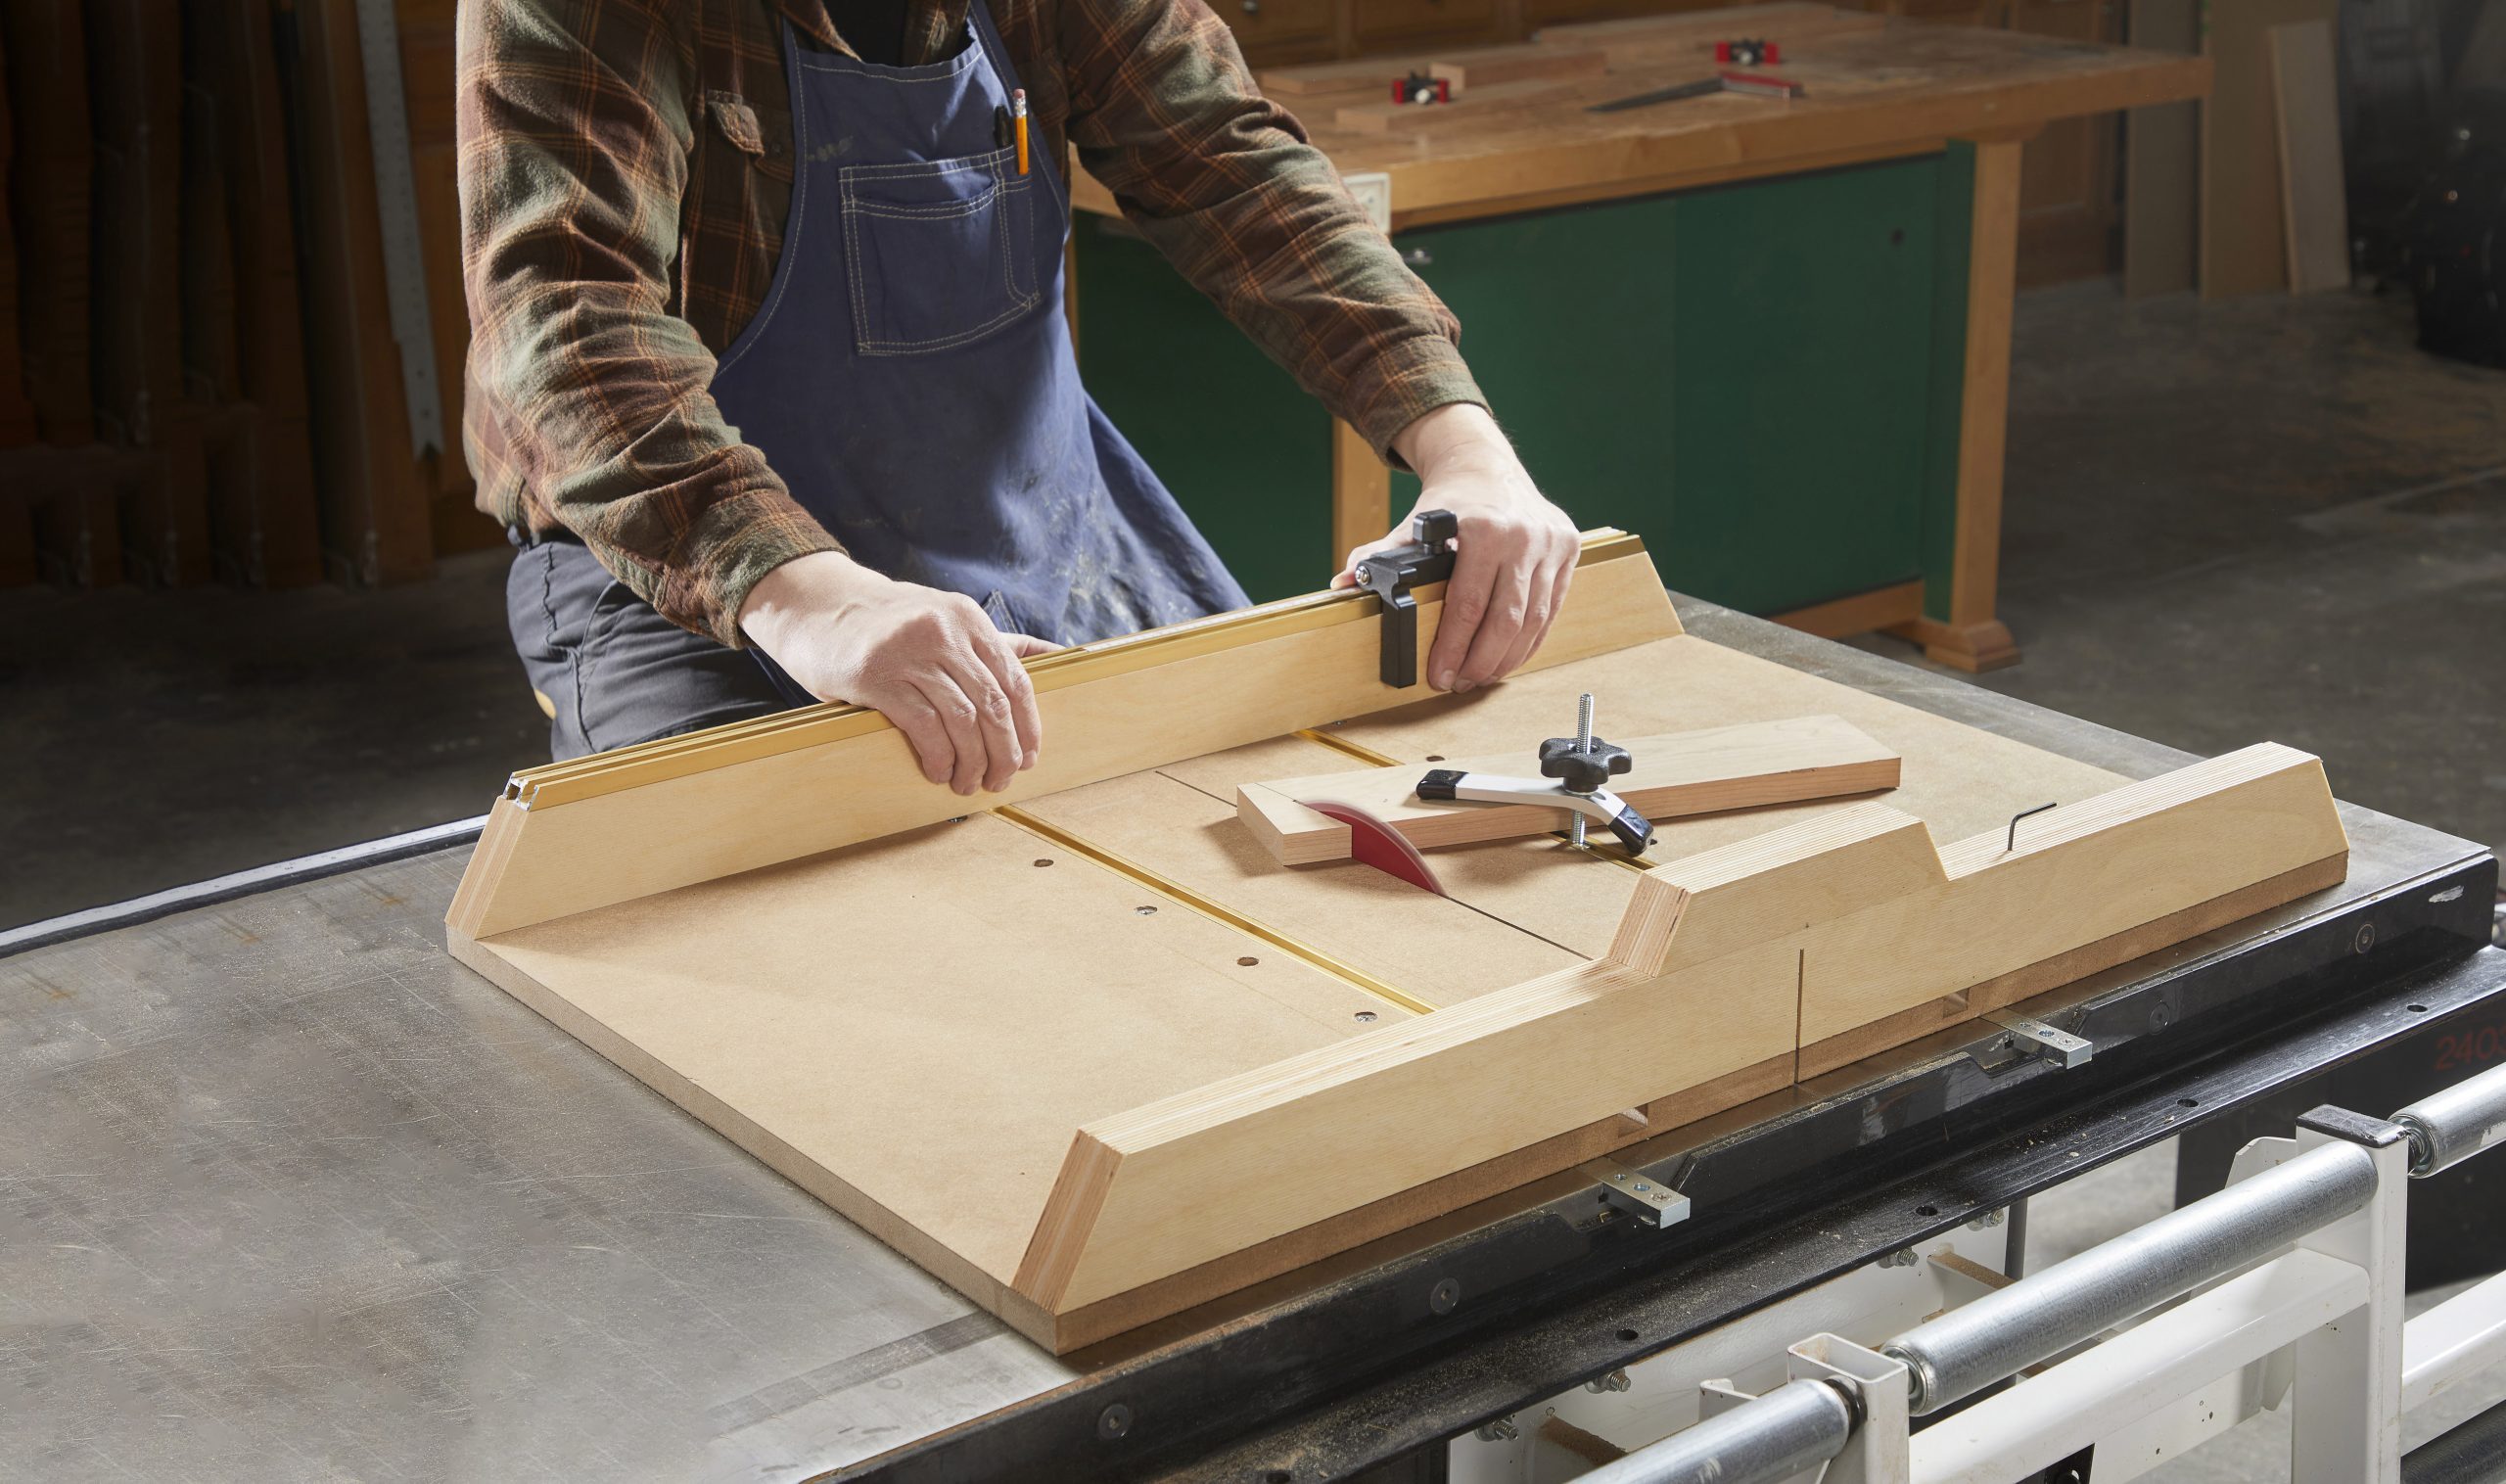
Image Source: www.familyhandyman.com
Why Build a Crosscut Sled?
A crosscut sled offers several advantages over using the miter gauge that typically comes with your table saw:
- Improved Accuracy: Sleds provide a stable platform, minimizing blade deflection and ensuring square cuts.
- Enhanced Safety: By holding the workpiece securely and keeping your hands away from the blade, a sled significantly reduces the risk of kickback.
- Increased Capacity: A sled can handle larger workpieces than a standard miter gauge.
- Repeatable Cuts: Easy setup for making identical cuts multiple times.
- Versatility: Can be adapted for various specialized cuts, such as miters, tapers, and dados.
Essential Materials and Tools
Before diving into the building a crosscut sled process, gather these materials and tools:
Materials:
- Base: ½” or ¾” plywood or MDF (Medium-Density Fiberboard) – dimensions will depend on your crosscut sled dimensions (see next section).
- Runners (2): Hardwood (e.g., maple, oak) or UHMW (Ultra-High Molecular Weight) – approximately ¾” thick, slightly narrower than your table saw’s miter slots.
- Fence (Front): Hardwood – approximately ¾” thick and 3-4″ tall.
- Fence (Rear): Hardwood – approximately ¾” thick and 3-4″ tall.
- Fasteners: Wood screws (various lengths), wood glue.
- Optional: T-track for adding stops or hold-downs.
Tools:
- Table Saw (obviously!)
- Miter Saw (optional, but helpful for accurate cuts)
- Measuring Tape and Square
- Drill and Drill Bits
- Countersink Bit
- Screwdriver or Drill/Driver
- Clamps
- Safety Glasses and Hearing Protection
Deciding on Crosscut Sled Dimensions
There isn’t a single “right” size for a crosscut sled. The ideal crosscut sled dimensions depend on the size of your table saw and the types of projects you typically work on. However, here are some general guidelines:
- Width: The sled should be wide enough to accommodate your most common workpiece sizes. As a starting point, consider making it as wide as the distance from the front edge of your table saw to the back edge.
- Depth: The depth (front to back) should be sufficient to support the workpiece and allow for a comfortable hand position. A depth of 18-24 inches is often a good starting point.
- Fence Height: Aim for a fence height of 3-4 inches to provide adequate support and prevent thin pieces from tipping over.
Example Dimensions for a Medium-Sized Sled:
| Component | Dimensions (inches) |
|---|---|
| Base | 24″ x 30″ |
| Runners | ¾” x ¾” x 18″ |
| Front Fence | ¾” x 3″ x 30″ |
| Rear Fence | ¾” x 3″ x 30″ |
Remember to adjust these dimensions to suit your specific needs and table saw size. Check for sufficient travel so that the blade will not contact the table saw edge.
Step-by-Step Guide: Building Your Crosscut Sled
Follow these steps to construct your own crosscut sled:
Step 1: Preparing the Runners
- Cut the Runners: Cut two runners from your chosen material (hardwood or UHMW). Make sure they are perfectly straight and of uniform thickness.
- Test the Fit: Ensure the runners slide smoothly and snugly in your table saw’s miter slots. They should move freely without excessive play. If the runners are too wide, carefully plane or sand them down until they fit correctly.
- Attach the Runners to the Base: Position the runners on the underside of the base, aligning them parallel to each other and matching the distance between your table saw’s miter slots. Use glue and screws to securely attach the runners to the base. Countersink the screws to prevent them from interfering with the table saw surface.
Step 2: Attaching the Base
- Prepare the Base: Cut the base to the desired dimensions (refer to the previous section). Ensure the edges are square and smooth.
- Glue-Up: Apply a thin layer of wood glue to the top surfaces of the runners.
- Attach the Base to the Runners: Carefully position the base over the runners, aligning them accurately. Clamp the base to the runners, ensuring a tight bond. Allow the glue to dry completely (typically 24 hours).
- Secure with Screws: After the glue has dried, reinforce the attachment by driving screws through the base into the runners. Countersink the screws to ensure they are flush with the surface of the base.
Step 3: Installing the Front Fence (The Critical Step)
The front fence is the most important part of the sled, as it determines the accuracy of your cuts.
- Cut the Fence: Cut the front fence to the desired dimensions (refer to the dimensions section). Make sure it is perfectly straight and square.
- Align the Fence: This is the most critical step. Place the sled on your table saw. Raise the blade slightly (about ¼”). Bring the sled forward until the blade is about halfway through the base. Place the front fence against the back edge of the base. You can use double sided tape to hold it in place.
- The Five-Cut Method: Use the five cut method to align your fence perfectly square to the blade.
- Make the first cut.
- Rotate the cut piece 180 degrees.
- Make the second cut.
- Measure the difference between the two ends of the two pieces.
- Adjust the fence by half of that difference.
- Repeat until you are satisfied that the fence is square to the blade.
- Secure the Fence: Once you’re satisfied with the alignment, carefully screw the fence to the base from underneath. Use plenty of screws to ensure a solid and stable connection.
Step 4: Adding the Rear Fence
- Cut the Rear Fence: Cut the rear fence to the desired dimensions.
- Attach the Fence: Apply glue to the edge of the base where the rear fence will be located. Position the rear fence against the edge of the base and clamp it in place. Secure the fence with screws from underneath.
Step 5: Reinforcing the Sled (Optional but Recommended)
For added stability and durability, consider adding reinforcement to your sled:
- Corner Braces: Cut triangular pieces of wood and attach them to the corners of the sled using glue and screws.
- Stiffening Ribs: Attach strips of wood to the underside of the base, running perpendicular to the runners.
Step 6: Fine-Tuning and Safety Checks
- Test Cuts: Make several test cuts to ensure the sled is cutting accurately. Use a square to check the cut pieces for squareness. If necessary, make minor adjustments to the fence alignment.
- Blade Guard: If possible, consider adding a blade guard to your sled for added safety.
- Smooth Operation: Ensure the sled slides smoothly and easily on the table saw. Apply wax to the runners if necessary.
Enhancing Your Crosscut Sled
Here are some ways to customize and improve your crosscut sled:
- T-Track: Install T-track on the fences to allow for the attachment of stops, hold-downs, and other accessories.
- Stop Blocks: Create adjustable stop blocks to make repeatable cuts at specific lengths.
- Hold-Down Clamps: Add hold-down clamps to securely hold the workpiece in place.
- Miter Attachment: Build an adjustable miter attachment for cutting angles.
- Zero-Clearance Insert: Add a zero-clearance insert to the blade opening to reduce tear-out and improve cut quality.
Table Saw Safety: Always a Priority
Using a table saw and crosscut sled safely is paramount:
- Wear Safety Glasses: Always protect your eyes from flying debris.
- Use Hearing Protection: Prolonged exposure to table saw noise can damage your hearing.
- Keep Your Hands Away from the Blade: Maintain a safe distance between your hands and the blade at all times.
- Never Reach Over the Blade: If you need to adjust the workpiece, turn off the saw and wait for the blade to stop spinning.
- Use Push Sticks or Push Blocks: Use push sticks or push blocks to guide the workpiece past the blade, especially when cutting small or narrow pieces.
- Be Aware of Kickback: Kickback occurs when the blade catches the workpiece and throws it back towards the operator. Be aware of the potential for kickback and take steps to prevent it.
Maintaining Your Crosscut Sled
Regular maintenance will help keep your crosscut sled in top condition:
- Clean the Sled: Remove sawdust and debris from the sled after each use.
- Wax the Runners: Apply wax to the runners periodically to ensure smooth operation.
- Check the Fence Alignment: Periodically check the fence alignment and make adjustments as needed.
- Inspect for Damage: Inspect the sled for any signs of damage and repair or replace worn parts.
Precision Cuts and Advanced Techniques
Once you’ve built your basic crosscut sled, you can explore more advanced techniques for achieving even greater accuracy and versatility:
- Using a Dial Indicator: Use a dial indicator to precisely align the fence to the blade.
- Featherboards: Add featherboards to the sled to hold the workpiece firmly against the fence.
- Dado Stack Compatibility: Design your sled to accommodate a dado stack for cutting wide grooves.
- Digital Readouts: Install digital readouts to measure the distance from the blade to the fence.
Fathoming Table Saw Sled Plans
While this guide provides a comprehensive overview of how to build a table saw crosscut sled, you might also be interested in exploring table saw sled plans available online or in woodworking books. These plans can offer different designs, variations, and specialized features that may suit your specific needs. Many plans offer pre-calculated crosscut sled dimensions, and some even include templates for complex cuts. Exploring different plans can inspire you and help you customize your own sled to perfection. Some examples are Rockler, Woodsmith plans, and others.
Interpreting the Miter Saw Alternative
Using a crosscut sled as an alternative to a miter saw comes with some real benefits. While a miter saw is great for quick angles and cutting trim, a crosscut sled is far better for getting perfectly square cuts and handling larger pieces of wood. Because the sled gives you a solid base to work on, the blade doesn’t wobble, which leads to much cleaner and sharper cuts. Plus, a sled gives you more control over the wood, making it safer to use and reducing the chance of kickback. If you are working on a project where accuracy is key, a crosscut sled is usually the best choice.
Frequently Asked Questions (FAQ)
- What is the best material for the runners?
- Hardwood (maple, oak) and UHMW (Ultra-High Molecular Weight) are both excellent choices. Hardwood is readily available and easy to work with, while UHMW is incredibly durable and self-lubricating.
- Can I use a crosscut sled on any table saw?
- Yes, as long as your table saw has miter slots and the sled runners are sized to fit those slots.
- How do I prevent tear-out when using a crosscut sled?
- Use a sharp blade, add a zero-clearance insert, and score the cut line before making the cut.
- How often should I check the fence alignment?
- Check the fence alignment before each major project or whenever you suspect it may have shifted.
- Is a crosscut sled really safer than using a miter gauge?
- Yes, in most cases. A crosscut sled provides a more stable platform and keeps your hands further away from the blade.
Building a table saw crosscut sled is a rewarding project that can significantly improve the accuracy and safety of your woodworking. With careful planning and execution, you can create a valuable table saw accessory that will serve you well for years to come. Embrace the opportunity to enhance your accurate cuts woodworking and elevate your craftsmanship with this essential woodworking jig.

Hi, I’m Tom Scalisi, and welcome to The Saw Blog! I started this blog to share my hands-on experience and insights about woodworking tools—especially saws and saw blades. Over the years, I’ve had the chance to work with a wide range of tools, and I’m here to help both professionals and hobbyists make informed decisions when it comes to selecting and using their equipment. Whether you’re looking for in-depth reviews, tips, or just advice on how to get the best performance out of your tools, you’ll find it here. I’m excited to be part of your woodworking journey!