
Are you looking to learn how to cut crown molding with a miter saw? It is absolutely a skill you can pick up with the right tools and a little practice. This guide will take you through every step of the process. We’ll cover everything from getting your saw ready to making perfect cuts for both inside and outside corners.
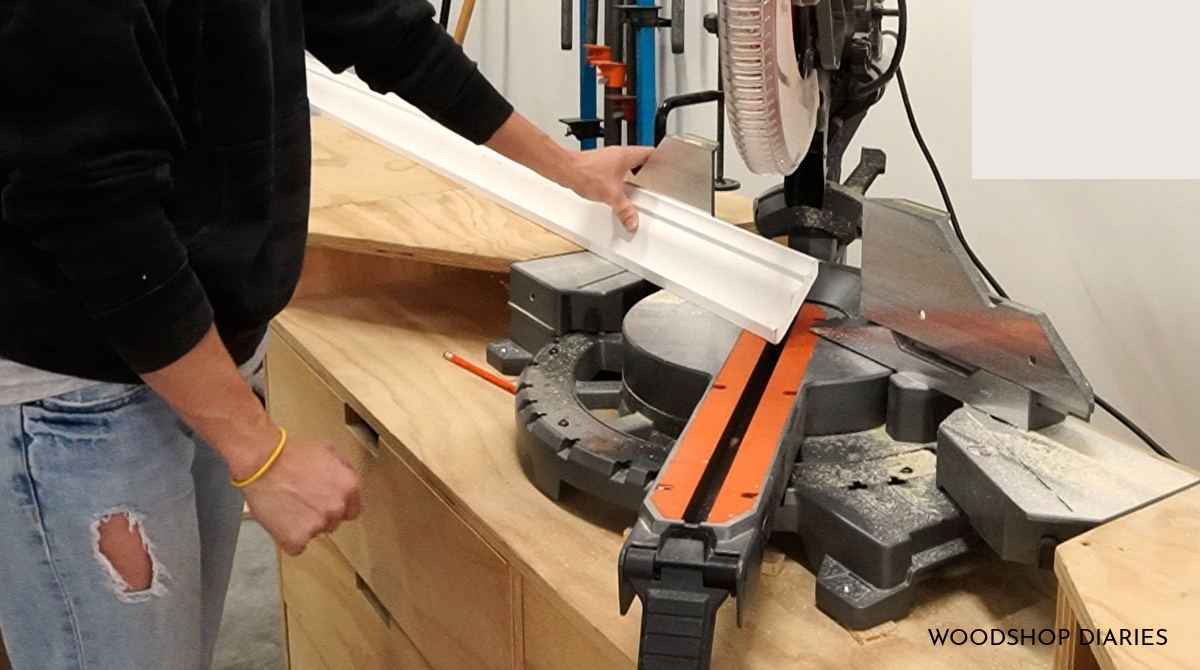
Image Source: www.woodshopdiaries.com
Fathoming the Basics of Crown Molding and Miter Saws
Crown molding adds a touch of elegance to any room. But getting those seamless joints requires precision. A miter saw is the key to achieving those accurate miter saw crown molding cuts that elevate your trim work.
What is Crown Molding?
Crown molding is decorative trim installed where the wall meets the ceiling. It comes in various profiles, sizes, and materials, from wood to polyurethane. Its primary purpose is aesthetic, adding visual interest and a finished look to a room.
Miter Saws: Your Crown Molding Ally
A miter saw is a power tool used to make accurate crosscuts and miter cuts. It’s essential for cutting crown molding angles precisely. Compound miter saws can also tilt the blade, allowing for beveled cuts in addition to miter cuts. This is crucial for cutting crown molding that lays flat on the saw.
Types of Miter Saws:
- Standard Miter Saw: Cuts angles to the left or right.
- Compound Miter Saw: Cuts angles and bevels (tilts the blade).
- Sliding Compound Miter Saw: Adds a sliding feature for cutting wider boards.
- Compound miter saw crown molding cuts will be precise with the right saw.
Setting Up for Success: Tools and Workspace
Before you start crown molding miter saw techniques, gather the necessary tools and prepare your workspace. This will ensure accuracy and safety.
Essential Tools:
- Miter Saw: Preferably a compound miter saw. Consider the best miter saw for crown molding, one with a large cutting capacity.
- Crown Molding: Choose your desired profile and material.
- Measuring Tape: For accurate measurements.
- Pencil: For marking cut lines.
- Safety Glasses: Always protect your eyes.
- Ear Protection: Power tools can be loud.
- Clamps: To secure the molding to the saw.
- Speed Square or Combination Square: For checking angles.
- Coping Saw (Optional): For how to cope crown molding.
- Wood Glue: For joining pieces.
- Nail Gun (Optional): For installing crown molding tips quickly.
- Caulk and Paint: For finishing touches.
Workspace Preparation:
- Clear the Area: Ensure ample space around your miter saw.
- Stable Surface: Place the miter saw on a sturdy table or stand.
- Dust Collection: Attach a dust bag or vacuum to the saw to minimize mess.
- Lighting: Good lighting is crucial for accurate cuts.
The Key: “Spring Angle” and Miter Saw Settings
The “spring angle” is the angle at which the crown molding sits against the wall and ceiling. Common spring angles are 45 degrees and 52 degrees. This angle dictates how you’ll position the molding on the miter saw.
“Upside Down and Backwards” Method
This is a popular method for cutting crown molding on a miter saw. Instead of standing the molding upright as it would be on the wall, you lay it flat on the saw bed. The “spring angle” is achieved by setting the miter and bevel angles on the saw.
Miter and Bevel Angle Chart (For 45-Degree Spring Angle):
| Corner Type | Miter Angle (Degrees) | Bevel Angle (Degrees) |
|---|---|---|
| Inside Corner Left | 31.6 | 33.9 |
| Inside Corner Right | 31.6 | 33.9 |
| Outside Corner Left | 31.6 | 33.9 |
| Outside Corner Right | 31.6 | 33.9 |
Note: Always double-check your saw’s manual for specific instructions and angle settings. Slight variations can occur between different saw models.
Using a Crown Molding Cutting Jig
A crown molding cutting jig is a helpful accessory. It holds the molding at the correct angle on the miter saw, simplifying the cutting process. You can purchase one or build your own.
Step-by-Step Cutting Guide: Inside and Outside Corners
Now, let’s delve into the practical steps for cutting crown molding for both inside and outside corners.
Cutting Inside Corners:
Inside corners are where two walls meet to form an inward angle.
- Measure the Wall Length: Measure the length of the wall where you’ll install the crown molding.
- Determine the Cut Angle: Use the miter and bevel angle chart for inside corners.
- Set the Miter Saw: Adjust the miter and bevel angles according to the chart.
- Position the Molding: Place the molding flat on the saw, with the bottom edge (the part that will touch the wall) against the fence.
- Make the Cut: Carefully lower the blade and cut the molding.
- Cut the Opposite Piece: For the other piece of the inside corner, reverse the miter angle and repeat the process.
- Test the Fit: Dry-fit the two pieces to ensure they align correctly.
- Adjust if Necessary: If the fit isn’t perfect, make slight adjustments to the angles.
Cutting Outside Corners:
Outside corners are where two walls meet to form an outward angle.
- Measure the Wall Length: Measure the length of the wall where you’ll install the crown molding.
- Determine the Cut Angle: Use the miter and bevel angle chart for outside corners.
- Set the Miter Saw: Adjust the miter and bevel angles according to the chart.
- Position the Molding: Place the molding flat on the saw, with the bottom edge against the fence.
- Make the Cut: Carefully lower the blade and cut the molding.
- Cut the Opposite Piece: For the other piece of the outside corner, reverse the miter angle and repeat the process.
- Test the Fit: Dry-fit the two pieces to ensure they align correctly.
- Adjust if Necessary: If the fit isn’t perfect, make slight adjustments to the angles.
Dealing with Imperfect Angles
Walls are not always perfectly square. To account for this, you may need to adjust the miter and bevel angles slightly. Start with a small adjustment and test the fit until you achieve a tight joint.
Coping Crown Molding: An Alternative Approach
How to cope crown molding is an alternative to mitered inside corners. Coping involves cutting the profile of one piece of molding to fit snugly against the face of the adjacent piece.
When to Cope:
- When walls are significantly out of square.
- For a more forgiving and seamless look.
- When dealing with complex angles.
How to Cope:
- Miter Cut One Piece: Cut the first piece of molding at a 45-degree angle, as if you were creating a mitered corner.
- Back-Cut with a Coping Saw: Use a coping saw to carefully remove the wood behind the mitered edge, following the profile of the molding.
- Test and Adjust: Test the fit against the adjacent piece of molding and make adjustments as needed until the profile matches perfectly.
- Glue and Install: Apply wood glue to the coped joint and secure the molding in place.
Installing Crown Molding: The Final Steps
Installing crown molding tips are crucial for a professional-looking finish.
- Mark Stud Locations: Use a stud finder to locate wall studs and mark them for nailing.
- Apply Adhesive: Apply construction adhesive to the back of the molding.
- Position and Secure: Position the molding against the wall and ceiling, aligning it with your marks.
- Nail in Place: Use a nail gun or finish nails to secure the molding to the studs.
- Fill Nail Holes: Fill nail holes with wood filler and sand smooth.
- Caulk Seams: Caulk any gaps between the molding and the wall or ceiling.
- Paint or Finish: Paint or finish the molding to match your decor.
Tips for Precise Cuts:
- Sharp Blade: Use a sharp blade for clean cuts.
- Secure the Molding: Use clamps to hold the molding in place while cutting.
- Slow and Steady: Cut slowly and steadily to avoid splintering.
- Practice Cuts: Practice on scrap pieces before cutting the actual molding.
- Check for Square: Ensure your miter saw is properly calibrated and square.
- Consider a Laser Guide: Some miter saws have laser guides that can help you align your cuts accurately.
- Double-Check Measurements: Always double-check your measurements before cutting.
- Invest in a High-Quality Saw: The best miter saw for crown molding will make the job easier and more accurate.
Common Mistakes to Avoid
- Incorrect Angle Settings: Double-check your miter and bevel angle settings before each cut.
- Rushing the Cut: Take your time and cut slowly for cleaner results.
- Ignoring Imperfect Walls: Account for walls that are not perfectly square.
- Using a Dull Blade: A dull blade can cause splintering and inaccurate cuts.
- Not Clamping the Molding: Failing to clamp the molding can lead to movement during the cut.
Frequently Asked Questions (FAQ)
- What is the best way to cut inside corner crown molding cut? The best way to cut crown molding for inside corners is to use a miter saw with the correct miter and bevel angle settings or to cope the joint.
- Can I use a hand saw to cut crown molding? While possible, it’s not recommended. A miter saw provides much greater accuracy and control, essential for seamless joints.
- What is the outside corner crown molding cut procedure? The process of cutting crown molding for outside corners involves setting the miter and bevel angles on the miter saw according to the corner’s angle and making precise cuts on each piece to form a seamless joint.
- How do I measure for crown molding? Measure each wall accurately and add a little extra length for mitered corners. It’s better to have a piece that’s slightly too long than too short.
- How do I attach crown molding to the wall? Use construction adhesive and finish nails to secure the molding to wall studs.
Conclusion:
Cutting crown molding with a miter saw requires practice and attention to detail. By following these steps and tips, you can achieve professional-looking results and enhance the beauty of your home. Remember to prioritize safety and take your time. With the right tools and techniques, you’ll be able to tackle any crown molding project with confidence.

Hi, I’m Tom Scalisi, and welcome to The Saw Blog! I started this blog to share my hands-on experience and insights about woodworking tools—especially saws and saw blades. Over the years, I’ve had the chance to work with a wide range of tools, and I’m here to help both professionals and hobbyists make informed decisions when it comes to selecting and using their equipment. Whether you’re looking for in-depth reviews, tips, or just advice on how to get the best performance out of your tools, you’ll find it here. I’m excited to be part of your woodworking journey!