
Cutting crown molding on a miter saw can seem tricky. How do you cut crown molding on a miter saw? You can cut crown molding using a miter saw by understanding its angles, using the proper techniques (like flat or nested cutting), and ensuring precise measurements. This guide offers a comprehensive look at achieving professional-looking crown molding installations with your miter saw.
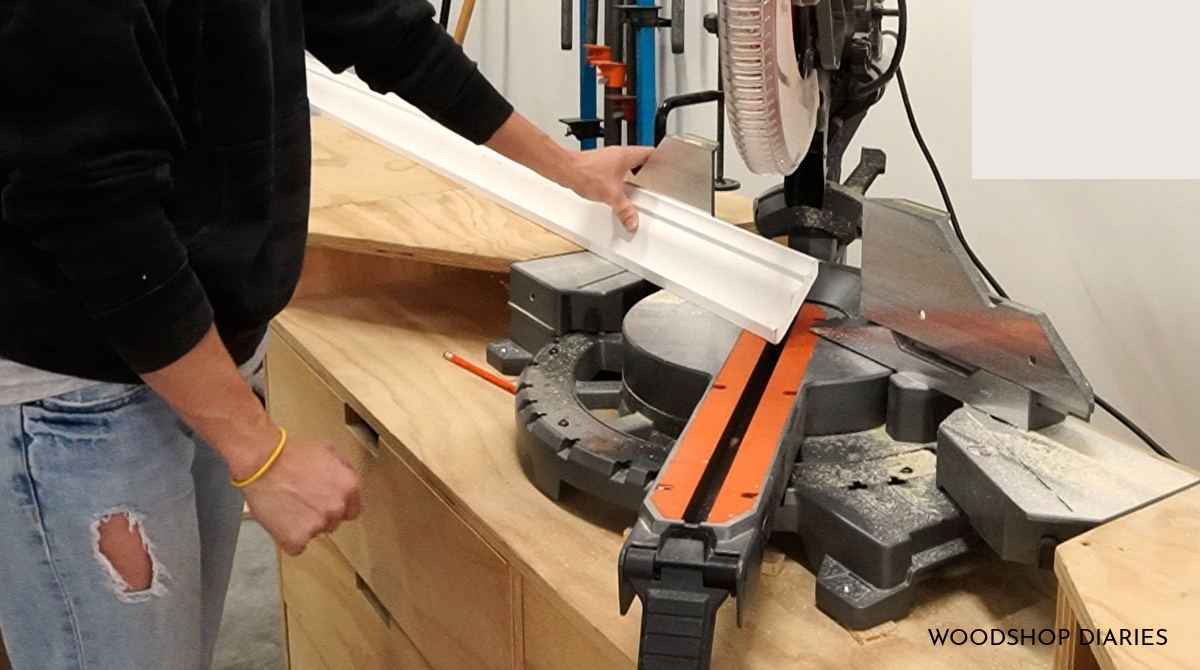
Image Source: www.woodshopdiaries.com
Grasping Crown Molding Basics
Before grabbing your saw, it’s crucial to learn some fundamental concepts. Crown molding isn’t just about straight cuts; it involves understanding angles, spring angles, and the difference between inside and outside corners.
What is Crown Molding?
Crown molding is simply a decorative piece of trim that goes right where your walls meet the ceiling. It’s a great way to give any room a stylish, finished look. You can find it in all kinds of shapes and sizes, and it comes in different materials like wood, MDF, or plastic.
Spring Angle Defined
The spring angle is the angle at which the crown molding sits against the wall and ceiling. It is the angle that the back of the crown molding makes with the wall. Common spring angles are 38 degrees and 45 degrees, but others exist. Knowing your spring angle is vital for accurate cuts.
Inside vs. Outside Corners
- Inside Corners: Where two walls meet inside a room, forming an angle less than 180 degrees.
- Outside Corners: Where two walls meet outside a room, forming an angle greater than 180 degrees.
Choosing the Right Miter Saw
While you can technically cut crown molding with a hand saw and miter box, a miter saw makes the job significantly easier and more precise. So, what is the best miter saw for crown molding?
Types of Miter Saws
- Standard Miter Saw: Cuts angles to the left and right. Good for basic cuts.
- Compound Miter Saw: Cuts angles (miter) and bevels (tilts the blade). Essential for crown molding.
- Sliding Compound Miter Saw: Offers the same capabilities as a compound miter saw but with the added benefit of a sliding blade for cutting wider pieces.
Compound Miter Saw Crown Molding: Why It’s Ideal
A compound miter saw is highly recommended. It allows you to make both miter and bevel cuts simultaneously, which is often needed for crown molding, especially when not cutting flat.
Essential Features to Look For
- Blade Size: 10-inch or 12-inch blades are common. A 12-inch blade is generally better for taller crown molding.
- Miter Range: Look for a saw with a wide miter range (e.g., 50 degrees left and right).
- Bevel Range: Should bevel both left and right for added convenience.
- Accuracy: A saw with clear, precise angle markings is crucial.
- Dust Collection: A good dust collection system keeps your workspace cleaner.
Crown Molding Miter Saw Angles: Setting Up Your Saw
Getting the correct angles on your miter saw is essential for clean joints. There are two primary methods for cutting crown molding: the nested (or upside down) method and the flat cutting method.
The Nested (Upside Down) Method
This method involves placing the crown molding in the miter saw as it would sit on the wall and ceiling. Think of it as positioning the molding “upside down.”
Pros:
- Mimics the installed position, making visualization easier.
- Good for complex angles.
Cons:
- Requires precise jig setup.
- Can be tricky to clamp securely.
Setting Up for Nested Cutting
- Build a Jig: Create a jig using scrap wood to hold the crown molding at its spring angle. This jig will act as a backstop.
- Secure the Jig: Attach the jig securely to the miter saw fence.
- Position the Molding: Place the crown molding against the jig, ensuring it sits snugly at the correct spring angle.
Finding the Correct Angles
- For a 90-degree inside corner: Miter angle = 45 degrees, Bevel angle = Spring Angle
- For a 90-degree outside corner: Miter angle = 45 degrees, Bevel angle = Spring Angle
Table: Miter & Bevel Angle Chart for Nested Cutting (90-Degree Corners)
| Corner Type | Spring Angle | Miter Angle | Bevel Angle |
|---|---|---|---|
| Inside Corner | 45 degrees | 45 degrees | 45 degrees |
| Outside Corner | 45 degrees | 45 degrees | 45 degrees |
| Inside Corner | 38 degrees | 45 degrees | 38 degrees |
| Outside Corner | 38 degrees | 45 degrees | 38 degrees |
Important Note: This chart is for perfect 90-degree corners. Walls are rarely perfect, so adjustments are usually needed. We’ll cover that later.
Crown Molding Flat Cutting
This method involves laying the crown molding flat on the miter saw table.
Pros:
- Simpler setup.
- Easier to clamp.
Cons:
- Requires more complex angle calculations.
- Visualization can be challenging.
Setting Up for Flat Cutting
- Lay the Molding Flat: Place the crown molding flat on the miter saw table with the decorative side facing up.
- Secure the Molding: Clamp the molding firmly to prevent movement during the cut.
Finding the Correct Angles for Flat Cutting
The formulas for calculating miter and bevel angles for flat cutting are more involved and depend on the spring angle of your crown molding. Many online calculators and charts can help. However, a general principle for 90-degree corners: the miter angle will still be 45 degrees for both inside and outside corners. The bevel angle is where the calculation differs based on the spring angle and corner type.
Cutting Crown Molding Tips For Accuracy
No matter which method you choose, here are some important tips:
- Measure Accurately: Double-check all measurements before cutting. “Measure twice, cut once” is a golden rule.
- Sharp Blade: Use a sharp blade designed for fine cuts. This will reduce tear-out and splintering.
- Support Long Pieces: Use supports on either side of the saw to keep long pieces of crown molding level.
- Creep Cutting: Slowly lower the blade into the molding. Don’t force it.
- Test Cuts: Always make test cuts on scrap pieces before cutting your actual crown molding.
- Consistent Pressure: Apply even pressure when cutting to avoid blade wobble.
- Safety First: Wear safety glasses and hearing protection.
Cutting Inside Corner Crown Molding
Inside corners require the two pieces of crown molding to meet perfectly inside the corner.
Mitered Inside Corners
Using the nested method and the chart above, you’d cut two pieces of crown molding, each with a 45-degree miter angle and a bevel angle matching your spring angle (e.g., 45 degrees for 45-degree spring angle molding).
Coping Crown Molding
Coping is a technique where one piece of crown molding is cut square and fits snugly into the corner. The second piece is then “coped” to match the profile of the first piece.
Why Use Coping?
- Handles imperfect corners better.
- Hides gaps that can occur with mitered corners due to wall irregularities.
How to Cope
- Miter Cut One Piece: Cut one piece of crown molding with a 45-degree inside corner miter cut. This will reveal the profile.
- Back Cut: Use a coping saw or a utility knife to carefully remove the wood behind the profile line. Angle the blade slightly backward to create a back cut.
- Test Fit: Check the fit of the coped piece against the first piece. Make adjustments as needed until the fit is perfect.
- Sand Smooth: Sand the coped edge smooth for a seamless transition.
Cutting Outside Corner Crown Molding
Outside corners require the two pieces of crown molding to meet perfectly on the outside of the corner.
Mitered Outside Corners
Using the nested method, you’d cut two pieces of crown molding, each with a 45-degree miter angle and a bevel angle matching your spring angle. The difference between inside and outside corner cuts lies in the direction of the miter.
Adjusting for Imperfect Corners
Walls are rarely perfectly square. Here’s how to handle angles that aren’t 90 degrees:
- Measure the Corner: Use a protractor or angle finder to measure the actual corner angle.
- Divide by Two: Divide the corner angle by two to get the miter angle for each piece of crown molding. For example, if the corner is 92 degrees, each piece needs a 46-degree miter cut.
- Adjust Bevel: The bevel angle usually remains the spring angle, but minor adjustments may be needed.
- Test and Adjust: Always test the fit and adjust the angles as needed. Small adjustments can make a big difference.
Finishing Touches
Once the crown molding is cut, the installation process begins. Remember to use construction adhesive and finish nails to secure the molding to the wall and ceiling. Fill nail holes and caulk gaps for a seamless finish.
FAQ – Frequently Asked Questions
Can I cut crown molding with a circular saw?
- While possible, it’s not recommended. A miter saw provides far more accuracy and control for angled cuts.
What if my walls aren’t straight?
- Use a long level to identify high and low spots. You may need to shim the crown molding or scribe it to fit the wall.
What is sprung angle crown molding?
- Sprung angle crown molding refers to the angle at which the back of the crown molding makes contact with the wall and ceiling.
What is the best way to cut long pieces of crown molding?
- Use a sliding compound miter saw and provide ample support for the molding on both sides of the saw.
Why are my mitered corners not meeting perfectly?
- Check the accuracy of your miter saw angles, the wall corner angle, and the spring angle of your crown molding. Slight adjustments to the miter or bevel angle may be necessary.
By following these steps and tips, you can confidently cut crown molding on a miter saw and achieve professional-looking results. Remember to take your time, measure carefully, and practice on scrap pieces. With a little patience and attention to detail, you can transform any room with beautiful crown molding.

Hi, I’m Tom Scalisi, and welcome to The Saw Blog! I started this blog to share my hands-on experience and insights about woodworking tools—especially saws and saw blades. Over the years, I’ve had the chance to work with a wide range of tools, and I’m here to help both professionals and hobbyists make informed decisions when it comes to selecting and using their equipment. Whether you’re looking for in-depth reviews, tips, or just advice on how to get the best performance out of your tools, you’ll find it here. I’m excited to be part of your woodworking journey!