
A circular saw is a powerful tool used to make straight cuts in various materials like wood, plastic, and metal. What is a circular saw? It is a handheld power saw with a rotating circular blade. This guide will help you learn how to use one safely and effectively.
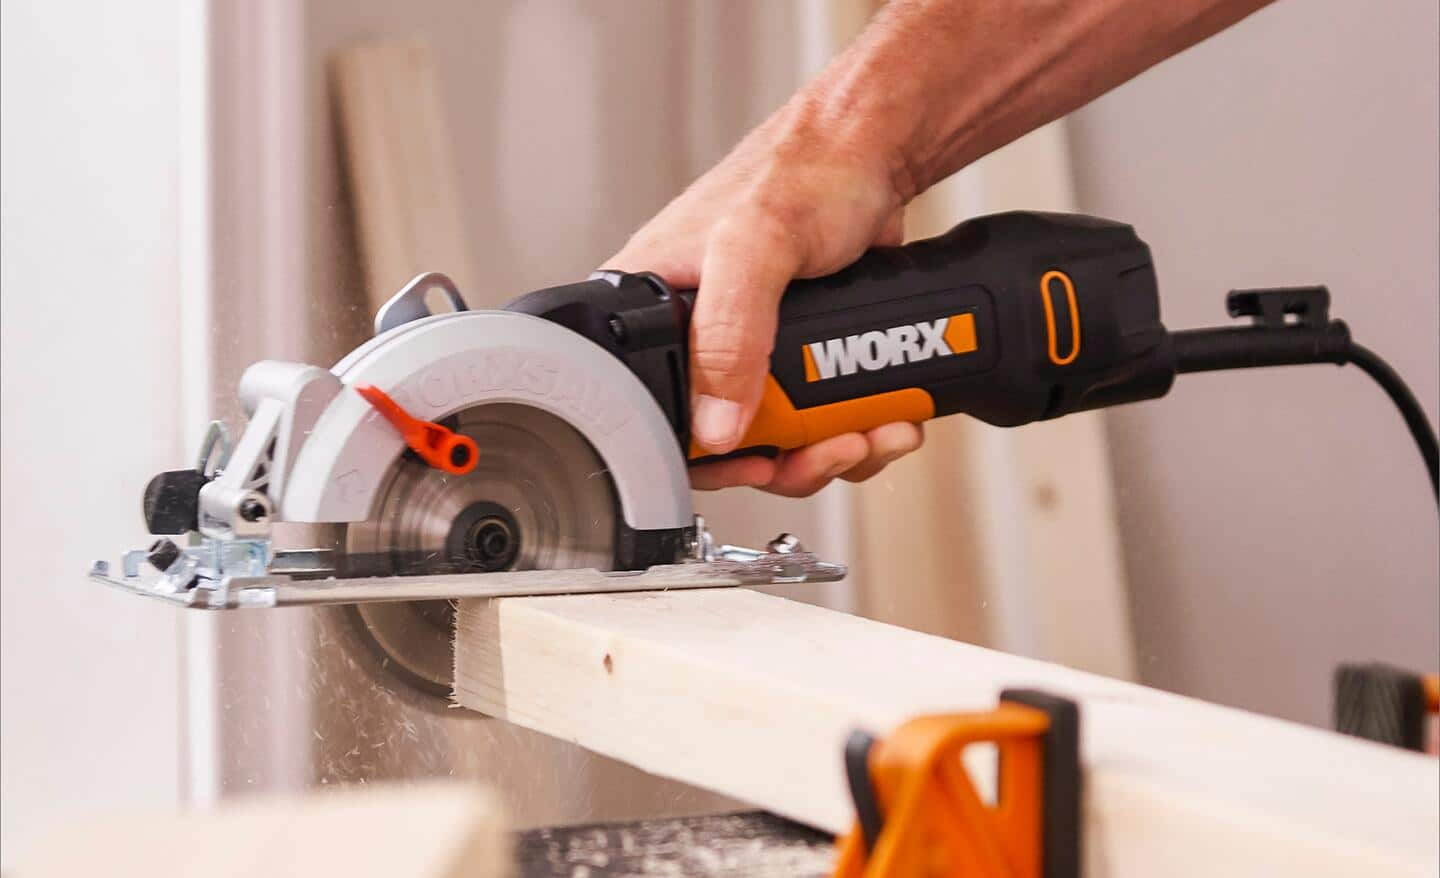
Image Source: dam.thdstatic.com
Getting Started with Your Circular Saw
Before you even pick up the saw to start cutting, it’s really important to get the basics down. This part of the guide will walk you through everything you need to know so you’re fully prepared before you make that very first cut.
Understanding the Parts of a Circular Saw
Familiarize yourself with the key components:
- Blade: The circular cutting disc. Different blades are designed for different materials.
- Motor: Powers the blade.
- Handle: For gripping and controlling the saw.
- Base Plate (Shoe): The flat metal part that rests on the material being cut.
- Blade Guard: A safety feature that covers the blade when not in use. It automatically retracts during cutting.
- Depth Adjustment: Controls how deep the blade cuts.
- Bevel Adjustment: Allows you to make angled cuts.
- Lock-Off Switch: Prevents accidental starting.
- Trigger: Activates the motor and blade.
Essential Safety Gear
Your safety is paramount. Always wear the following:
- Safety Glasses: To protect your eyes from flying debris.
- Hearing Protection: Circular saws are loud.
- Dust Mask or Respirator: To avoid inhaling sawdust.
- Gloves: For better grip and protection.
- Sturdy Footwear: Closed-toe shoes are a must.
Setting Up Your Work Area
- Clear the Area: Remove any obstructions.
- Good Lighting: Ensure you can see clearly.
- Stable Surface: Use a workbench or sawhorses.
- Secure the Material: Use clamps to prevent movement.
Circular Saw Blade Selection
Choosing the right blade is crucial for a clean, safe, and efficient cut. Circular saw blade selection depends on the material you are cutting.
Types of Blades
- General Purpose Blades: Suitable for cutting various types of wood.
- Crosscut Blades: Designed for cutting across the grain of the wood. They have more teeth for a smoother finish.
- Rip Cut Blades: Designed for cutting along the grain of the wood. They have fewer teeth for faster cutting.
- Plywood Blades: Feature many teeth to prevent splintering when cutting plywood.
- Metal Cutting Blades: Specifically designed for cutting metal.
- Diamond Blades: Used for cutting concrete, tile, and masonry.
Tooth Count
The number of teeth on the blade affects the cut quality:
- More Teeth: Smoother cuts, slower cutting speed. Ideal for plywood and fine woodworking.
- Fewer Teeth: Faster cuts, rougher finish. Ideal for ripping lumber.
Blade Material
- Steel Blades: Affordable and suitable for general wood cutting.
- Carbide-Tipped Blades: More durable and stay sharp longer. Recommended for hardwoods and abrasive materials.
Blade Selection Table
| Material | Blade Type | Tooth Count | Notes |
|---|---|---|---|
| Soft Wood | General Purpose/Rip Cut | 18-24 | Faster cutting |
| Hard Wood | Crosscut/General Purpose | 40-60 | Smoother finish |
| Plywood | Plywood Blade | 60-80 | Prevents splintering |
| Aluminum | Non-Ferrous Metal Blade | 60-80 | Use cutting lubricant |
| Steel | Metal Cutting Blade | Varies | Use appropriate blade for steel type; cut slowly with cutting lubricant. |
| Concrete/Masonry | Diamond Blade | N/A | Use dry or wet cutting as specified by the blade manufacturer. |
Setting the Circular Saw for the Cut
Proper setup ensures accuracy and safety.
Circular Saw Depth of Cut
The circular saw depth of cut should be set so the blade extends just slightly beyond the thickness of the material.
- Too Deep: Can cause kickback and increase the risk of injury.
- Not Deep Enough: The saw won’t cut through the material completely.
Steps to Adjust the Depth:
- Loosen the depth adjustment knob or lever.
- Place the saw’s base plate on the material you’ll be cutting.
- Adjust the blade depth so it extends about ¼ inch (6mm) below the material.
- Tighten the adjustment knob or lever.
Circular Saw Bevel Cutting
Circular saw bevel cutting lets you make angled cuts.
Steps to Adjust the Bevel Angle:
- Loosen the bevel adjustment knob or lever.
- Tilt the saw base to the desired angle using the angle markings on the saw.
- Tighten the adjustment knob or lever.
- Ensure the angle is locked securely before cutting.
Basic Circular Saw Cutting Techniques
Now that you have prepared your work area and made the proper adjustments to the saw, you can get started with basic cutting. Circular saw cutting techniques will ensure a smoother, more controlled cut.
Making a Straight Cut
- Mark the Cut Line: Use a pencil and ruler or a chalk line to mark the cutting line clearly on the material.
- Position the Saw: Align the saw blade with the cutting line. Most saws have a notch or line on the base plate to indicate the blade’s position.
- Secure the Material: Clamp the material to your workbench or sawhorses.
- Start the Saw: Hold the saw firmly with both hands. Engage the lock-off switch and pull the trigger.
- Let the Blade Reach Full Speed: Wait until the blade is spinning at full speed before making contact with the material.
- Cut Along the Line: Guide the saw smoothly along the cutting line, applying gentle, consistent pressure. Let the saw do the work; don’t force it.
- Follow Through: Continue cutting until you have completely cut through the material.
- Release the Trigger: Let the blade stop completely before setting the saw down.
Using a Circular Saw Guide Rail
A circular saw guide rail can improve the accuracy of cuts.
- Place the Guide Rail: Position the guide rail along the cut line and secure it with clamps.
- Position the Saw: Place the base plate of the circular saw against the guide rail.
- Make the Cut: Follow the same steps as making a straight cut, using the guide rail to keep the saw on the cut line.
Circular Saw Plunge Cut
A circular saw plunge cut is where you start the cut in the middle of the material, not from an edge.
- Mark the Cut: Draw the outline of the area to be cut.
- Set the Depth: Adjust the blade depth to the thickness of the material.
- Tilt the Saw: Rest the front edge of the base plate on the material. Tilt the saw so the blade is not touching the surface.
- Start the Saw: Engage the lock-off switch and pull the trigger. Let the blade reach full speed.
- Lower the Blade: Slowly lower the blade into the material, pivoting the saw on the front edge of the base plate.
- Cut Along the Line: Once the blade is fully engaged, guide the saw along the marked lines.
- Complete the Cut: Finish cutting along the marked lines to complete the opening.
Advanced Cutting Techniques
Once you are comfortable with the basics, you can explore these advanced techniques.
Ripping Lumber
Ripping is cutting with the grain.
- Mark the Cut: Mark a straight line.
- Use a Rip Fence: Attach a rip fence to the saw if available, or use a clamped straight edge as a guide.
- Make the Cut: Follow the marked line or the rip fence to cut along the grain.
Cutting Sheet Goods (Plywood, MDF)
- Support the Sheet: Place the sheet goods on a stable surface with supports to prevent sagging.
- Use a Plywood Blade: Use a blade with a high tooth count to minimize splintering.
- Score the Cut Line: Score the cut line with a utility knife before cutting to reduce splintering.
- Make the Cut: Cut slowly and steadily along the marked line, using a guide rail for best results.
Cutting Metal
Can I cut metal with a circular saw? Yes, but you need a specific metal cutting blade.
- Use a Metal Cutting Blade: Use a blade specifically designed for cutting metal.
- Secure the Metal: Clamp the metal securely to prevent vibration.
- Wear Safety Glasses and Gloves: Sparks and metal shards can be hazardous.
- Cut Slowly: Cut slowly and apply cutting lubricant to reduce friction and heat.
Circular Saw Maintenance
Regular circular saw maintenance will extend the life of your saw and ensure it operates safely and efficiently.
Cleaning
- Unplug the Saw: Always unplug the saw before performing any maintenance.
- Remove Sawdust: Use a brush or compressed air to remove sawdust and debris from the saw.
- Clean the Base Plate: Wipe the base plate with a clean cloth to ensure it slides smoothly.
Blade Care
- Inspect the Blade: Check the blade for damage, such as bent or missing teeth.
- Sharpen or Replace: Sharpen dull blades or replace them if they are damaged.
- Store Properly: Store blades in a dry place to prevent rust.
Motor Maintenance
- Check Brushes (if applicable): Some circular saws have replaceable carbon brushes. Check them periodically and replace them when they are worn.
- Lubricate Moving Parts: Lubricate moving parts as recommended by the manufacturer.
Cord Inspection
- Check for Damage: Inspect the power cord for cuts, fraying, or other damage.
- Replace if Damaged: Replace the cord if it is damaged to prevent electrical hazards.
Circular Saw Troubleshooting
Circular saw troubleshooting helps identify and fix common issues.
| Problem | Possible Cause | Solution |
|---|---|---|
| Saw won’t start | Power cord issue, switch problem | Check power cord and outlet, check the switch. Replace the switch or cord if necessary. |
| Blade binds | Incorrect blade, wood pinching | Use the correct blade for the material, use a wedge to keep the cut open. |
| Excessive vibration | Loose blade, damaged blade | Tighten the blade, inspect the blade for damage. Replace if necessary. |
| Motor overheating | Dull blade, excessive pressure | Sharpen or replace the blade, reduce the pressure. |
| Cut is not straight | Unstable hand, wrong angle | Practice maintaining a steady hand, ensure you’re cutting at the correct angle, use a guide rail. |
| Wood is splintering | Wrong blade for material, dull blade | Use a plywood blade for plywood, ensure your blade is sharp. |
| Saw kicks back | Cutting too fast, wood pinching | Reduce cutting speed, use a wedge to keep the cut open. |
Circular Saw Safety Tips
Using circular saw safely is crucial to preventing accidents.
- Read the Manual: Familiarize yourself with the saw’s features and safety instructions.
- Inspect the Saw: Check for damage before each use.
- Use the Right Blade: Use the correct blade for the material you are cutting.
- Keep the Blade Sharp: Dull blades increase the risk of kickback.
- Wear Safety Gear: Always wear safety glasses, hearing protection, and a dust mask.
- Maintain a Firm Grip: Use both hands to control the saw.
- Keep the Cord Clear: Keep the power cord away from the blade.
- Don’t Overreach: Keep your body balanced and avoid reaching too far.
- Support the Material: Support long pieces of material to prevent them from sagging.
- Avoid Cutting Small Pieces: Small pieces can be difficult to control.
- Unplug the Saw: Always unplug the saw before making adjustments or changing the blade.
- Store Safely: Store the saw in a dry place, out of reach of children.
Frequently Asked Questions (FAQ)
Q: Can I use a circular saw to cut curves?
A: No, circular saws are designed for straight cuts. For curves, use a jigsaw or bandsaw.
Q: Who is responsible if I injure myself while using a circular saw?
A: You are responsible for your own safety. Always follow safety guidelines and use appropriate safety gear.
Q: What is kickback?
A: Kickback is when the saw suddenly jerks backward, often due to the blade binding in the material. It can be dangerous, so always use proper cutting techniques and keep the blade sharp.
Q: What is the best way to prevent splintering when cutting plywood?
A: Use a plywood blade, score the cut line with a utility knife before cutting, and use a backing board.
Q: How often should I sharpen my circular saw blade?
A: It depends on how often you use the saw and the type of materials you are cutting. Sharpen the blade when it starts to cut slower or leaves a rough edge.

Hi, I’m Tom Scalisi, and welcome to The Saw Blog! I started this blog to share my hands-on experience and insights about woodworking tools—especially saws and saw blades. Over the years, I’ve had the chance to work with a wide range of tools, and I’m here to help both professionals and hobbyists make informed decisions when it comes to selecting and using their equipment. Whether you’re looking for in-depth reviews, tips, or just advice on how to get the best performance out of your tools, you’ll find it here. I’m excited to be part of your woodworking journey!