
Have you ever spent hours carefully applying caulk, only to end up with a messy, uneven line that ruins your hard work? We have all been there. Achieving that perfect, professional-looking seal is the most frustrating part of any home improvement project. It is common to feel overwhelmed by the many different tools and techniques available, especially when one wrong move can turn a simple bathroom or kitchen repair into a total disaster.
Choosing the right method matters because it affects how well your home stays protected from moisture and leaks. If your caulk is bumpy or thin, it won’t hold up over time. You deserve a finish that looks clean, stays secure, and makes your space look brand new again. You do not need to be a professional contractor to get these results.
In this guide, we will break down the best ways to smooth caulk so you can finish your project with confidence. We will cover simple tricks, common household items, and professional tools that make the job easy. You will learn exactly how to get a smooth, crisp line every single time. Let’s dive into the simple steps that will take your DIY skills to the next level.
Top Way To Smooth Caulk Recommendations

- ✅ One pre-filled precision applicator is included for a single touch-up, repair, or small sealing job without reloading or cleanup.
- ✅ White-colored caulk blends with white and light-colored interior and exterior trim, molding, and finish surfaces for repairs that are less noticeable after curing or painting.
- ✅ The ultra-fine tip allows clean, controlled dispensing into small cracks, seams, and gaps where standard caulk guns are oversized and messy.
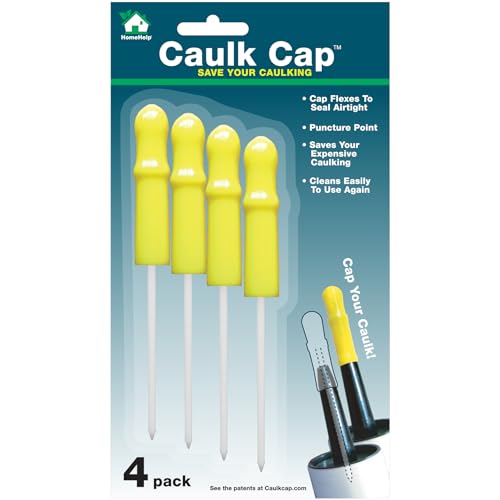
- THE ORIGINAL CAULK CAP. Trusted by pros and DIYers since 2014, our signature yellow caulk cap is the original tool for keeping open tubes sealed tight and fresh between jobs.
- JOIN 1 MILLION HAPPY CUSTOMERS. With over a million sold on Amazon, we're the go-to fix to stop costly tube dry-outs. Don't waste a $10 caulk tube—join the users who stretch every dollar.
- FITS SMOOTH & RING-LOCK NOZZLES. Works on smooth-top nozzles like GE Silicone and grooved ring-lock designs like DAP. Pushes in firmly for a secure, airtight seal on almost any standard caulk tube sealer application.
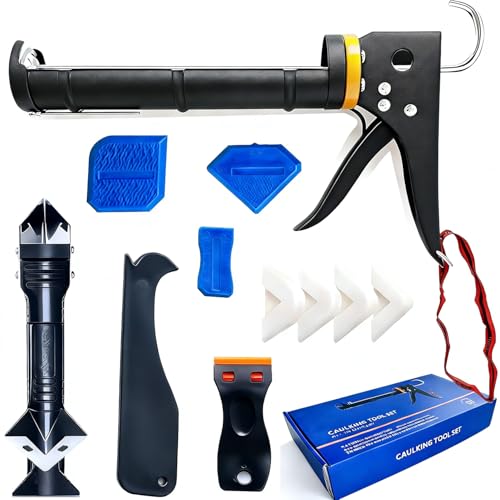
- ALL-IN-ONE SOLUTION - Tired of lumpy caulk lines and sticky fingers? The ultimate caulking tool kit includes a high-performance caulk gun, 1 caulk remover with 4 replacement silicone heads, and 5 shaping caulking scrapers! No more hand fatigue, no messy slips - just pro-level control, even on corners
- YOUR DIY BEST FRIEND - The IELEK Caulking Gun combines lightweight design with a smooth-glide mechanism and ergonomic handle for superior control. With 5 included shaping tools, you can achieve professional-grade edges in half the time. Perfect for all your sealing needs - from grout lines to window seals - with effortless precision
- BUILT TO OUTLAST YOUR PROJECTS - Engineered with a heavy-duty metal frame and anti-drip plastic nozzle, this premium caulk kit is designed to withstand years of demanding use. The reinforced construction prevents bending or jamming, while the precision nozzle ensures clean, consistent flow every time. Whether you're a weekend DIYer or a professional contractor, this is the last caulking kit you'll ever need to buy - guaranteed to handle everything from quick home repairs to large-scale projects without fail

- Easy Tooling: Effortlessly apply and smooth caulk with our innovative EZ4T Caulk Tooling Aid
- Versatile Use: Compatible with all caulk types for various surfaces like tile, countertops, and sinks
- Clear Finish: Dries transparent, allowing your caulk lines to blend seamlessly with your surface
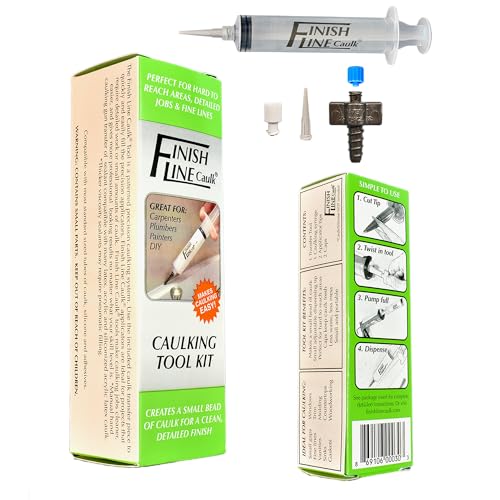
- ✅ PRECISION CAULKING MADE EASY – Tackle fine detail caulking with precision! The Finish Line Caulk tool kit ensures smooth application for small cracks, tight seams, and intricate projects like baseboards, trim, and woodwork.
- ✅ SYRINGE-STYLE APPLICATOR FOR CONTROLLED FLOW – Unlike bulky caulk guns, this precision caulking syringe lets you apply just the right amount of caulk, sealant, or glue for professional-looking results—no messy over-application!
- ✅ SMALL REPLACEABLE TIPS FOR DETAILED WORK – Comes with fine dispensing tips to help you seal baseboards, fill nail holes, and perfect delicate caulk lines in hard-to-reach areas. Ideal for woodworking, cabinetry, bathroom sealing, and touch-ups.
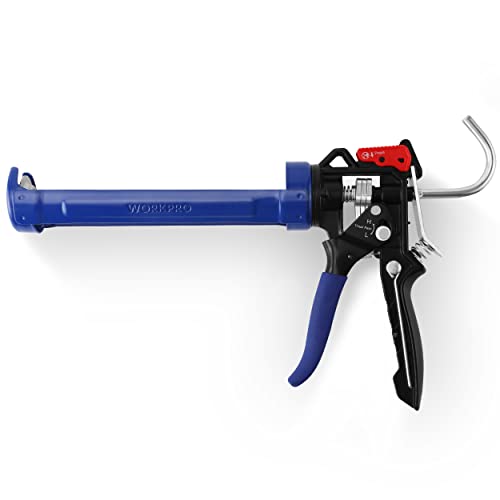
- Switch at Will of High & Low Flow Rates: WORKPRO caulking gun allows for switching between high and low flow rates. Pull the trigger handle downwards, the high setting thrust ratio 18:1 for use with adhesive materials. Push the trigger handle upwards, the low setting of thrust ratio 9:1 for use with acrylic materials.
- Drip Controllable: The hand caulk gun can switch from drip to less-drip for dispensing desired applications. Press down on the front of the red button, this process stops the caulk from flowing and allows for clean, smooth transitions and less mess to clean up. Press down towards the rear of the red button, this mode keeps constant pressure on the tube for providing smoother action and quicker working.
- Allows for Effortless Maneuvering in Tight Areas: The sealant cartridge gun with a rotating barrel can effortlessly reach hard-to-reach places. A rotating shaft is designed to allow easy maneuvering in tight areas. WORKPRO's half-barrel frame caulking gun is ideal for standard-size 10oz cartridges.
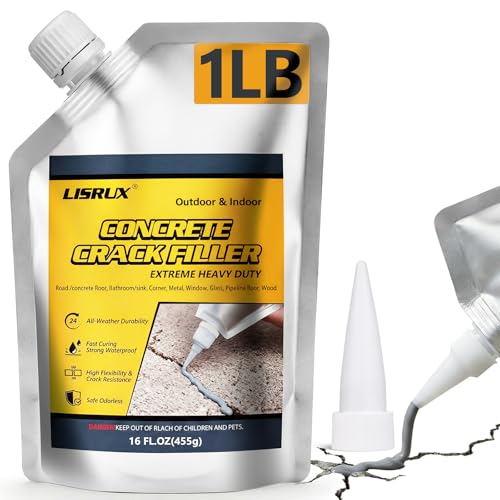
- High Elasticity and Strong Adhesion: Our concrete crack filler for driveway uses a flexible, highly elastic formula. The cement crack filler has strong adhesion and adapts to ground movement and settlement, withstanding frequent traffic and concrete expansion and contraction to ensure a durable seal.
- Weather Resistance and Durability:LISRUX self leveling concrete crack sealant creates a strong waterproof barrier that resists rain & snow. And our concrete crack filler offers excellent resistance to aging, weathering, and chemical corrosion, Withstands a wide range of weather conditions, including exposure to UV rays and extreme temperatures, ensuring long-lasting durability and reducing the need for frequent repairs or replacements.
- Fast Curing & Self-Leveling:Concrete crack waterproof sealant has self-leveling characteristics, can ensure that the surface is smooth and flat. 24-48 hours to fully cured, the formation of seamless bonding, saving time and effort. Ensuring a flawless surface without constant maintenance.

- Color matched by Color Fast to Custom Building Products/Polyblend grout line
- Siliconized acrylic latex caulk formula; water clean-up
- Colored caulk come in a 10.3 oz tube for standard caulk gun
The Ultimate Guide to Achieving Perfect Caulk Lines
Applying caulk is often the most frustrating part of a home improvement project. A messy bead can ruin the look of a brand-new tub or sink. “Way to Smooth” tools are designed to fix this problem. They help you create professional, clean lines without the headache. This guide helps you choose the right tool for your next project.
Key Features to Look For
When shopping for a smoothing tool, focus on these three features:
- Shape Variety: Look for a kit that includes multiple angles and radii. Different corners require different shapes to get a perfect finish.
- Material Flexibility: The tool should be firm enough to push the caulk, but flexible enough to glide over uneven tiles.
- Easy Cleaning: Caulk sticks to everything. Choose a material that allows dried caulk to peel off easily.
Understanding Important Materials
Most high-quality smoothing tools are made from silicone or specialized rubber. These materials are non-stick. They prevent the caulk from bonding to the tool. Avoid cheap plastic tools, as they often drag and leave streaks. High-grade silicone is the gold standard because it bends to match the curve of your corner.
Factors That Affect Quality
Several things change how well your tool works:
1. Tool Thickness
A tool that is too thick will push too much caulk out of the gap. A tool that is too thin will buckle under pressure. Aim for a medium thickness for the best control.
2. Edge Sharpness
The edges of the tool must be smooth and free of nicks. Even a tiny bump on the edge will create a wavy line in your caulk.
3. Surface Preparation
No tool can fix a dirty surface. You must remove all old caulk and clean the area with rubbing alcohol before you start.
User Experience and Use Cases
These tools are perfect for beginners and pros alike. You use them by applying your caulk bead first. Then, you select the matching corner on your tool. You drag the tool along the joint in one smooth, continuous motion. This motion forces the caulk into the gap and wipes away the excess at the same time. These tools work great for bathtubs, kitchen sinks, windows, and floor trim.
10 Frequently Asked Questions
Q1: Do I need a special tool, or can I use my finger?
A: Your finger often leaves oils behind. This prevents the caulk from sticking well. A tool provides a cleaner, more consistent finish.
Q2: How do I clean the tool after use?
A: Let the caulk dry completely. Once it is dry, you can simply peel it off the silicone tool.
Q3: Can I use these tools with all types of caulk?
A: Yes, these tools work with silicone, latex, and acrylic caulks.
Q4: What if I make a mistake?
A: If the line looks bad, wipe it away immediately with a damp rag and try again.
Q5: Should I wet the tool before using it?
A: Some professionals dip the tool in a mix of water and dish soap. This prevents the caulk from sticking to the tool.
Q6: Do these tools work on curved surfaces?
A: Yes, flexible silicone tools are specifically designed to follow curves and uneven wall surfaces.
Q7: How long do these tools last?
A: With proper care and cleaning, a silicone smoothing tool can last for years of home projects.
Q8: Which size should I choose?
A: Start with a multi-piece kit. This ensures you have the right size for both thin bathroom gaps and wide window seals.
Q9: Does the angle of the tool matter?
A: Yes. Keeping the tool at a 45-degree angle usually provides the best pressure and the cleanest look.
Q10: Can I use these for outdoor projects?
A: Absolutely. They work just as well on exterior siding and window frames as they do inside your home.

Hi, I’m Tom Scalisi, and welcome to The Saw Blog! I started this blog to share my hands-on experience and insights about woodworking tools—especially saws and saw blades. Over the years, I’ve had the chance to work with a wide range of tools, and I’m here to help both professionals and hobbyists make informed decisions when it comes to selecting and using their equipment. Whether you’re looking for in-depth reviews, tips, or just advice on how to get the best performance out of your tools, you’ll find it here. I’m excited to be part of your woodworking journey!