
Have you ever dreamed of turning your digital designs into real, physical objects right from your desk? 3D printing used to be a hobby for people with thousands of dollars to spend, but that has changed. Today, you can own a powerful machine without breaking the bank.
However, finding a quality 3D printer for under $200 can feel like a gamble. The market is flooded with cheap models that often jam, break, or produce messy prints. It is easy to feel overwhelmed by technical jargon and confusing reviews when you just want a machine that works. You don’t want to waste your hard-earned money on a printer that ends up collecting dust in the corner.
In this guide, we take the stress out of your search. We have tested and researched the best budget-friendly options that actually deliver high-quality results. You will learn which features matter most for beginners and which common traps you should avoid. We will help you cut through the noise so you can start creating your own projects with confidence.
Are you ready to find the perfect machine for your workshop? Let’s explore the top 3D printers that prove you don’t need a huge budget to start your printing journey.
Top 3D Printer Under $200 Recommendations

- Foolproof Setup with Video Guides – Never get stuck! We provide a crystal-clear Quick Start Guide and step-by-step video tutorials. Watch them online to get started.
- Simple Assembly with Video Guide – Requires quick modular setup (watch our step-by-step video). Comes with 10m PLA filament, TF card, tools, and 12V Type-C power adapter. Follow the video to assemble, level the bed, load filament, and start printing in minutes.
- Versatile Filament Compatibility – Unleash your creativity with both PLA and flexible TPU (1.75mm). The reliable 0.4mm nozzle and precise 0.05-0.3mm layer thickness deliver detailed, smooth prints for all your projects, from toys to home decor.
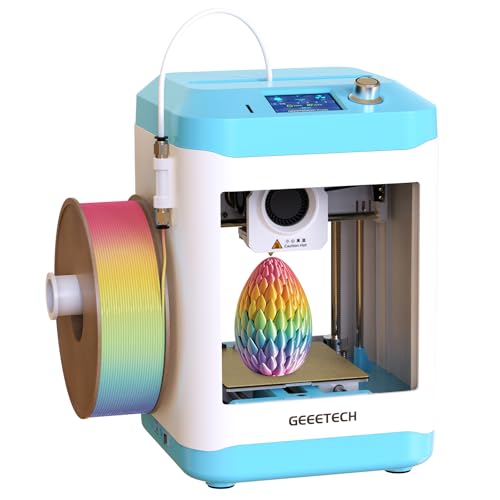
- High Precision and Speed: Our 3d printer for kids achieves a top speed of 250mm/s, significantly reducing printing time while maintaining professional-grade precision at 0.01mm. Enjoy the fun of 3D printing with high-quality results
- Ideal for Kids and Beginners: This toybox 3d printer was fully assembled and ready to use out of the box. This complete starter kit includes a mini 3d printer, a roll of test PLA filament, an SD card, and additional 3D printer accessories. Easy to operate, even users with no prior experience can quickly get started
- Outstanding Design: Automatic Nozzle Cleaning: Ensures a clean nozzle for consistent print quality;One-Button Auto-Leveling: Simplifies the setup process for hassle-free printing;One-Touch Filament Loading: Load and unload filament with just a touch of a button;PEI Heated Bed: Makes it easy to remove models after printing
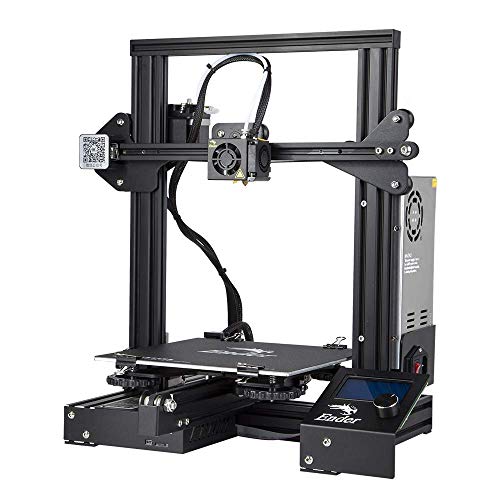
- Resume Printing Function: no worry to the immediate power outage or electric circuit error, Ender 3 has the ability to resume printing even after a power outage or lapse occurs, you can continue to print
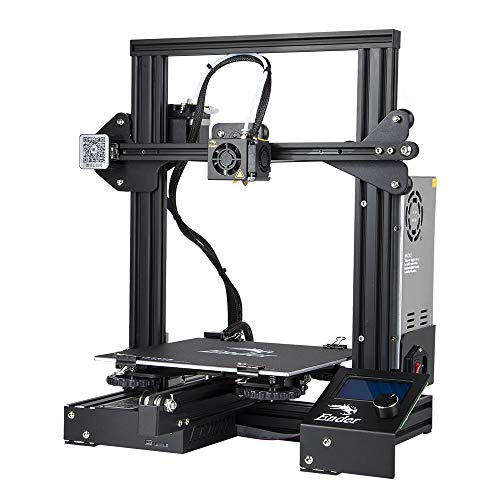
- Creality Ender 3 3d printer, it is the most basic 3d printer model, more students and beginners can learn the 3d printer by this model, it can help to excercise your hands-on skills. It comes with several assembled parts, you need about 2 hours to assemble
- Advanced Extruder Technology: Ender 3 upgraded extruder greatly reduces plugging risk and bad extrustion; V-shape with POM wheels make it move noiseless, smoothly and durable

- 【250mm/s High-speed Printing】Creality Ender 3 V3 SE 3d printer supports a maximum printing speed of 250mm/s, 2500mm/s² acceleration.The speed has been greatly improved while maintaining the printing quality, saving 73% of the time compared with other printers.
- 【Powerful ""Sprite"" Direct Extruder】Ender 3 V3 SE is the upgrade of ender 3, ender 3 v2, ender 3 pro, ender 3 neo, ender 3 v2 neo, ender 3 s1, ender 3 s1 pro etc 3d printer, comes with the new upgraded ""Sprite"" full metal dual-geardirect extruder, more powerful extruder pushing force and lightweight, the extruder realizes smooth feeding and discharging of flaments without slipping. Works extremely well in printing flaments like PLA, TPU, PETG, etc. And the extruder is market-proven for its reliability, as over 500,000 units have been shipped worldwide
- 【Worry-free CR Touch Auto Leveling & Strain Sensor】Creality Ender 3 upgraded 3d printer features a CR Touch sensor for auto leveling and a strain sensor for auto z-offset. Just lay back and enjoy the print success, there is no need to participate manually throughout the process, making leveling much easier
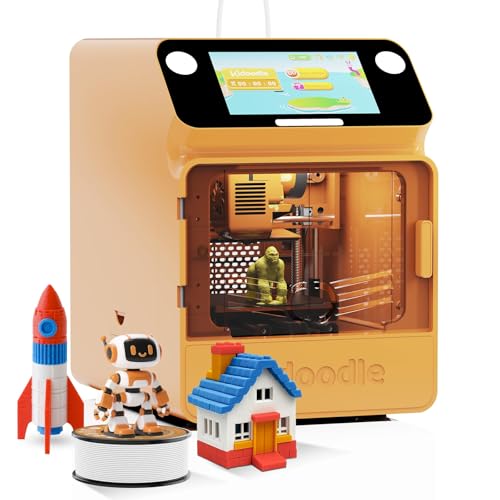
- 【Quality Upgraded】- The new version has been improved, with enhancements to the toy library and fixes for printer output issues.
- 【Easy to use Mini 3D Printers】- Pre-assembled Kidoodle mini 3D printer (312*312*352mm) saves space and works out-of-the-box. Perfect for kids and 3d printing beginners with one-click printing.
- 【Child-Safe Lock】- Enjoy peace of mind with a fully enclosed 3D printer structure designed for safety. If the door is opened it automatically pauses printing and reduces the nozzle temperature. Prevent accidents and keep children safe.
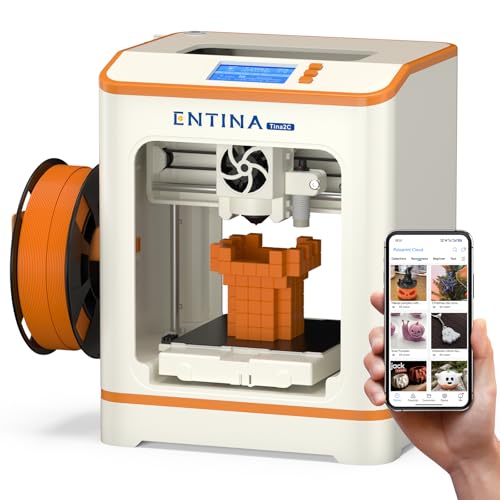
- Start Printing Effortlessly: The Entina Tina2C 3d printer is a smart and fun mini printer designed with comprehensive beginner guidance. Featuring the Poloprint Cloud app and a modular design, it makes DIY creation easy—print whatever you like and start your first print in just 8 minutes.
- Endless Creativity: The Tina2C kids 3d printer supports both 2.4G WiFi and offline printing, giving you flexible ways to create. The app offers a large built-in model library, over 20 creative modules, AI-powered search, and photo-to-print features, along with regularly updated STEM course packages. With TF card offline printing, you can slice models from popular online platforms or print your own designs—offering more flexibility in how users choose and prepare models and making it easy to meet the creative needs of beginners and family users.
- Stable and Reliable Performance: Designed for easy out-of-the-box use, the Tina2C mini 3D printer is ready to use right away. Its flexible magnetic build plate makes model removal easier with a simple bend, helping simplify post-print cleanup. The nozzle design helps improve print consistency, while the integrated quick-swap printhead supports easy maintenance for first-time users. The foldable filament holder supports spools from 200 g to 1 kg, offering greater flexibility for different filament sizes.
- Creality Ender 3 Series Printer with Direct Drive Extruder, CR Touch Auto Bed Leveling, Dual Z-Axis for Smooth Printing, Silent Motherboard, 220×220×270mm Build Volume

- 【Fully Assembled】Out of the box, the user-friendly beginner 3D printer is easy to operate with 2.4" LCD Display. Come with a sample PLA filament roll and a Micro SD card that has multiple model files, you can instantly enjoy the world of 3D printing. (TINA2 Basic is printed by TF card and USB)
- 【Auto Bed Leveling】WEEFUN mini 3D printers don't need manual adjustments, one-touch auto-leveling for more simple and more precise printing. It's a good choice for beginners and children.
- Open-Source & Flexible Printing: TINA2 mini 3d printer is fully open-source, supporting slicing models via Wiibuilder / Cura / Simplify3d / PrusaSlicer on PC and laptops, and then save prints to an SD card or send commands via 3D-USB cable, giving you full control for custom projects. Suitable for beginners and professional makers to unleash creativity and easily create your own designs.
The Ultimate Guide to Buying a 3D Printer Under $200
Getting into 3D printing does not have to cost a fortune. Many great printers now sell for under $200. These machines are perfect for beginners, students, and hobbyists. This guide will help you choose the right printer for your needs.
1. Key Features to Look For
When you shop for a budget printer, look for these helpful features:
- Auto-Leveling: This feature saves you a lot of time. It makes sure the printer bed is flat before you start.
- Print Volume: This is the size of the object you can print. Most budget printers have a space of about 220 x 220 x 250 mm.
- Build Surface: A magnetic, flexible plate makes it easy to pop your finished parts off.
- Resume Printing: This feature saves your progress if the power goes out suddenly.
2. Important Materials
Most printers under $200 use a material called PLA. It is the best choice for beginners. It is easy to use, smells fine, and comes in many colors. Some printers can also use PETG. This material is stronger and a bit more flexible. Stick to these two materials until you learn how your printer works.
3. Factors That Affect Print Quality
Several things change how your prints look:
- Frame Stability: A sturdy metal frame stops the printer from shaking. Shaking causes wavy lines on your prints.
- Nozzle Size: A 0.4mm nozzle is standard. It gives a good balance between speed and detail.
- Cooling Fans: Good fans cool the plastic quickly. This helps your prints keep their shape and look sharp.
- Slicer Settings: The “slicer” is the software you use to prepare your file. Using the right settings in this program is just as important as the printer itself.
4. User Experience and Use Cases
Budget printers are great for learning the basics. You will spend some time assembling the machine, but that helps you understand how it works. These printers are excellent for making toys, small replacement parts, custom keychains, and school projects. They are not meant for printing 24 hours a day, but they are perfect for weekend projects.
Frequently Asked Questions
Q: Is it hard to set up a 3D printer?
A: Most budget printers arrive as a “kit.” You will need to tighten some screws and plug in a few wires. It usually takes about 30 to 60 minutes to finish the setup.
Q: Do I need a computer to use the printer?
A: Yes, you need a computer to “slice” your files. After you slice the file, you can save it to an SD card and print directly from the printer.
Q: How much does the plastic cost?
A: A standard 1kg spool of PLA filament usually costs between $15 and $25.
Q: Are these printers safe to keep in my bedroom?
A: It is better to keep them in a room with good airflow. PLA is safe, but it is always smart to keep your workspace well-ventilated.
Q: How long does a print take?
A: It depends on the size. A small keychain might take 30 minutes. A large toy might take 10 hours or more.
Q: Can I print things with multiple colors?
A: Most budget printers only hold one color at a time. You can pause the print and swap the filament to change colors, though!
Q: Do these printers break easily?
A: They are sturdy, but they do need maintenance. You should clean the nozzle and tighten the belts every few weeks.
Q: What software should I use?
A: Most people use free software like Cura or PrusaSlicer. These programs are easy to learn and work with almost every printer.
Q: Can I upgrade my printer later?
A: Yes! You can buy better nozzles, glass beds, or different extruders to make your printer even better over time.
Q: What is the most common mistake for beginners?
A: The most common mistake is not leveling the bed correctly. If the bed is not level, the plastic will not stick to the surface.

Hi, I’m Tom Scalisi, and welcome to The Saw Blog! I started this blog to share my hands-on experience and insights about woodworking tools—especially saws and saw blades. Over the years, I’ve had the chance to work with a wide range of tools, and I’m here to help both professionals and hobbyists make informed decisions when it comes to selecting and using their equipment. Whether you’re looking for in-depth reviews, tips, or just advice on how to get the best performance out of your tools, you’ll find it here. I’m excited to be part of your woodworking journey!