
Can you cut trim with a miter saw? Yes, a miter saw is the ideal tool for making precise angle cuts in trim. This guide provides all the information needed for accurate miter saw trim cuts, from setup to precise trim cutting using miter saw techniques.
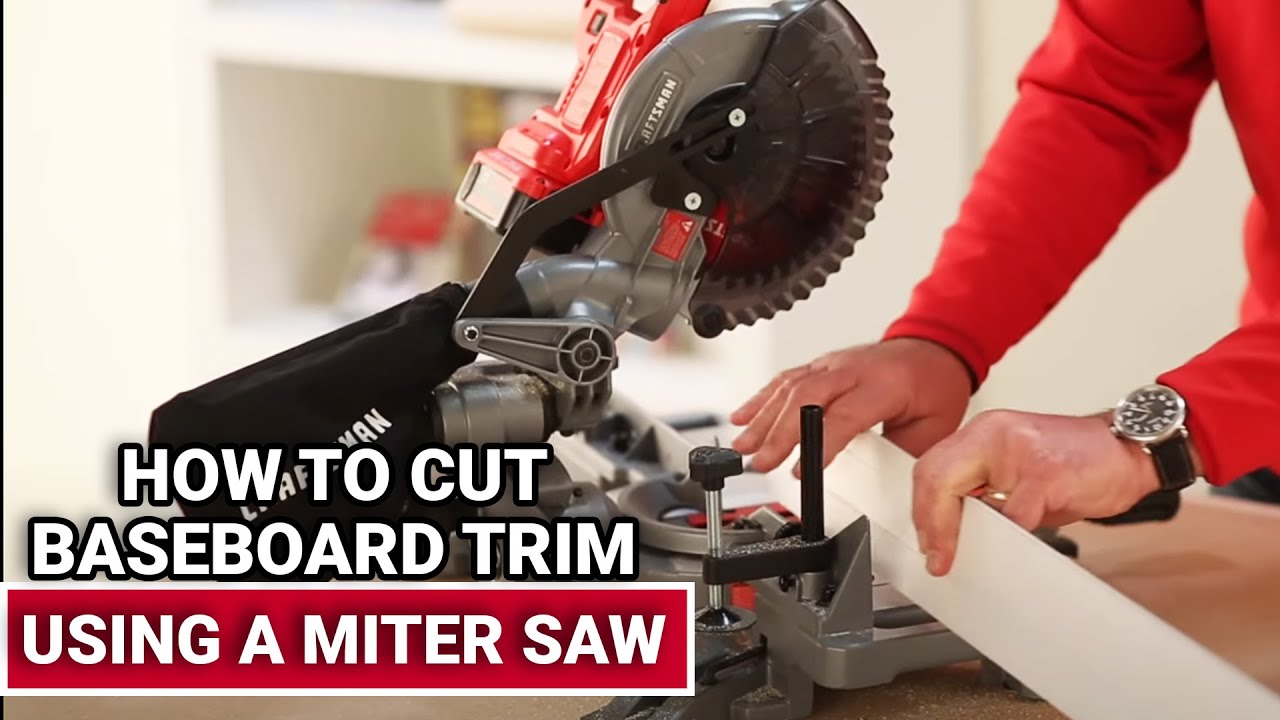
Image Source: i.ytimg.com
Selecting the Right Miter Saw for Trim
Choosing the correct miter saw can make a significant difference in the quality of your trim work. Not all miter saws are created equal, and some are better suited for delicate trim work than others.
Types of Miter Saws
- Standard Miter Saw: This basic saw makes miter cuts (angled cuts across the width of the board) and crosscuts (cuts straight across the board). It’s a good starting point, but limited in functionality.
- Compound Miter Saw: This type adds the ability to tilt the blade for bevel cuts (angled cuts through the thickness of the board). This is useful for crown molding and other complex trim.
- Sliding Compound Miter Saw: The best choice for most trim work. The blade slides along rails, allowing you to cut wider boards. This is especially helpful when cutting baseboard with miter saw.
Important Miter Saw Features for Trim
- Blade Size: A 10-inch or 12-inch blade is typical. A 10-inch blade is sufficient for most trim projects, and is often lighter and more affordable.
- Laser Guide/LED Lighting: These features project a line onto the workpiece, showing exactly where the blade will cut. This helps improve accuracy.
- Dust Collection: Trim work can create a lot of sawdust. A good dust collection system will keep your workspace clean and improve visibility.
- Miter and Bevel Angle Range: Ensure the saw can accommodate the angles you’ll need for your trim project. For miter saw for crown molding, a wide bevel range is essential.
- Positive Stops: These are pre-set angles (0, 22.5, 45, and sometimes 31.6 degrees) that allow you to quickly and accurately set the miter angle.
Preparing Your Miter Saw for Trim Work
Proper preparation is key for achieving accurate trim cutting techniques. Before you even think about cutting, take these steps:
Miter Saw Setup for Trim
- Stable Base: Place your miter saw on a sturdy, level surface. A miter saw stand is ideal, but a workbench or even a solid table can work. Make sure the saw doesn’t wobble.
- Secure the Saw: Bolt the miter saw to the stand or workbench to prevent movement during cutting.
- Check for Square: Use a speed square or combination square to ensure the blade is perfectly perpendicular to the fence (the vertical backstop). If it’s not, adjust the fence according to the manufacturer’s instructions.
- Test Cuts: Make several test cuts on scrap wood to verify the accuracy of your miter and bevel angles. Adjust the saw as needed.
Selecting the Right Blade
The blade is one of the most important factors in achieving clean, precise cuts. For best miter saw blades for trim, consider these factors:
- Tooth Count: A blade with a high tooth count (60-80 teeth for a 10-inch blade, 80-100 teeth for a 12-inch blade) will produce smoother cuts with less splintering.
- Tooth Grind: A triple-chip grind (TCG) is a good all-around choice for trim work.
- Blade Material: Carbide-tipped blades are more durable and stay sharp longer than steel blades.
- Thin Kerf: A thin-kerf blade removes less material with each cut, reducing strain on the saw and producing cleaner edges.
Calibrating Your Miter Saw
A calibrated saw is essential for precise trim cutting using miter saw.
- Check the Miter Angle: Set the miter angle to 0 degrees. Use a precision square to ensure the blade is exactly 90 degrees to the fence. Adjust if necessary.
- Check the Bevel Angle: Set the bevel angle to 0 degrees. Use a level to ensure the blade is perfectly vertical. Adjust if necessary.
- Fine-Tune: Use shims or adjustment screws to fine-tune the angles until they are perfectly accurate. Refer to your saw’s manual for specific instructions.
Basic Miter Saw Techniques for Trim
With your saw properly set up, it’s time to start cutting trim.
Measuring and Marking
Accurate measurements are crucial for professional-looking trim work.
- Measure Twice, Cut Once: This is a golden rule of carpentry. Double-check your measurements before making any cuts.
- Use a Precise Measuring Tool: A good quality tape measure or measuring stick is essential.
- Mark Clearly: Use a sharp pencil to mark your cut lines. Avoid using pens or markers, as they can bleed and make it difficult to see the exact cutting point.
- Consider the Kerf: The kerf is the width of the saw blade. When making precise cuts, account for the kerf by marking slightly to the waste side of your line.
Making the Cut
- Secure the Trim: Place the trim firmly against the fence and hold it securely with your hand or a clamp. Keep your hands away from the blade’s path.
- Start the Saw: Turn on the saw and let it reach full speed before lowering the blade into the wood.
- Lower the Blade Slowly: Lower the blade smoothly and steadily along your marked line. Avoid forcing the blade through the wood.
- Complete the Cut: Once the cut is complete, release the trigger and wait for the blade to stop spinning before raising it.
- Check the Cut: Inspect the cut for accuracy and smoothness.
Miter Saw Angle Guide for Trim
| Angle | Use Cases |
|---|---|
| 45° | Corners for square rooms (90° corners), picture frames |
| 22.5° | Eight-sided shapes, some decorative trim details |
| 30° | Six-sided shapes |
| 31.6° | Common crown molding spring angle (check manufacturer’s specifications) |
| Custom | Angled walls, irregular shapes, unique design elements requiring non-standard angles |
Advanced Miter Saw Techniques for Trim Carpentry
Beyond basic cuts, these techniques will elevate your trim carpentry skills.
How to Cut Trim Corners with Miter Saw
Creating seamless corners is essential for professional-looking trim.
- Inside Corners: These are typically coped (see below), but can be mitered if the walls are perfectly square. To miter an inside corner, set the miter saw to 45 degrees and cut two pieces of trim, one with the miter angled to the left and the other to the right.
- Outside Corners: These are always mitered. Follow the same procedure as for inside corners, but ensure the miters create an outward-facing point.
- Coping: This technique involves cutting one piece of trim square and then shaping the end of the other piece to match the profile of the first. Coping is more forgiving than mitering because it allows for slight variations in wall angles.
- Cut the first piece of trim square and install it.
- Cut the second piece of trim at a 45-degree miter angle.
- Use a coping saw or utility knife to remove the waste material behind the miter, following the profile of the trim.
- Test-fit the coped piece against the first piece and adjust as needed.
Cutting Baseboard with Miter Saw
Baseboard installation requires specific techniques.
- Measuring Baseboard: Measure the length of the wall where the baseboard will be installed.
- Cutting Outside Corners: Miter the ends of the baseboard pieces to create an outside corner. Remember to measure accurately, as outside corners are very visible.
- Cutting Inside Corners: You can miter inside corners if the walls are perfectly square, or you can cope them for a more precise fit.
- Scribing: If the floor or wall is uneven, you may need to scribe the baseboard to match the contours. Use a compass to transfer the shape of the floor or wall onto the baseboard, then use a jigsaw or coping saw to cut along the scribed line.
Miter Saw for Crown Molding
Crown molding adds a touch of elegance to any room, but it can be tricky to install.
- Spring Angle: The spring angle is the angle at which the crown molding sits against the wall and ceiling. It is important to know the spring angle of your crown molding before making any cuts.
- Cutting Crown Molding Flat: Most crown molding is cut “flat” on the miter saw, rather than standing up as it would be installed. This requires a different setup and angle calculations.
- Nested Cutting: Some miter saws have a “nested cutting” feature that allows you to cut crown molding at the correct angle while it is sitting in the position it will be installed.
- Crown Stops: These accessories help to hold the crown molding in the correct position while cutting.
- Practice: Crown molding can be challenging to cut accurately. Practice on scrap pieces of molding before cutting your final pieces.
Compound Cuts
Compound cuts involve both a miter angle and a bevel angle. These are used for complex trim details and irregular shapes.
- Determine the Angles: Use a protractor or angle finder to determine the required miter and bevel angles.
- Set the Saw: Adjust the miter and bevel angles on the miter saw according to your measurements.
- Make the Cut: Secure the trim and make the cut, following the same procedures as for basic cuts.
Tips for Achieving Precise Trim Cutting Using Miter Saw
- Sharp Blade: Always use a sharp blade for clean, accurate cuts.
- Consistent Pressure: Apply consistent pressure when cutting to prevent the blade from wandering.
- Support Long Pieces: Use extension wings or a support stand to support long pieces of trim.
- Avoid Rushing: Take your time and focus on making accurate cuts.
- Practice: The more you use your miter saw, the better you will become at cutting trim.
- Use Clamps: Secure the workpiece using clamps to prevent movement during the cut.
Trim Carpentry Tips
- Plan Your Cuts: Before you start cutting, plan out the order in which you will cut the trim pieces.
- Start with the Longest Pieces: Cut the longest pieces of trim first, as these are the most critical.
- Use a Story Stick: A story stick is a piece of wood that is used to transfer measurements from one location to another. This can be helpful for ensuring that trim pieces are the correct length.
- Fill Nail Holes: After installing the trim, fill the nail holes with wood filler and sand smooth.
- Caulk Seams: Caulk the seams between the trim and the wall or ceiling for a seamless look.
Safety Precautions
- Wear Safety Glasses: Always wear safety glasses to protect your eyes from flying debris.
- Wear Hearing Protection: Miter saws can be loud. Wear hearing protection to prevent hearing damage.
- Keep Hands Away from the Blade: Keep your hands away from the blade at all times.
- Unplug the Saw: Unplug the saw before making any adjustments or changing the blade.
- Read the Manual: Read the miter saw’s manual carefully before using it.
Frequently Asked Questions (FAQ)
- What is the best miter saw for a beginner? A compound miter saw is a good starting point. It offers a balance of features and affordability.
- Can I cut metal with a miter saw? Yes, but you’ll need a special metal-cutting blade.
- How do I prevent tear-out when cutting trim? Use a sharp blade, clamp the trim securely, and cut slowly.
- What is the best way to cut crown molding? Cut crown molding flat or nested, depending on your saw’s capabilities and your comfort level.
- How do I fix a miter cut that is not perfect? Small gaps can be filled with caulk. For larger gaps, recut the trim or use wood filler.
If you use these tips and tricks, you’ll be able to cut trim with your miter saw like a total pro. It’s the best way to make sure your next home project looks polished and perfect. Just remember that getting it right takes a little practice—so don’t worry if you mess up a few pieces at first. Every mistake is just a chance to learn how to do it better the next time!

Hi, I’m Tom Scalisi, and welcome to The Saw Blog! I started this blog to share my hands-on experience and insights about woodworking tools—especially saws and saw blades. Over the years, I’ve had the chance to work with a wide range of tools, and I’m here to help both professionals and hobbyists make informed decisions when it comes to selecting and using their equipment. Whether you’re looking for in-depth reviews, tips, or just advice on how to get the best performance out of your tools, you’ll find it here. I’m excited to be part of your woodworking journey!