
Can you use a skill saw instead of a table saw? Yes, you can! Even though a real table saw is usually more accurate and easier to use, you can still get similar results with a standard circular saw if you have the right tools and a little patience. This guide will show you how to safely use your handheld saw to get the job done just like a table saw.
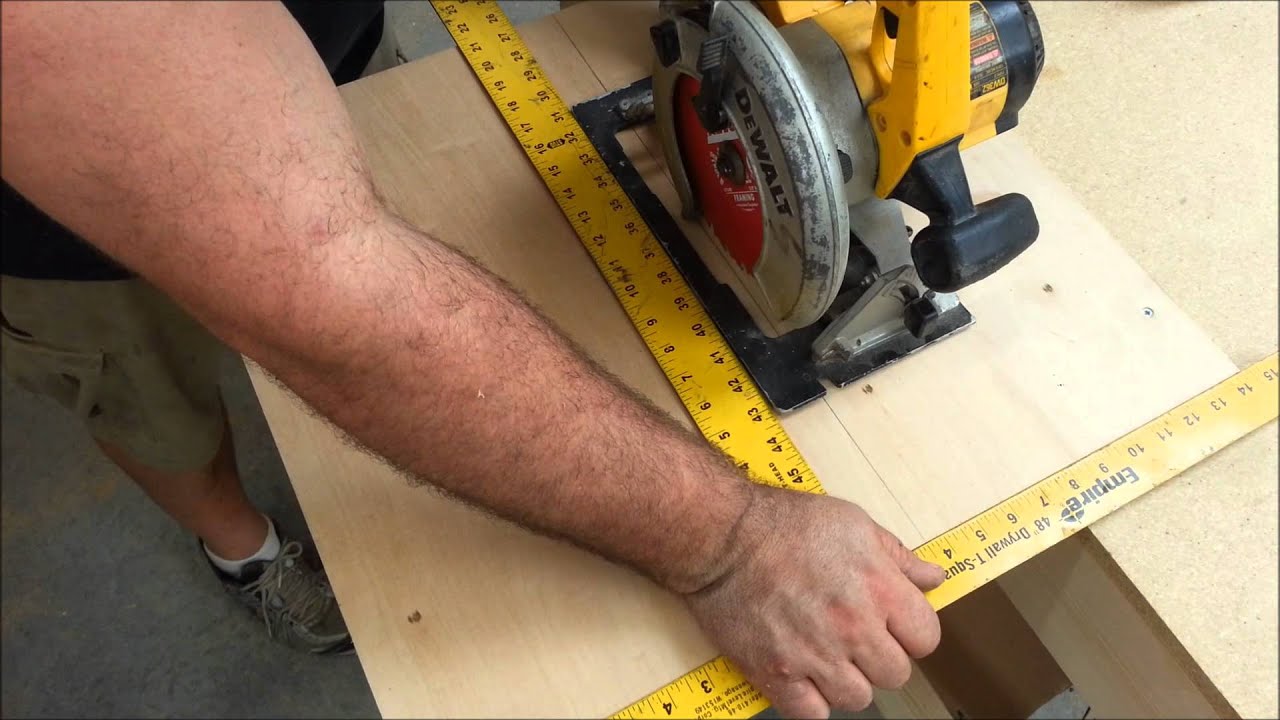
Image Source: i.ytimg.com
Achieving Table Saw Precision with a Skill Saw
While a skill saw table saw conversion might sound intimidating, it’s a practical solution for those without the space or budget for a full-sized table saw. Mastering this skill opens up a range of woodworking possibilities.
Why Consider a Skill Saw as a Table Saw Alternative?
There are several reasons why someone might choose to use a skill saw as a table saw alternative:
- Cost-Effectiveness: Skill saws are generally more affordable than table saws.
- Space Saving: Skill saws are compact and portable, ideal for small workshops or on-site work.
- Versatility: A skill saw can be used for various cutting tasks beyond just straight cuts, whereas a table saw is more specialized.
Limitations of Using a Skill Saw as a Table Saw
It’s crucial to acknowledge the limitations:
- Precision: Achieving the same level of precision as a table saw can be challenging.
- Safety: Using a skill saw in this way requires extra caution. Kickback is still a concern.
- Cut Capacity: Skill saws typically have a smaller cutting capacity than table saws, limiting the thickness of material you can cut.
Essential Tools and Materials
Before attempting any diy table saw with skill saw methods, gather the necessary tools and materials:
- Skill Saw: A well-maintained skill saw with a sharp blade is essential.
- Safety Glasses: Protect your eyes from flying debris.
- Hearing Protection: Reduce noise exposure.
- Dust Mask: Prevent inhalation of sawdust.
- Clamps: Secure your workpieces and guides.
- Straight Edge/Guide: A sturdy straight board or metal ruler for guiding the saw.
- Measuring Tape: Accurate measurements are crucial.
- Pencil: For marking cut lines.
- Work Bench or Table: A stable surface to work on.
- (Optional) Miter Gauge: For angled cuts.
- (Optional) Wood for Jig Building: For creating a more stable platform.
- Square: Ensure your fences and guides are square.
Methods for Using a Skill Saw as a Table Saw
Several methods can help you achieve table saw-like cuts with a skill saw. Each method offers varying levels of precision and safety.
Method 1: The Clamped Straight Edge
This is the simplest and most common method for using skill saw for ripping.
- Measure and Mark: Measure and mark the desired cut line on your workpiece.
- Position the Straight Edge: Align the straight edge along the marked line, accounting for the distance between the edge of the skill saw’s base plate and the blade (this is the ‘offset’).
- Clamp Securely: Clamp the straight edge firmly to the workpiece, ensuring it won’t move during the cut.
- Make the Cut: Guide the skill saw along the straight edge, keeping the base plate flush against it. Maintain a steady and even pressure.
Table: Calculating Skill Saw Offset
| Saw Model (Example) | Offset Distance (Approximate) |
|---|---|
| Model A | 1 1/2 inches |
| Model B | 1 3/4 inches |
| Model C | 1 inch |
Note: Always measure the offset of your specific skill saw. This is critical for accurate cuts!
Pros and Cons of the Clamped Straight Edge Method
| Pros | Cons |
|---|---|
| Simple and easy to set up. | Requires careful measurement and clamping. |
| Suitable for shorter cuts. | Can be less accurate for long cuts. |
| Doesn’t require any specialized jigs or equipment (beyond clamps). | Relies on the user to maintain consistent pressure and alignment. |
Method 2: Building a Simple Skill Saw Fence
Creating a skill saw fence for straight cuts offers more control and repeatability than the clamped straight edge alone.
- Construct the Fence: Cut a long, straight piece of wood (e.g., a 2×4) to serve as the fence. It should be long enough to extend beyond the length of your workpiece.
- Attach to a Base: Attach the fence to a larger, flat base (e.g., a piece of plywood). Ensure the fence is perfectly square to one edge of the base. You can use wood glue and screws for a strong connection.
- Determine the Cut Line: Mark the desired cut line on your workpiece.
- Position and Clamp: Position the base so the fence aligns with your desired cut line (accounting for the skill saw’s offset). Clamp the entire assembly securely to your workbench.
- Make the Cut: Guide the skill saw along the fence, keeping the base plate flush against it.
Diagram of a Simple Skill Saw Fence
_________________________ | | Fence (2×4) |_________________________| | | Screws & Glue | _________________________ | | Base (Plywood) |_________________________|
Pros and Cons of the Fence Method
| Pros | Cons |
|---|---|
| More accurate and repeatable than the clamped straight edge. | Requires building the fence. |
| Provides better support for the workpiece. | Can be cumbersome to move and store. |
| Allows for consistent cuts of the same width (after initial setup). | Still requires accurate measurement of the skill saw’s offset. |
Method 3: The Skill Saw Table Saw Conversion Jig
For a more sophisticated approach, consider building a jig for using skill saw as table saw. This involves creating a platform that holds the skill saw upside down, effectively turning it into a makeshift table saw. A safer version inverts the material against the skill saw.
- Design and Build the Jig: The jig consists of a platform with a cutout for the skill saw. The saw is mounted underneath, with the blade protruding through a slot in the platform. The design should include a fence that can be adjusted to control the width of the cut. It should also fully enclose the back side of the blade.
- Secure the Skill Saw: Carefully and securely mount the skill saw to the underside of the platform. Ensure the blade is properly aligned with the slot.
- Add a Fence: Construct a fence that runs parallel to the blade. The fence should be adjustable and lockable to allow for different cut widths.
- Safety Features: Incorporate safety features such as a blade guard, a push stick, and a power switch easily accessible.
- Make the Cut: Turn on the skill saw. Feed the workpiece against the fence, guiding it slowly and steadily across the blade.
Key Considerations for Jig Construction
- Stability: The jig must be sturdy and stable to prevent movement during operation.
- Alignment: Precise alignment of the blade and fence is crucial for accurate cuts.
- Safety: Prioritize safety features to minimize the risk of accidents.
- Dust Collection: Consider adding a dust collection port to minimize sawdust buildup.
Pros and Cons of the Table Saw Conversion Jig
| Pros | Cons |
|---|---|
| Closest to a true table saw experience with homemade table saw. | Requires significant time and effort to design and build. |
| Allows for more precise and repeatable cuts. | Can be expensive, depending on the materials used. |
| Offers increased safety compared to other methods (if well-designed). | May void the warranty on your skill saw (check manufacturer’s policy). |
Method 4: Plunge Cutting Techniques for Table-Like Cuts
Sometimes you need to make a cut inside of a workpiece, and this requires a special way of cutting known as plunge cutting. While not strictly “table saw” cuts, plunge cutting with skill saw as table saw can be used in conjunction with other methods to achieve table-like results.
- Marking the Cut: Mark the starting and ending points of your desired cut.
- Setting the Blade Depth: Adjust the blade depth on your skill saw so it is slightly deeper than the thickness of the material you are cutting.
- Tilting the Saw: Position the front edge of the saw base on the material, with the blade raised above the surface.
- Starting the Saw: Turn on the saw and allow the blade to reach full speed.
- Lowering the Blade: Carefully and slowly lower the spinning blade into the material at the starting point.
- Completing the Cut: Once the blade is fully through the material, guide the saw along the marked line to the ending point.
- Stopping the Saw: Turn off the saw and allow the blade to come to a complete stop before lifting the saw from the workpiece.
When to Use Plunge Cuts
- Creating dadoes or grooves
- Making cutouts in the middle of a panel
- Starting a cut in an area inaccessible from the edge
Safety Tips for Plunge Cutting
- Wear safety glasses and a dust mask.
- Use a sharp blade.
- Maintain a firm grip on the saw.
- Avoid forcing the saw.
- Be aware of the potential for kickback.
Safety Precautions
Safety is paramount when using skill saw as a table saw. Always adhere to these guidelines:
- Read the Manual: Familiarize yourself with your skill saw’s operating instructions and safety guidelines.
- Wear Safety Gear: Always wear safety glasses, hearing protection, and a dust mask.
- Secure the Workpiece: Ensure your workpiece is securely clamped or supported to prevent movement during cutting.
- Use Sharp Blades: Dull blades require more force and increase the risk of kickback.
- Maintain Control: Keep a firm grip on the saw and avoid forcing it through the material.
- Be Aware of Kickback: Understand the causes of kickback and take steps to prevent it.
- Never Reach Over the Blade: Avoid reaching over the blade while the saw is running.
- Disconnect Power: Always disconnect the power cord before making adjustments or changing blades.
- Keep Your Work Area Clean: A clean and organized work area reduces the risk of accidents.
Tips for Achieving Accurate Cuts
Achieving accurate cuts requires attention to detail and consistent technique.
- Accurate Measurements: Double-check all measurements before cutting.
- Precise Marking: Use a sharp pencil and a precise marking tool.
- Proper Alignment: Ensure your guides and fences are perfectly aligned.
- Consistent Pressure: Apply consistent pressure while guiding the saw.
- Slow and Steady: Avoid rushing the cut.
- Practice: Practice on scrap wood to refine your technique.
- Check for Square: After cutting, verify the squareness of your cuts with a square.
When To Buy a Table Saw
While a skill saw can be a useful table saw substitute, there are times when investing in a dedicated table saw is the better option.
- High Volume of Cuts: If you frequently make a large number of cuts, a table saw will save you time and effort.
- High Precision Requirements: For projects requiring extremely precise cuts, a table saw is generally more accurate.
- Thick Materials: Table saws can typically handle thicker materials than skill saws.
- Advanced Cuts: Table saws are better suited for making complex cuts such as dados, rabbets, and miters.
- Increased Safety: While skill saws can be dangerous, table saws come equipped with features like riving knives and anti-kickback pawls that enhance safety.
Troubleshooting Common Issues
| Issue | Possible Cause | Solution |
|---|---|---|
| Uneven Cut | Inconsistent pressure, warped guide | Apply even pressure, use a straight guide, check skill saw for any play. |
| Blade Binding | Dull blade, wood pinching | Use a sharp blade, ensure the wood is properly supported and not pinching the blade. |
| Kickback | Wood pinching, feeding too fast | Use a riving knife (if applicable), feed the wood slowly and steadily. |
| Inaccurate Cut | Inaccurate measurements, misaligned guide | Double-check measurements, ensure the guide is properly aligned. |
| Splintering | Dull blade, cutting against the grain | Use a sharp blade, score the cut line with a utility knife before cutting. |
FAQ
Can I use any skill saw as a table saw? While most skill saws can be used with the methods described, larger and more powerful saws are generally better suited for this purpose.
Is it safe to use a skill saw as a table saw? Yes, but it requires extra caution. Follow all safety precautions and use appropriate techniques to minimize the risk of accidents.
What is the best blade for ripping with a skill saw? A ripping blade with fewer teeth (e.g., 24 teeth) is generally recommended for ripping lumber.
How do I prevent kickback when using a skill saw? Use a sharp blade, support the workpiece properly, avoid pinching the blade, and never force the saw.
Can I cut angles with a skill saw used as a table saw? Yes, by using a miter gauge or carefully adjusting the position of the fence.
What are some table saw substitutes using skill saw? In addition to the methods described above, you can also use a track saw or a jigsaw for certain table saw tasks.
Where can I get skill saw cutting guide for tables? You can find plans online, adapt from woodworking books, or design your own based on your specific needs.
Using a skill saw as a table saw can be a valuable skill for woodworkers on a budget or with limited space. By following the techniques and safety precautions outlined in this guide, you can achieve accurate and safe cuts with a skill saw. Remember to prioritize safety and practice to refine your skills.

Hi, I’m Tom Scalisi, and welcome to The Saw Blog! I started this blog to share my hands-on experience and insights about woodworking tools—especially saws and saw blades. Over the years, I’ve had the chance to work with a wide range of tools, and I’m here to help both professionals and hobbyists make informed decisions when it comes to selecting and using their equipment. Whether you’re looking for in-depth reviews, tips, or just advice on how to get the best performance out of your tools, you’ll find it here. I’m excited to be part of your woodworking journey!