
What is the best way to use a DeWalt table saw? The best way to use a DeWalt table saw involves prioritizing safety, understanding the saw’s components, and employing proper techniques for ripping, crosscutting, and performing regular maintenance. This comprehensive guide covers everything you need to know about DeWalt table saw operation, from initial setup to advanced woodworking techniques, while emphasizing crucial safety practices to ensure a safe and efficient working environment.
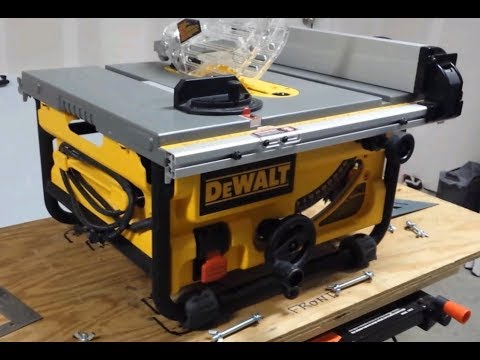
Image Source: i.ytimg.com
Fathoming Your DeWalt Table Saw
Before you even plug in your DeWalt table saw, take some time to really learn how it is built. This is a key step for staying safe and making sure you use the tool the right way.
Key Components
- Table Top: The flat surface where you guide the wood. Keep it clean and free of debris.
- Blade: The heart of the saw, responsible for cutting. Different blades are used for different materials and cuts.
- Arbor: The shaft that holds the blade.
- Motor: Powers the blade.
- Fence (Rip Fence): A guide that helps you make straight, consistent rips (cuts along the grain).
- Miter Gauge: A guide used for making crosscuts (cuts across the grain) at specific angles.
- Blade Guard: A safety device that covers the blade to prevent accidental contact. Always use it when possible.
- Anti-Kickback Pawls: Prevent the wood from being thrown back towards you during a rip cut.
- Riving Knife/Spreader: Located behind the blade, it keeps the kerf (the cut in the wood) open to prevent binding and kickback.
- On/Off Switch: Controls the power to the saw. Make sure it’s easily accessible.
- Blade Height Adjustment: Allows you to raise or lower the blade for different cutting depths.
- Bevel Adjustment: Allows you to tilt the blade for angled cuts.
Table 1: DeWalt Table Saw Components and Their Functions
| Component | Function |
|---|---|
| Table Top | Provides a stable surface for guiding the workpiece |
| Blade | Performs the cutting action |
| Fence (Rip Fence) | Guides the workpiece for accurate rip cuts |
| Miter Gauge | Guides the workpiece for accurate crosscuts at various angles |
| Blade Guard | Protects the user from accidental contact with the blade |
| Anti-Kickback Pawls | Prevent the workpiece from being thrown back during rip cuts |
| Riving Knife | Prevents the workpiece from binding and reduces the risk of kickback |
| On/Off Switch | Controls the power supply to the saw |
| Blade Height Adjustment | Adjusts the height of the blade above the table for different cut depths |
| Bevel Adjustment | Tilts the blade for making bevel cuts |
Models Overview
DeWalt offers a range of table saw models, each with its own features and capabilities. Some popular models include:
- DWE7485: Compact and portable, suitable for smaller jobsites and DIY enthusiasts.
- DWE7491RS: A more robust model with a rolling stand, offering increased stability and portability.
- DCS7485: A cordless model offering convenience and portability without compromising power.
Choosing the right model depends on your specific needs and the types of projects you plan to undertake.
Prioritizing DeWalt Table Saw Safety
DeWalt table saw safety is non-negotiable. A moment of carelessness can lead to serious injury. Always adhere to these guidelines:
Essential Safety Gear
- Eye Protection: Safety glasses or a face shield are crucial to protect your eyes from flying debris.
- Hearing Protection: Table saws are loud. Use earplugs or earmuffs to prevent hearing damage.
- Dust Mask or Respirator: Sawdust can be harmful to your lungs. Wear a mask to avoid inhaling it.
- Work Gloves: Provide a better grip and protect your hands from splinters and sharp edges.
- Appropriate Clothing: Avoid loose clothing, jewelry, and long hair that could get caught in the blade.
- Push Sticks/Pads: Essential for keeping your hands away from the blade when making narrow cuts.
General Safety Rules
- Read the Manual: Thoroughly read and understand the DeWalt table saw manual before operating the saw.
- Inspect the Saw: Before each use, inspect the saw for any damage or missing parts.
- Ensure Proper Setup: Make sure the blade is properly installed, the fence is aligned, and all safety devices are in place.
- Stay Focused: Avoid distractions and never operate the saw when tired or under the influence of drugs or alcohol.
- Maintain a Safe Distance: Keep your hands and body out of the path of the blade. Use push sticks or pads when necessary.
- Never Reach Over the Blade: Avoid reaching over the blade while the saw is running.
- Support Long Workpieces: Use outfeed supports or rollers to support long pieces of wood and prevent them from tipping.
- Avoid Kickback: Be aware of the risk of kickback and take steps to prevent it.
- Unplug Before Adjustments: Always unplug the saw before making any adjustments or changing the blade.
- Keep the Work Area Clean: Remove sawdust and debris regularly to prevent slips and falls.
Setting Up Your DeWalt Table Saw
Proper setup is crucial for accurate cuts and safe operation.
Initial Setup
- Assembly: Follow the manufacturer’s instructions for assembling the table saw.
- Leveling: Ensure the table saw is level on a stable surface.
- Blade Installation: Install the appropriate blade for your cutting task.
- Fence Alignment: Align the fence parallel to the blade.
- Safety Device Installation: Install the blade guard, anti-kickback pawls, and riving knife.
DeWalt Table Saw Fence Adjustment
The fence is your guide for rip cuts. Accurate fence adjustment is key.
- Loosen the Fence: Release the locking mechanism on the fence.
- Position the Fence: Slide the fence to the desired width according to your measurements.
- Lock the Fence: Securely lock the fence in place.
- Verify Alignment: Double-check that the fence is parallel to the blade using a measuring tape. Measure from the blade to the fence at both the front and back of the blade. The measurements should be identical.
DeWalt Table Saw Blade Change
Changing the blade is necessary for different types of cuts and materials.
- Unplug the Saw: Disconnect the power cord from the outlet.
- Raise the Blade: Raise the blade to its maximum height.
- Remove the Throat Plate: Remove the throat plate insert around the blade.
- Lock the Arbor: Use the arbor wrench to lock the arbor in place.
- Loosen the Arbor Nut: Use the blade wrench to loosen the arbor nut (typically clockwise to loosen).
- Remove the Blade: Carefully remove the old blade.
- Install the New Blade: Install the new blade, ensuring the teeth are pointing in the correct direction (towards the front of the saw).
- Tighten the Arbor Nut: Tighten the arbor nut securely (typically counter-clockwise to tighten).
- Replace the Throat Plate: Reinstall the throat plate.
- Test the Saw: Plug in the saw and test it to ensure the blade is running smoothly and properly.
Basic Cutting Techniques
Mastering the basic cutting techniques is essential for any woodworking project.
DeWalt Table Saw Ripping
Ripping is cutting wood along the grain.
- Set the Fence: Adjust the fence to the desired width.
- Position the Wood: Place the wood against the fence.
- Turn on the Saw: Start the saw and let it reach full speed.
- Feed the Wood: Slowly and steadily feed the wood through the blade, keeping it tight against the fence.
- Use Push Sticks/Pads: Use push sticks or pads to push the wood through the blade, especially when making narrow cuts.
- Maintain Control: Keep a firm grip on the wood and maintain control throughout the cut.
DeWalt Table Saw Crosscutting
Crosscutting is cutting wood across the grain.
- Use the Miter Gauge: Place the wood against the miter gauge.
- Set the Angle: Adjust the miter gauge to the desired angle.
- Turn on the Saw: Start the saw and let it reach full speed.
- Feed the Wood: Slowly and steadily push the miter gauge and wood through the blade.
- Maintain Control: Keep a firm grip on the miter gauge and wood throughout the cut.
- Consider a Crosscut Sled: For more accurate and repeatable crosscuts, consider using a crosscut sled.
Bevel Cuts
Bevel cuts are angled cuts made by tilting the blade.
- Adjust the Bevel Angle: Loosen the bevel adjustment knob and tilt the blade to the desired angle.
- Lock the Bevel Angle: Securely lock the bevel angle in place.
- Set the Fence: Adjust the fence as needed for the cut.
- Follow Cutting Procedures: Follow the same cutting procedures as for ripping or crosscutting, depending on the type of cut.
Compound Cuts
Compound cuts involve both a bevel angle and a miter angle. These cuts are more complex and require careful planning and setup.
- Set Both Angles: Adjust both the bevel angle and the miter angle to the desired settings.
- Secure Settings: Make sure both angles are securely locked in place.
- Plan the Cut: Carefully plan the cut and ensure you understand how the wood will be oriented.
- Make the Cut: Proceed with the cut, taking extra care to maintain control and accuracy.
Advanced Techniques
Once you’re comfortable with the basics, you can explore more advanced techniques.
Dado Cuts
Dado cuts are grooves cut into the wood, often used for joining pieces together.
- Use a Dado Blade: Install a dado blade set on your table saw.
- Set the Width and Depth: Adjust the width and depth of the dado cut.
- Make Multiple Passes: Depending on the width of the dado, you may need to make multiple passes.
- Use a Backer Board: Use a backer board to prevent tear-out.
Rabbet Cuts
Rabbet cuts are similar to dado cuts but are made on the edge of the wood.
- Use a Rabbeting Bit or Blade: Use a rabbeting bit or blade set on your table saw.
- Adjust the Width and Depth: Adjust the width and depth of the rabbet cut.
- Make the Cut: Carefully make the cut, keeping the wood tight against the fence.
Taper Cuts
Taper cuts are angled cuts that gradually reduce the width of the wood.
- Build a Tapering Jig: Construct a tapering jig to hold the wood at the desired angle.
- Set the Fence: Position the jig and wood against the fence.
- Make the Cut: Slowly and steadily feed the jig and wood through the blade.
DeWalt Table Saw Maintenance
Regular maintenance will extend the life of your DeWalt table saw and ensure it operates safely and efficiently.
Routine Maintenance
- Clean the Saw: Regularly clean the saw to remove sawdust and debris.
- Lubricate Moving Parts: Lubricate moving parts with a dry lubricant.
- Inspect the Blade: Check the blade for sharpness and damage. Replace the blade when necessary.
- Check the Fence: Ensure the fence is aligned and secure.
- Inspect the Power Cord: Check the power cord for damage.
- Tighten Hardware: Periodically tighten all bolts and screws.
DeWalt Table Saw Troubleshooting
Here are some common problems and solutions:
Table 2: Troubleshooting Common DeWalt Table Saw Issues
| Problem | Possible Cause | Solution |
|---|---|---|
| Saw vibrates excessively | Loose bolts or screws | Tighten all bolts and screws |
| Blade doesn’t cut straight | Misaligned fence | Adjust the fence alignment |
| Wood burns while cutting | Dull blade | Replace the blade |
| Kickback occurs | Incorrect cutting technique | Use proper cutting techniques and safety devices |
| Motor overheats | Overload or poor ventilation | Reduce the load and ensure proper ventilation |
| Saw won’t start | Power cord issue or tripped breaker | Check the power cord and reset the breaker |
DeWalt Table Saw Accessories
A range of accessories can enhance the functionality and safety of your DeWalt table saw.
Essential Accessories
- Push Sticks/Pads: For safe ripping.
- Miter Gauge: For accurate crosscutting.
- Featherboards: To keep the wood pressed against the fence.
- Outfeed Supports: For supporting long workpieces.
- Dust Collection System: To remove sawdust and keep the work area clean.
- Dado Blade Set: For making dado cuts.
- Crosscut Sled: For accurate and repeatable crosscuts.
DeWalt Table Saw Woodworking: Project Ideas
Now that you know how to use your DeWalt table saw, here are some project ideas to get you started:
- Cutting Boards: A simple and practical project to practice ripping and crosscutting.
- Shelves: Build custom shelves to organize your home or workshop.
- Picture Frames: Create custom picture frames to display your favorite photos.
- Small Tables: Build small tables for your living room or bedroom.
- Wooden Boxes: Construct wooden boxes for storage or gifts.
FAQ
- Can I use my DeWalt table saw to cut metal?
- No, DeWalt table saws are designed for cutting wood and should not be used to cut metal.
- What is kickback, and how can I prevent it?
- Kickback is when the wood is thrown back towards you during a cut. Prevent it by using a riving knife, anti-kickback pawls, and proper cutting techniques.
- How often should I replace the blade on my DeWalt table saw?
- Replace the blade when it becomes dull or damaged, or when you switch to a different type of cut.
- What is the best way to clean my DeWalt table saw?
- Use a brush or vacuum to remove sawdust and debris. Lubricate moving parts with a dry lubricant.
- Who is responsible for table saw safety on a job site?
- Everyone on the job site is responsible for safety. This includes the saw operator, supervisors, and anyone else working in the area.
By following these safety guidelines and best practices, you can safely and effectively use your DeWalt table saw to create a wide range of woodworking projects. Remember to always prioritize safety and take your time to ensure accurate and professional results.

Hi, I’m Tom Scalisi, and welcome to The Saw Blog! I started this blog to share my hands-on experience and insights about woodworking tools—especially saws and saw blades. Over the years, I’ve had the chance to work with a wide range of tools, and I’m here to help both professionals and hobbyists make informed decisions when it comes to selecting and using their equipment. Whether you’re looking for in-depth reviews, tips, or just advice on how to get the best performance out of your tools, you’ll find it here. I’m excited to be part of your woodworking journey!